Configuration guide
- Go to
Tools/Options/Local Servers/Proxiesand set port to 8081 - Then go to
Tools/Options/Server Certificatesand click on save - Import it in your browser (in brave/chrome search for certificates and add it on authorities)
Set up dark mode
- Go to
Options >> Display >> Look and Felland selectFlat Dark:D
Benefits of OWASP ZAP
It’s completely open source and free. There is no premium version, no features are locked behind a paywall, and there is no proprietary code.
There’s a couple of feature benefits too with using OWASP ZAP over Burp Suite:
- Automated Web Application Scan: This will automatically passively and actively scan a web application, build a sitemap, and discover vulnerabilities. This is a paid feature in Burp.
- Web Spidering: You can passively build a website map with Spidering. This is a paid feature in Burp.
- Unthrottled Intruder: You can bruteforce login pages within OWASP as fast as your machine and the web-server can handle. This is a paid feature in Burp.
- No need to forward individual requests through Burp: When doing manual attacks, having to change windows to send a request through the browser, and then forward in burp, can be tedious. OWASP handles both and you can just browse the site and OWASP will intercept automatically. This is NOT a feature in Burp.
If you’re already familiar with Burp the keywords translate over like so:
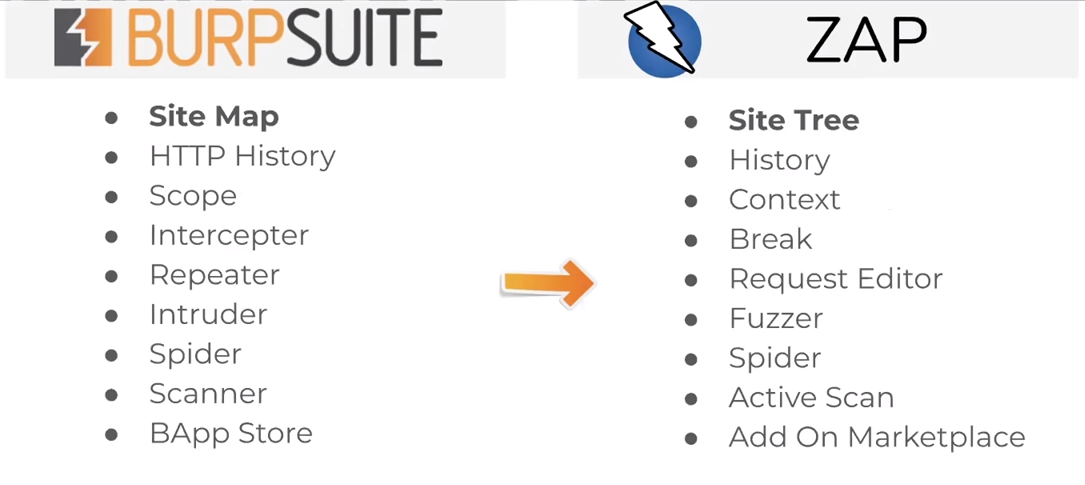
ZAP is unable to perform Login timing attacks. Burp can.
Installation
Download from the official website: zaproxy
- In Kali you can use:
sudo apt install zaproxy -y
How to perform an automated scan
Lets perform an automated scan. Click the big Automated Scan button and input your target:
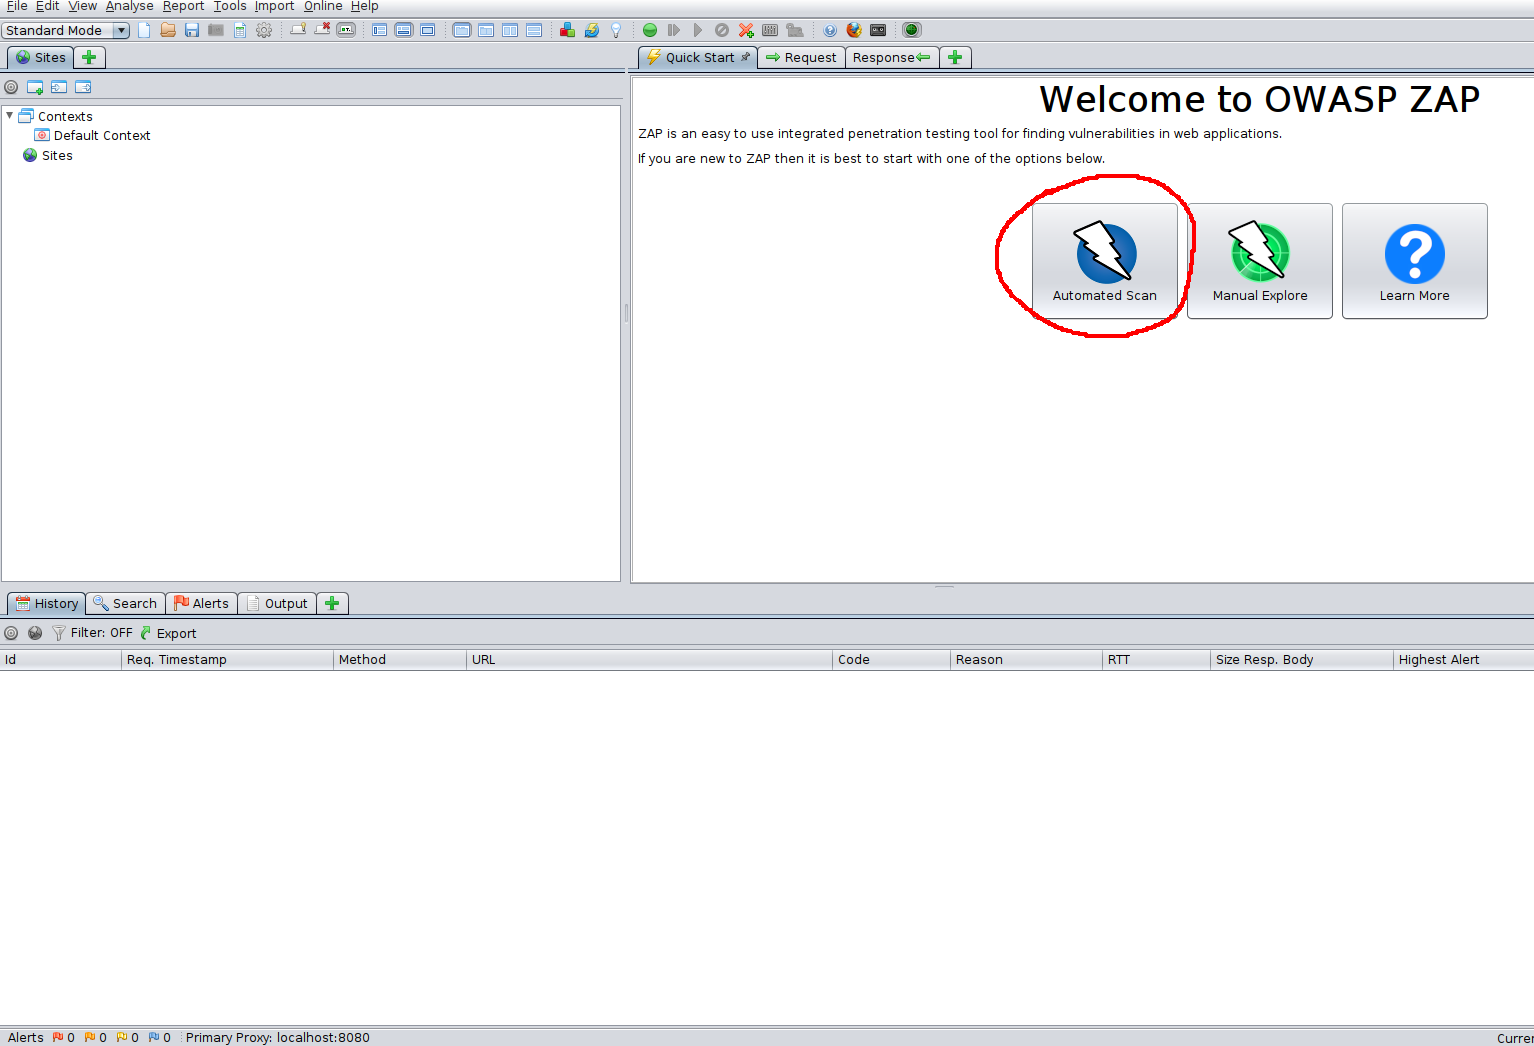
The automated scan performs both passive and automated scans to build a sitemap and detect vulnerabilities.
On the next page you may see the options to select either to use “traditional spider” or “Ajax spider”.
A traditional spider scan is a passive scan that enumerates links and directories of the website. It builds a website index without brute-forcing. This is much quieter than a brute-force attack and can still net a login page or other juicy details, but is not as comprehensive as a bruteforce.
The Ajax Spider is an add-on that integrates in ZAP a crawler of AJAX rich sites called Crawljax. You can use it in conjunction with the traditional spider for better results. It uses your web browser and proxy.
The easiest way to use the Ajax Spider is with HTMLUnit.
To install HTML Unit use the command: sudo apt install libjenkins-htmlunit-core-js-java
And then select HtmlUnity from the Ajax Spider Dropdown.
Both utilities can further be configured in the options menu (Ctrl+Alt+O)
Example Automated Scan Output:
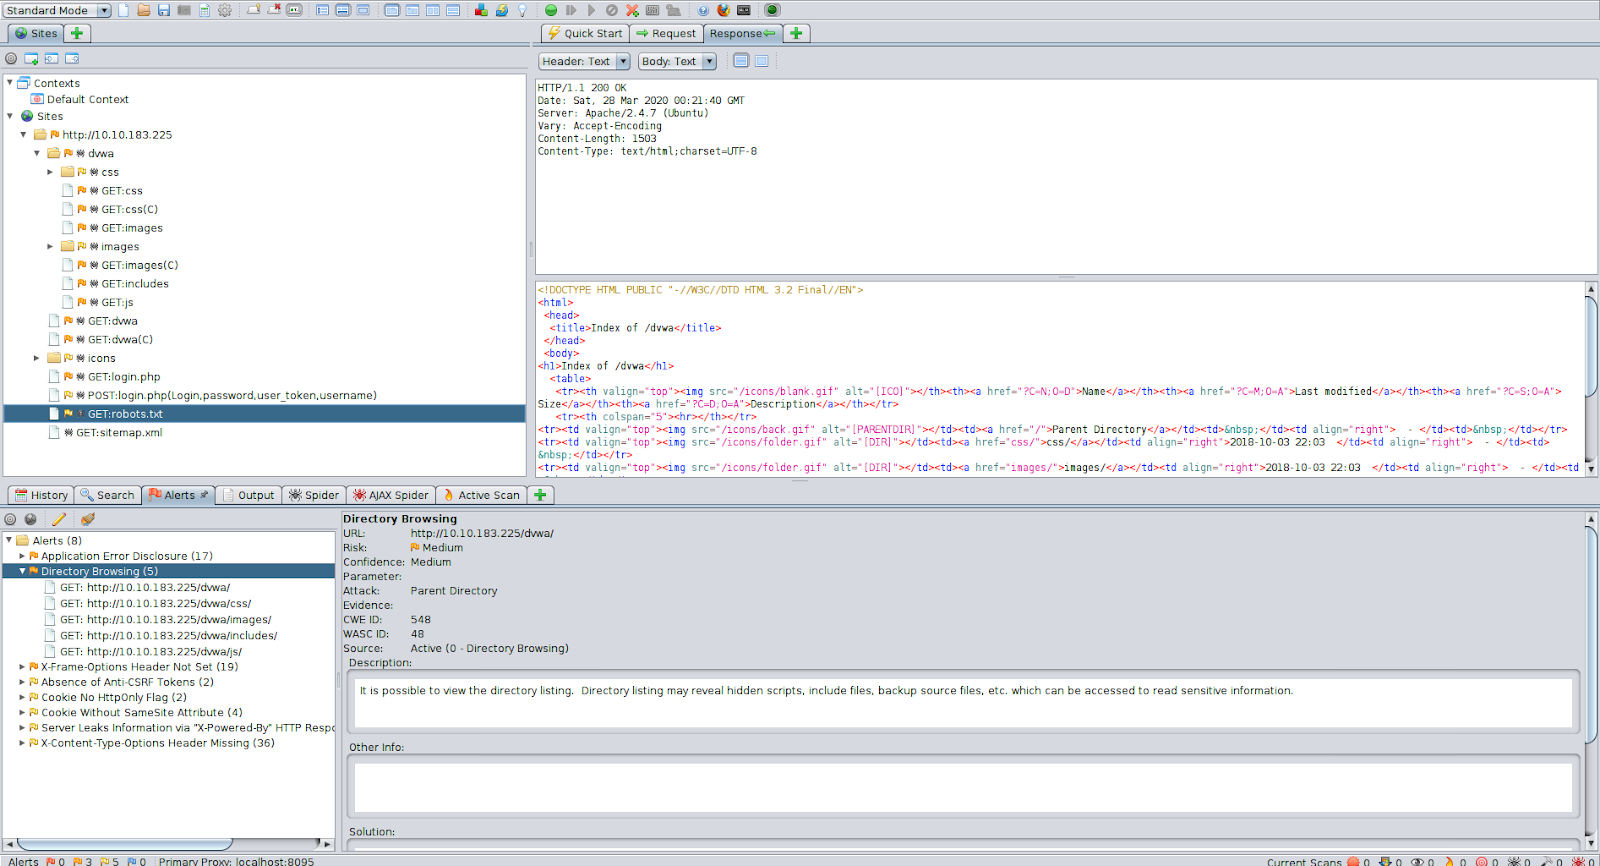
With very minimal setup we were able to do an automated scan that gave us a sitemap and a handful of vulnerabilities.
Manual scanning
Lets perform a manual scan against the DVWA machine.
Like Burp, you should set-up your proxy between OWASP ZAP and your Browser. We’ll be using Firefox.
OWASP Proxy Setup:
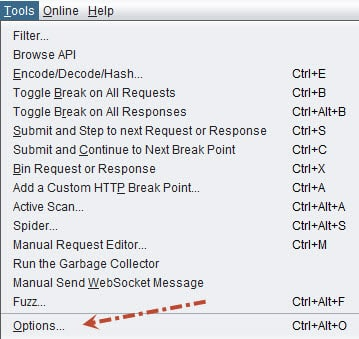
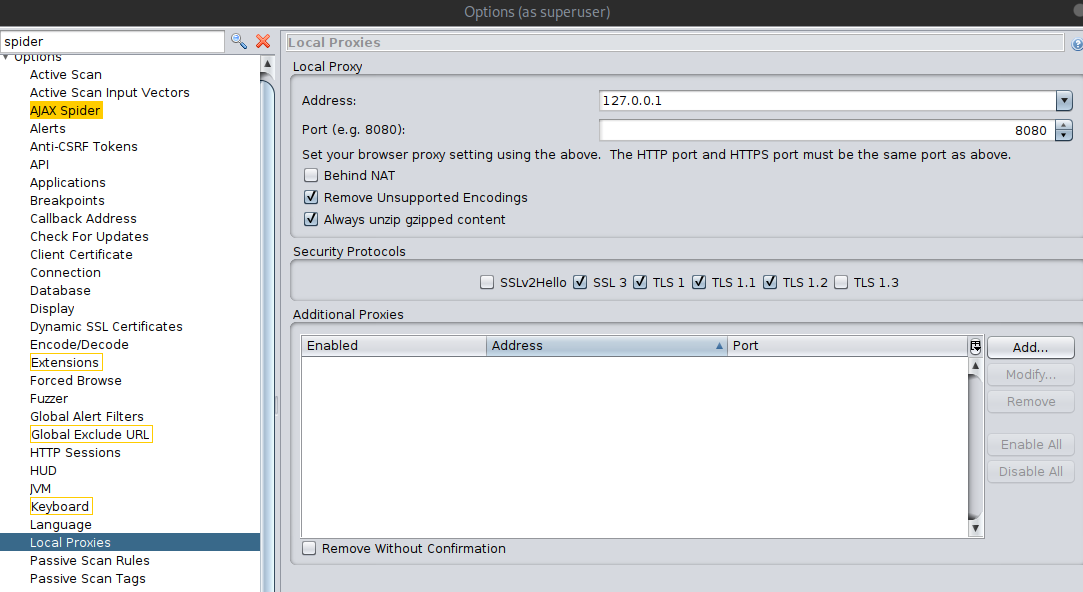
Add ZAP Certificates:
Without importing ZAP Certificates, ZAP is unable to handle simultaneous Web request forwarding and intercepting. Do not skip this step.
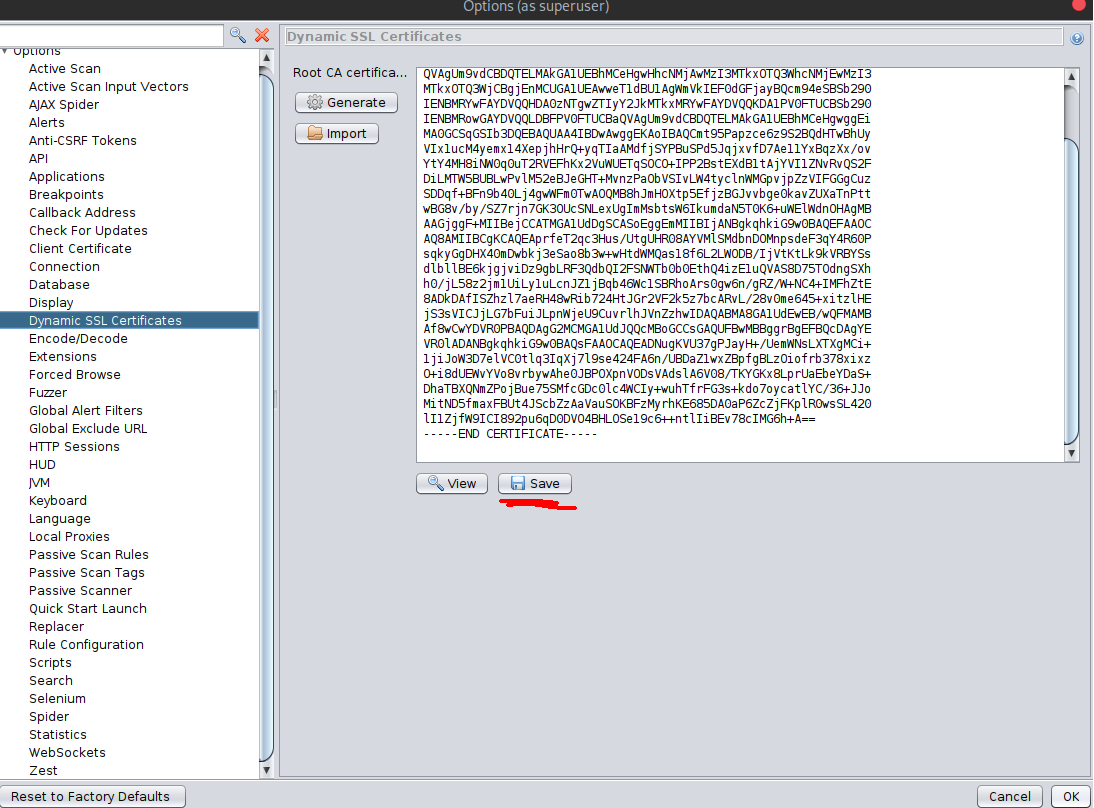
In the same options menu, navigate to Dynamic SSL Certificates and save the certificate somewhere you’ll remember and not delete.
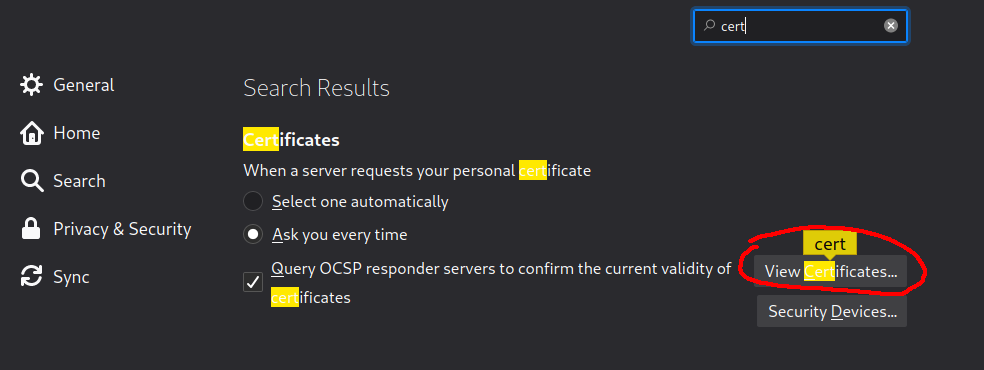
Then, open Firefox, navigate to your preferences, and search for certificates and click “View Certificates”
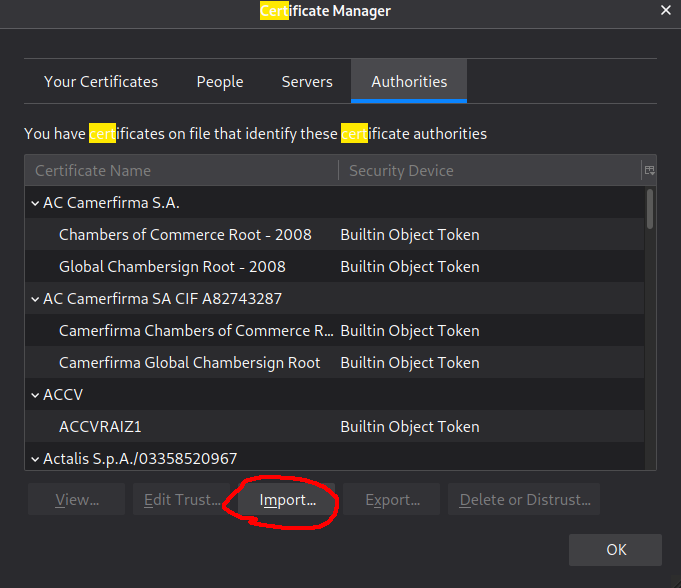
Then click “Import” and then navigate to the earlier downloaded certificate and open it.
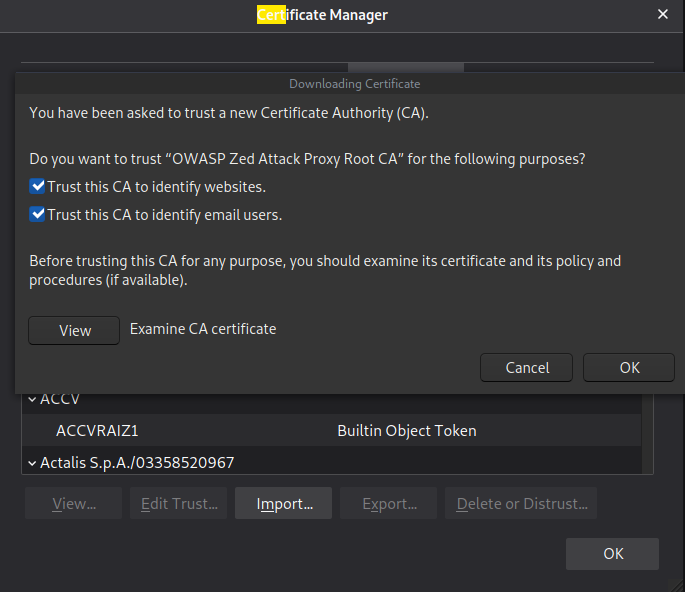
Select both and then hit OK.
Scanning an Authenticated Web Application
Without your Zap application being authenticated, it can’t scan pages that are only accessible when you’ve logged in. Lets set up the OWASP ZAP application to scan these pages, using your logged in session.
Lets go to the DVWA machine (http://10.10.176.113), and login using the following credentials:
Username: admin Password: password
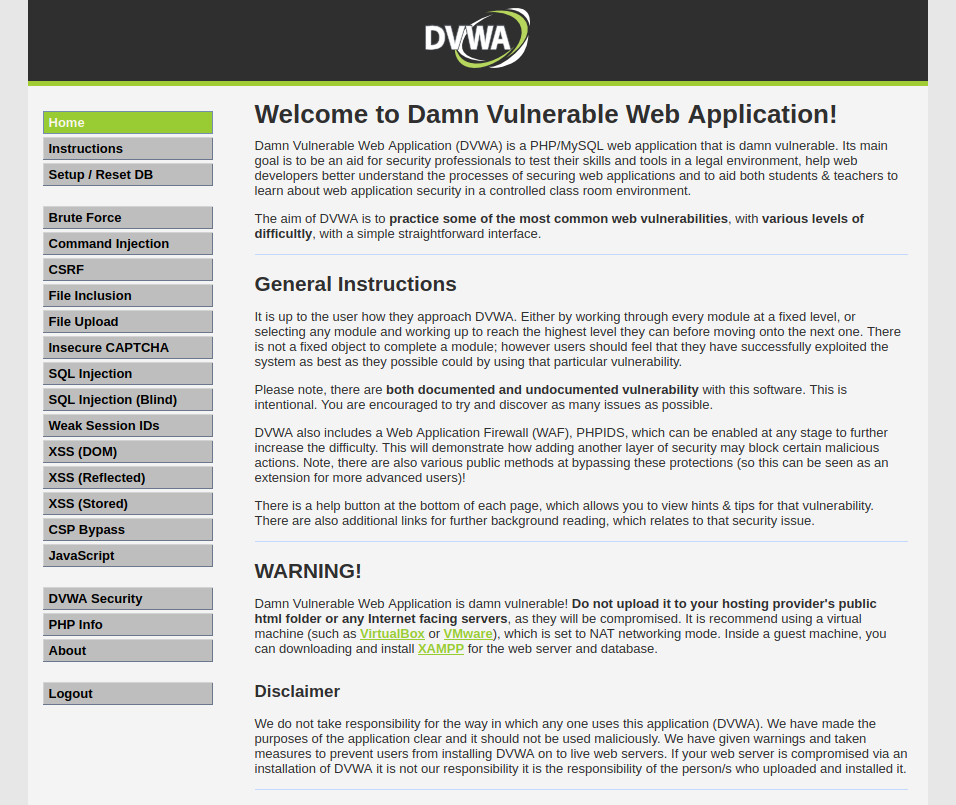
After logging in you should see this.
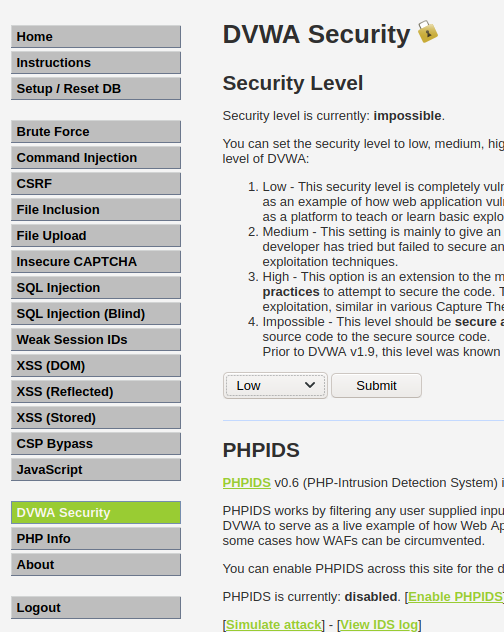
For the purpose of this exercise, once you’ve logged in, navigate to the DVWA Security tab and set the Security level to Low and then hit submit.
We’re going to pass our authentication token into ZAP so that we can use the tool to scan authenticated webpages.

Enter inspect element and take note of your PHPSESSION cookie.
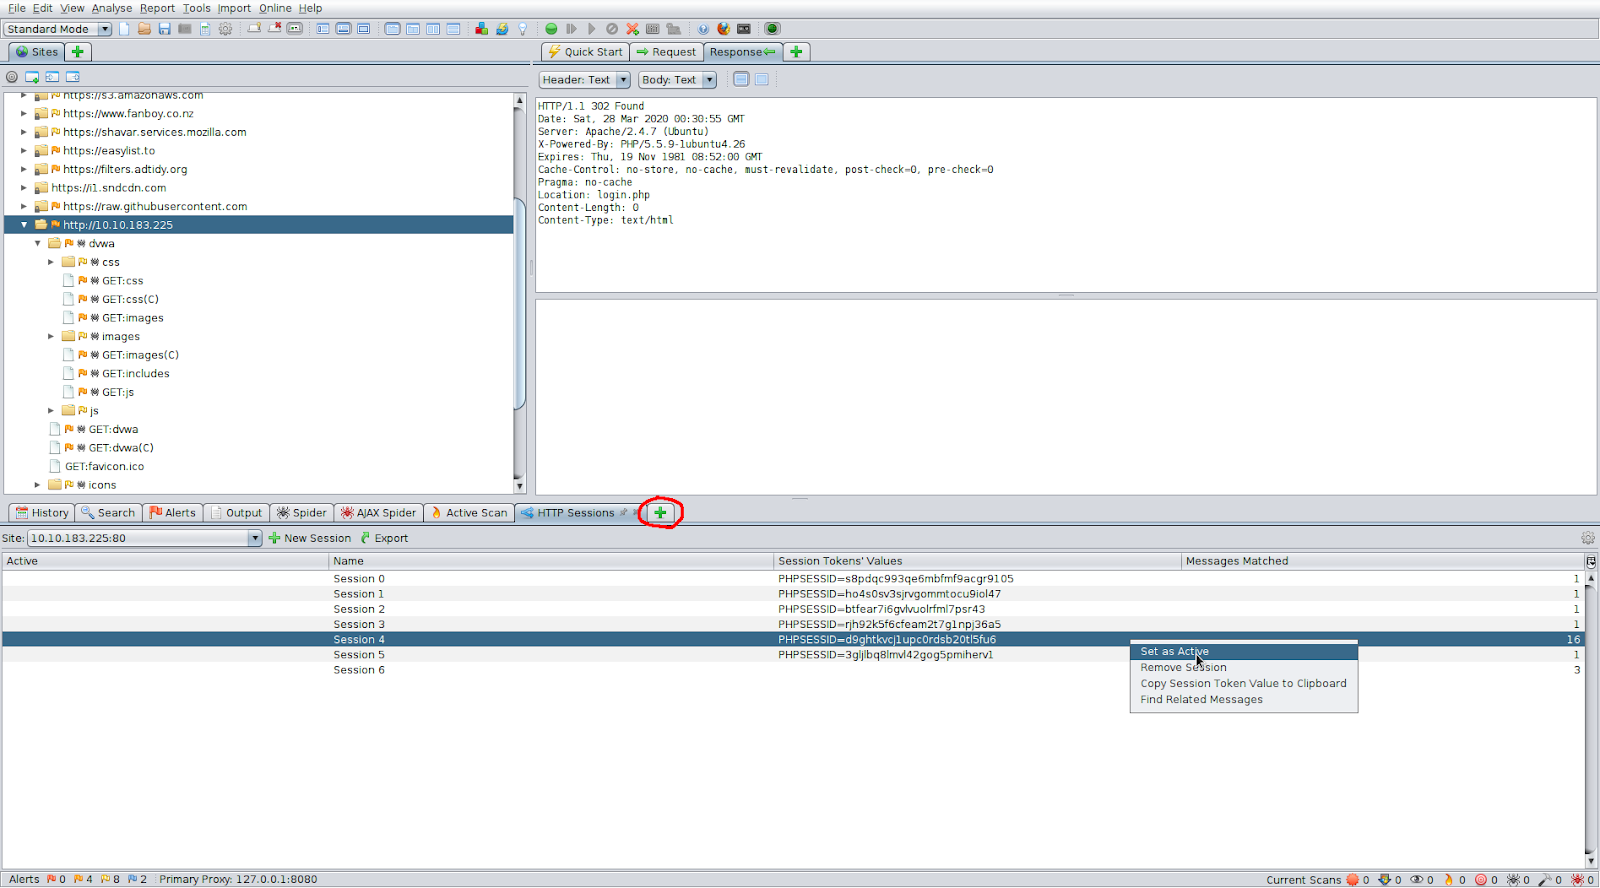
In ZAP open the HTTP Sessions tab with the new tab button, and set the authenticated session as active.
Now re-scan the application. You’ll see it’s able to pick up a lot more. This is because its able to see all of the sections of DVWA that was previously behind the login page.
Brute-Force Directories
If the passive scans are not enough, you can use a wordlist attack and directory bruteforce through ZAP just as you would with gobuster. This would pick up pages that are not indexed.
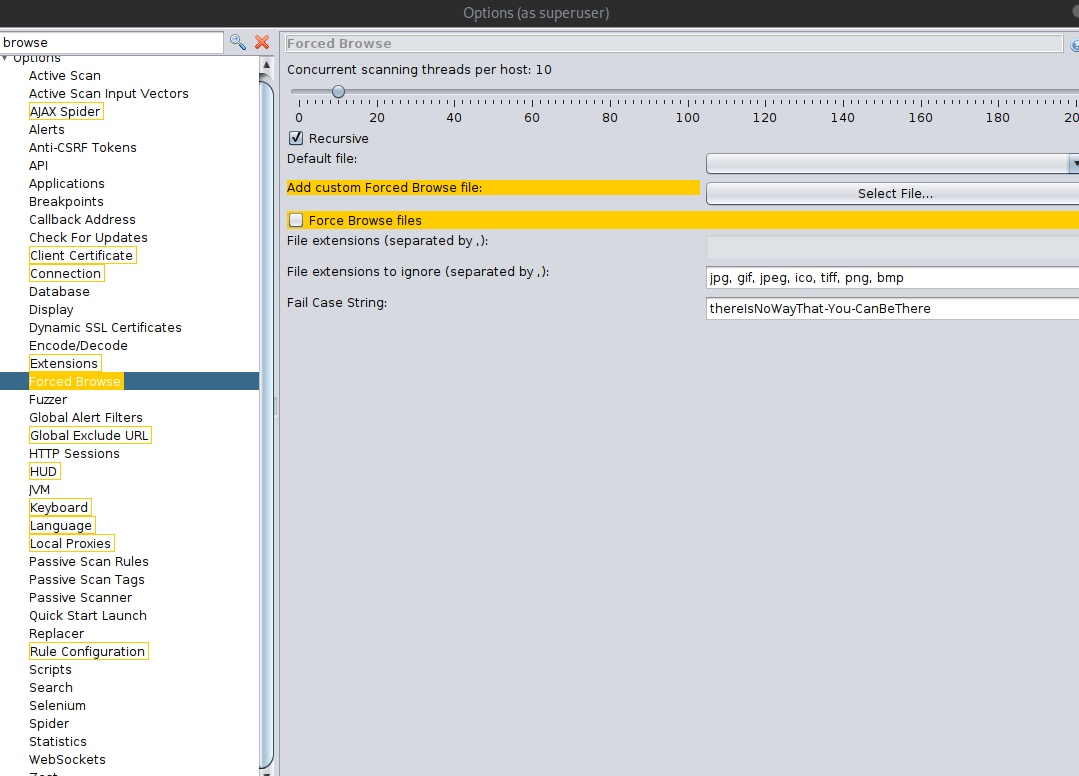
First. Go into your ZAP Options (at the bottom navigation panel, with the screen plus button), navigate to Forced Browse, and add the Custom Wordlist. You can also add more threads and turn off recursive brute-forcing.
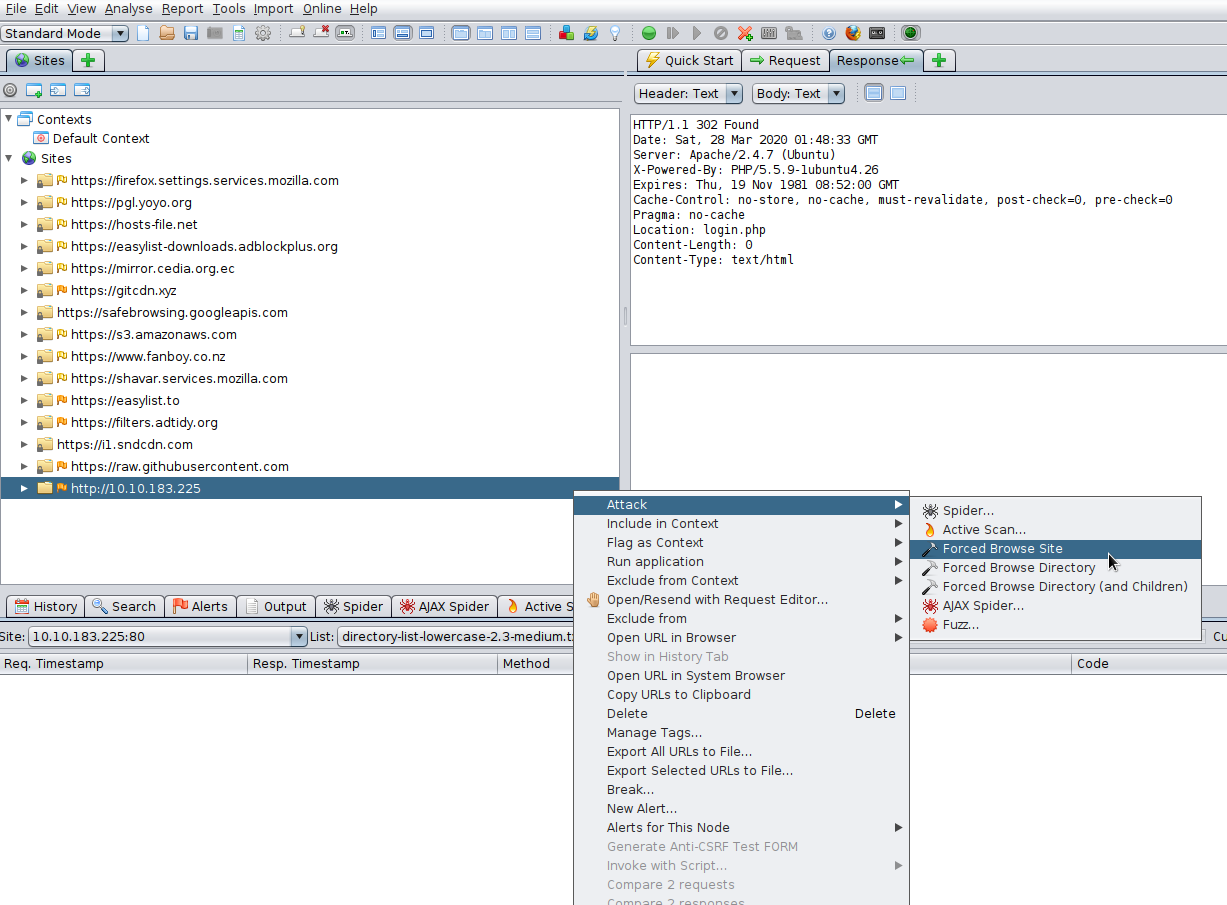
Then, right click the site->attack->forced browse site

Select your imported wordlist from the list menu, and then hit the play button!
Brute-force Web Login
Lets brute-force a form to get credentials. Although we already know the credentials, lets see if we can use Zap to obtain credentials through a Brute-Force attack.
If you wanted to do this with BurpSuite, you’d need to intercept the request, and then pass it to Hydra. However, this process is much easier with ZAP!
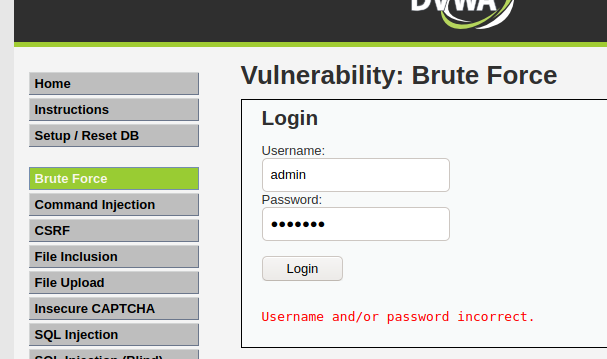
Navigate to the Brute Force page on DVWA and attempt login as “admin” with the password “test123”
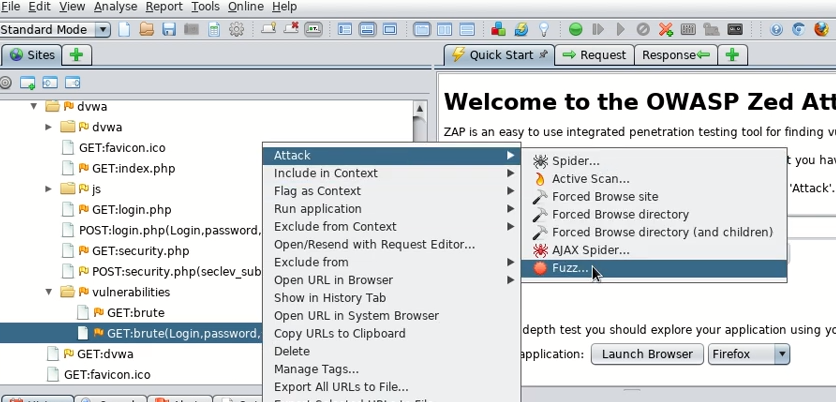
Then, find the GET request and open the Fuzz menu.

Then highlight the password you attempted and add a wordlist. This selects the area of the request you wish to replace with other data.
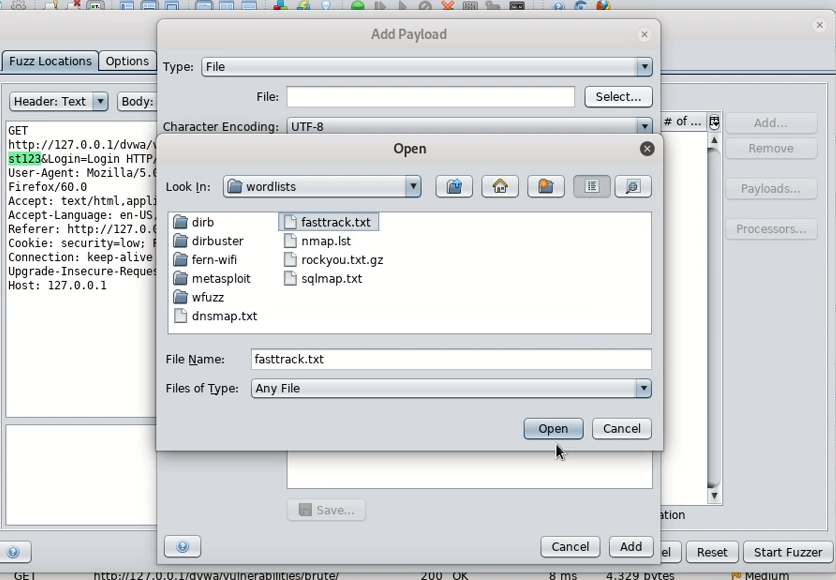
For speed we can use fasttrack.txt which is located in your /usr/share/wordlists if you’re using Kali Linux.

After running the fuzzer, sort the state tab to show Reflected results first. Sometimes you will get false-positives, but you can ignore the passwords that are less than 8 characters in length.
ZAP Extensions
Want to further enhance ZAPs capabilities? Look at some of it’s downloadable extensions!
Let’s install the bugcrowd HUNT extensions for OWASP ZAP. This will passively scan for known vulnerabilities in web applications.

First navigate in your terminal somewhere you’d like to store the scripts
git clone https://github.com/bugcrowd/HUNT
Then in ZAP click the “Manage Add-Ons” icon
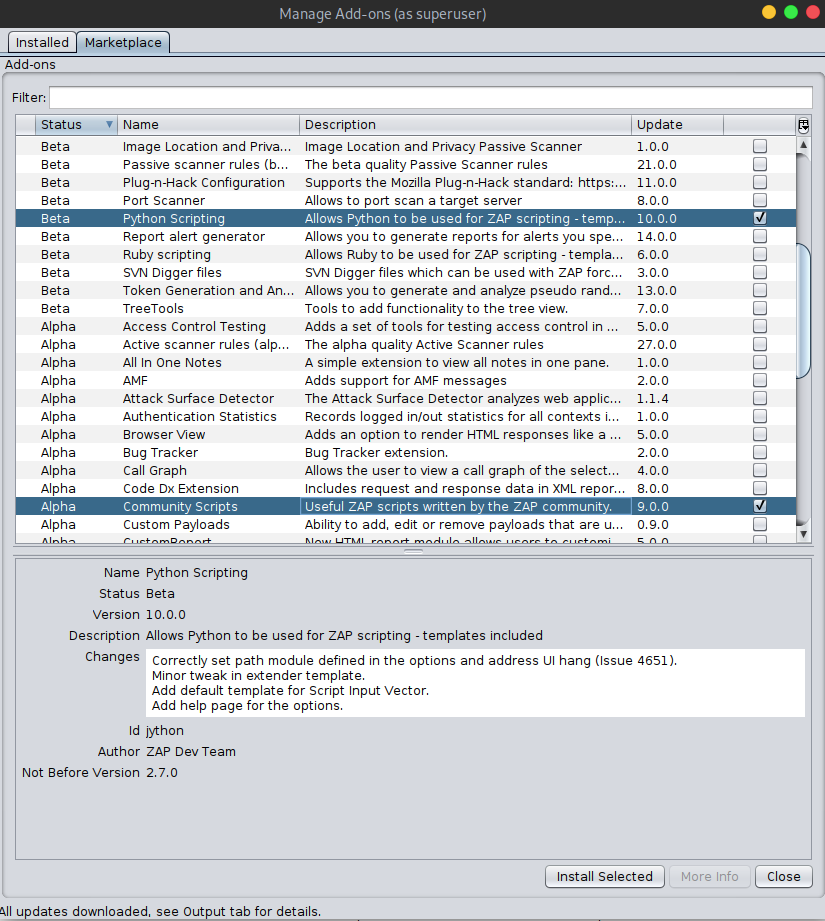
From the Marketplace install “Python Scripting” and “Community Scripts”
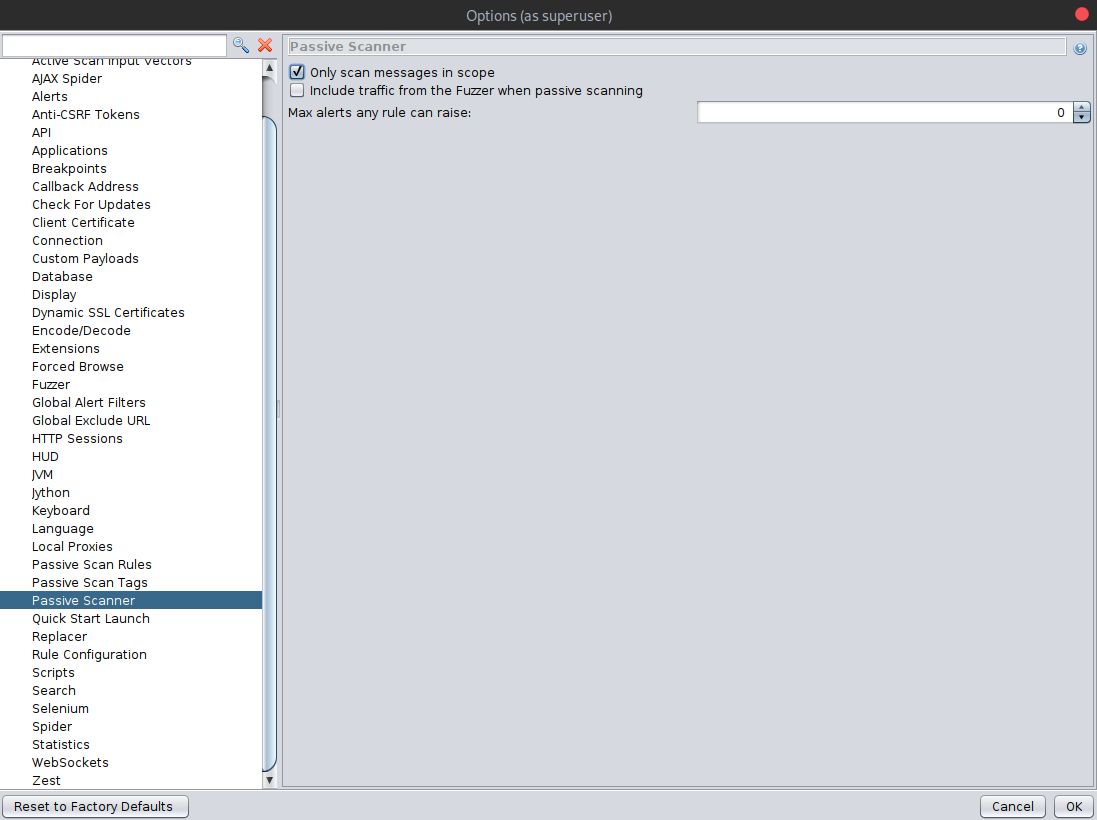
In ZAP Options, under Passive Scanner, make sure “Only scan messages in scope” is enabled. Then hit OK.
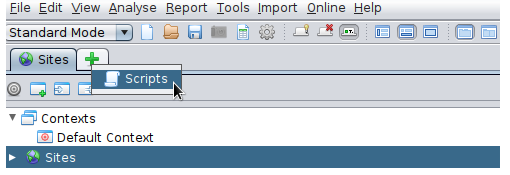
In ZAP open the Scripts tab.
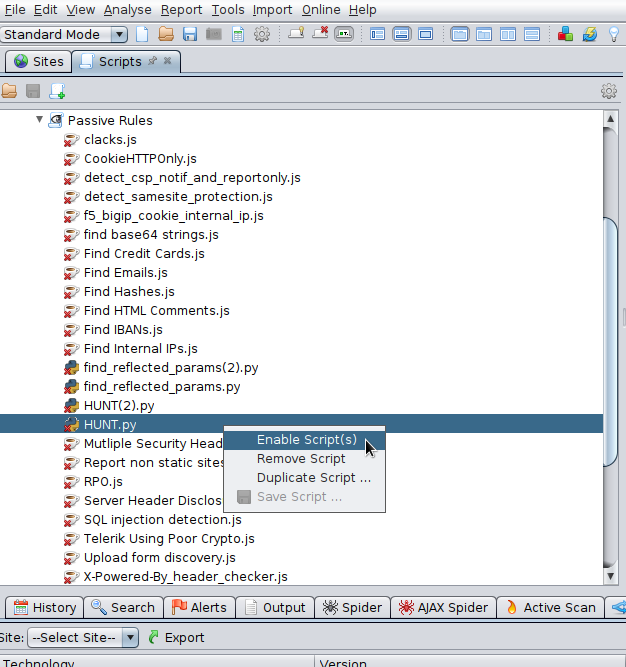
And under Passive Rules, find and enable the HUNT.py script
Now when you browse sites and HUNT will passively scan for SQLi, LFI, RFI, SSRF, and others. Exciting!
Zap Fuzzer
Fuzz
To start our fuzzing, we will visit the URL from the exercise at the end of this section to capture a sample request. As we will be fuzzing for directories, let’s visit <http://SERVER_IP:PORT/test/> to place our fuzzing location on test later on. Once we locate our request in the proxy history, we will right-click on it and select (Attack>Fuzz), which will open the Fuzzer window:

The main options we need to configure for our Fuzzer attack are:
- Fuzz Location
- Payloads
- Processors
- Options
Let’s try to configure them for our web directory fuzzing attack.
Locations
The Fuzz Location is very similar to Intruder Payload Position, where our payloads will be placed. To place our location on a certain word, we can select it and click on the Add button on the right pane. So, let’s select test and click on Add:

As we can see, this placed a green marker on our selected location and opened the Payloads window for us to configure our attack payloads.
Payloads
The attack payloads in ZAP’s Fuzzer are similar in concept to Intruder’s Payloads, though they are not as advanced as Intruder’s. We can click on the Add button to add our payloads and select from 8 different payload types. The following are some of them:
File: This allows us to select a payload wordlist from a file.File Fuzzers: This allows us to select wordlists from built-in databases of wordlists.Numberzz: Generates sequences of numbers with custom increments.
One of the advantages of ZAP Fuzzer is having built-in wordlists we can choose from so that we do not have to provide our own wordlist. More databases can be installed from the ZAP Marketplace, as we will see in a later section. So, we can select File Fuzzers as the Type, and then we will select the first wordlist from dirbuster:
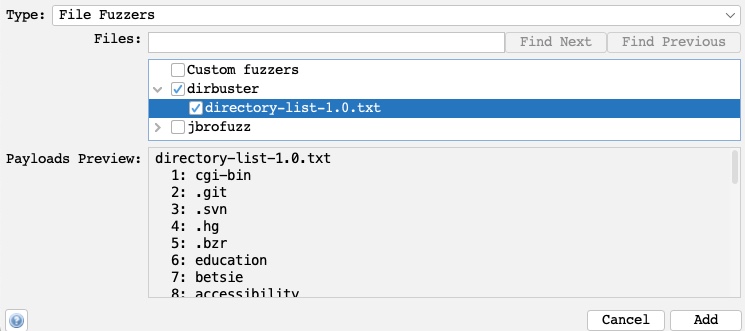
Once we click the Add button, our payload wordlist will get added, and we can examine it with the Modify button.
Processors
We may also want to perform some processing on each word in our payload wordlist. The following are some of the payload processors we can use:
- Base64 Decode/Encode
- MD5 Hash
- Postfix String
- Prefix String
- SHA-1/256/512 Hash
- URL Decode/Encode
- Script
As we can see, we have a variety of encoders and hashing algorithms to select from. We can also add a custom string before the payload with Prefix String or a custom string with Postfix String. Finally, the Script type allows us to select a custom script that we built and run on every payload before using it in the attack.
We will select the URL Encode processor for our exercise to ensure that our payload gets properly encoded and avoid server errors if our payload contains any special characters. We can click on the Generate Preview button to preview how our final payload will look in the request:
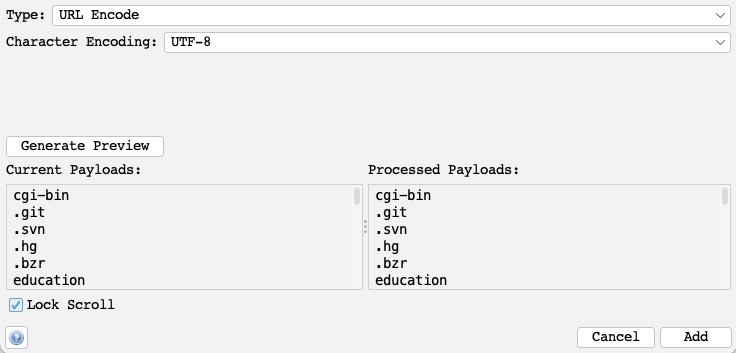
Once that’s done, we can click on Add to add the processor and click on Ok in the processors and payloads windows to close them.
Options
Finally, we can set a few options for our fuzzers, similar to what we did with Burp Intruder. For example, we can set the Concurrent threads per scan to 20, so our scan runs very quickly:
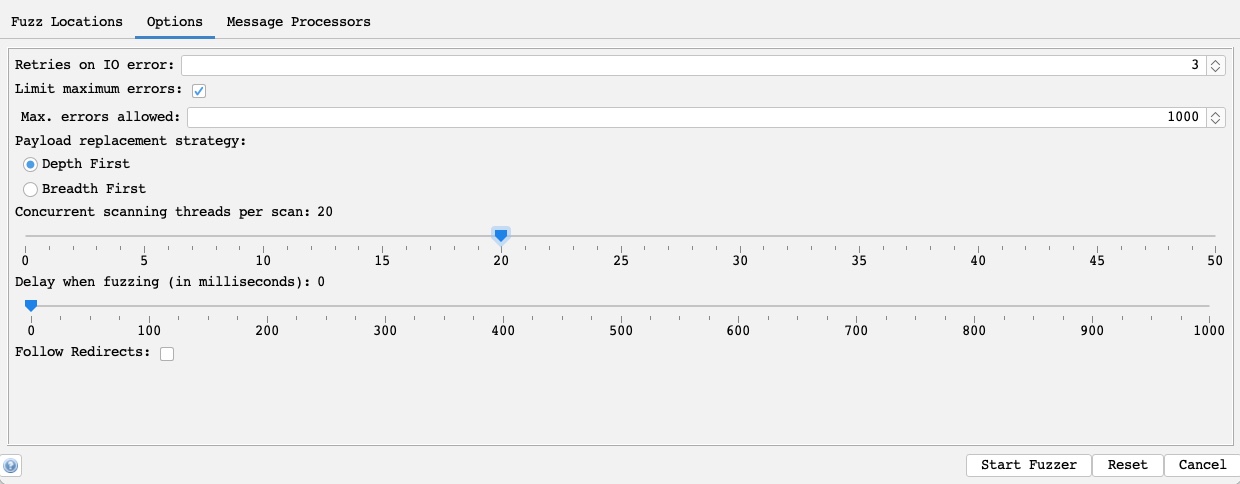
The number of threads we set may be limited by how much computer processing power we want to use or how many connections the server allows us to establish.
We may also choose to run through the payloads Depth first, which would attempt all words from the wordlist on a single payload position before moving to the next (e.g., try all passwords for a single user before brute-forcing the following user). We could also use Breadth first, which would run every word from the wordlist on all payload positions before moving to the next word (e.g., attempt every password for all users before moving to the following password).
Start
With all of our options configured, we can finally click on the Start Fuzzer button to start our attack. Once our attack is started, we can sort the results by the Response code, as we are only interested in responses with code 200:

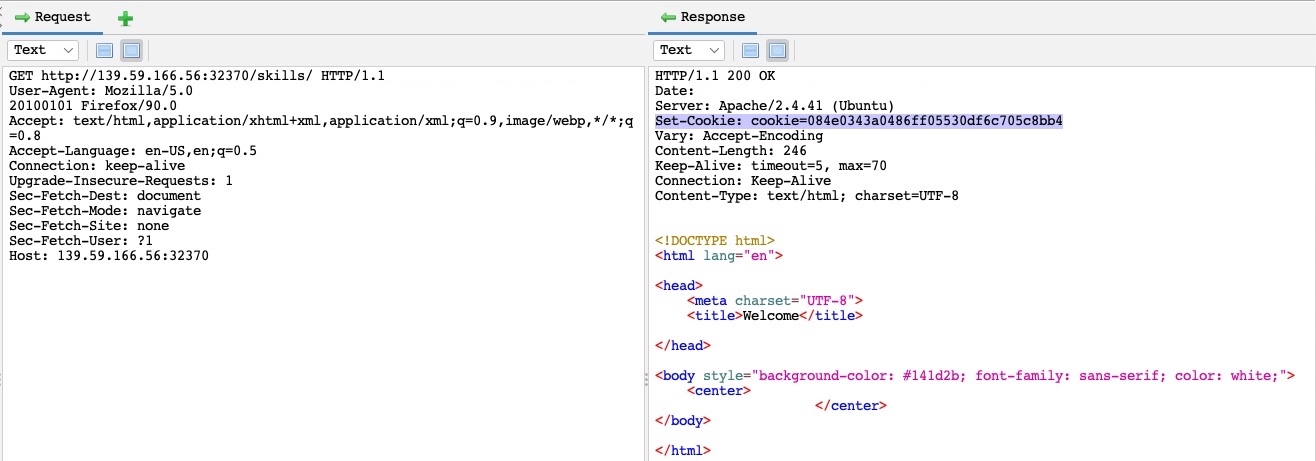
As we can see, we got one hit with code 200 with the skills payload, meaning that the /skills/ directory exists on the server and is accessible. We can click on the request in the results window to view its details:
Zap Extensions (Marketplace)

