Credits to https://surecloudcyber.com
What is Keycloak?
Keycloak is an open-source Identity and Access Management (IAM) solution. It allows easy implementation of single sign-on for web applications and APIs.
All of the below tests were performed on Keycloak version 15.0.2; newer versions might fix/prevent the described attack methodologies. The security team reviewed this article at Keycloak before publication.
Am I Testing Keycloak?
To understand if the target web application is running a Keycloak instance, we should look at the following clues:
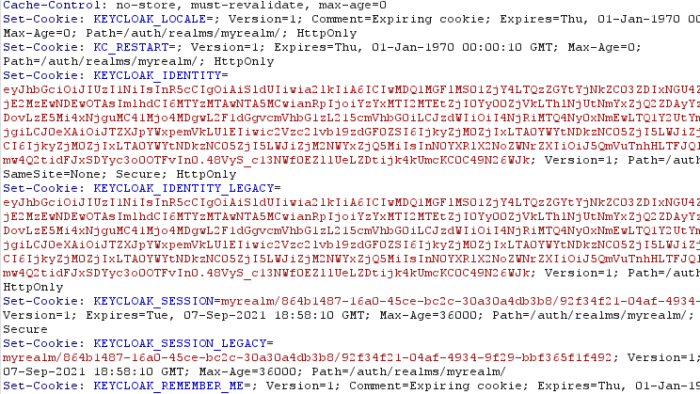
Cookie Name – Once logged in with valid credentials, you should be able to see the following cookies in the first server’s response:
URLs: Keycloak has a very distinctive URL, e.g.:

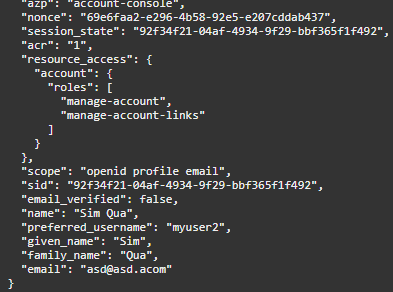
JWT Payload: Even if this is an OAuth requirement, the JWT could also give you a hint that you’re using Keycloak, just by looking at sections like ‘resource_access’ and ‘scope’; e.g.:
Page Source: Finally, you might also find references of
/keycloak/in the source code of the login page:

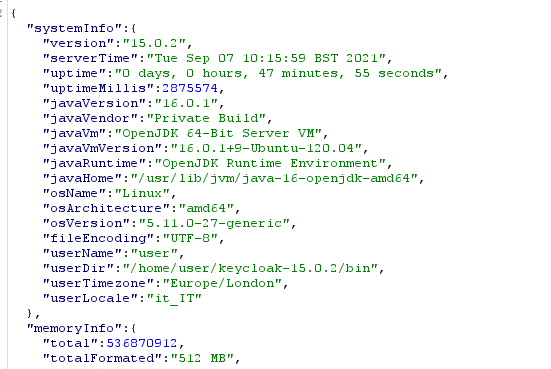
Identifying Keycloak Version Information (auth)
At the moment, there is no way to identify the running Keycloak version by looking at it from an unauthenticated perspective. The only way is via an administrative account (with the correct JWT token in the request header):
OpenID Configuration / SAML Descriptor
For a bit more information regarding what’s supported by the platform:
/auth/realms/realm_name/.well-known/openid-configuration /auth/realms/realm_name/protocol/saml/descriptor
For public keys:
/auth/realms/realm_name/
These endpoints are in line with the specification of OpenID (https://openid.net/specs/openid-connect-discovery-1_0.html#ProviderConfigurationRequest) and the response is a set of Claims about the OpenID Provider’s configuration, including all necessary endpoints and public key location information.
Realms
A realm manages a set of users, credentials, roles, and groups. A user belongs to and logs into a realm. Realms are isolated from one another and can only manage and authenticate the users that they control.
When you boot Keycloak for the first time, Keycloak creates a pre-defined realm for you. This initial realm is the master realm – the highest level in the hierarchy of realms. Admin accounts in this realm have permissions to view and manage any other realm created on the server instance. When you define your initial admin account, you create an account in the master realm. Your initial login to the admin console will also be via the master realm.
It is not recommended to configure a web application’s SSO on the default master realm for security and granularity.

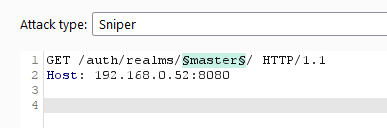
Realms Enumeration
Realms can be easily enumerated, but that’s a default behaviour of the platform. Obtaining a list of valid realms might be useful later on in the assessment.
It is possible to enumerate via Burp Suite Intruder on the following URL: /auth/realms/realm_name/
A good wordlist to use, can be found in: https://raw.githubusercontent.com/chrislockard/api_wordlist/master/objects.txt
Realms Self-Registration Enabled
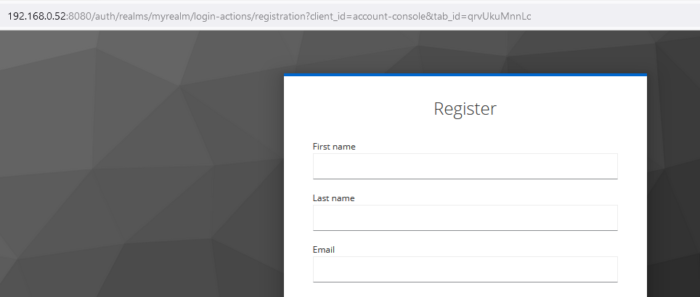
Realms can be configured to allow user self-registration. This is not an issue itself and is often advertised in the login page:

Just in case the client is using a custom template for the login page, hiding the registration link, we can still try to directly access the registration link, which is: /auth/realms/<realm_name>/login-actions/registration?client_id=<same_as_the_login_page>&tab_id=<same_as_the_login_form>
The registration process can be configured to verify a newly registered user email or not.

If not strictly necessary for the realm, we recommend disabling self-registration in a production environment.
Client IDs
Clients are entities that can request Keycloak to authenticate a user. Most often, clients are applications and services that want to use Keycloak to secure themselves and provide a single sign-on solution. Clients can also be entities that just want to request identity information or an access token so that they can securely invoke other services on the network that Keycloak secures.
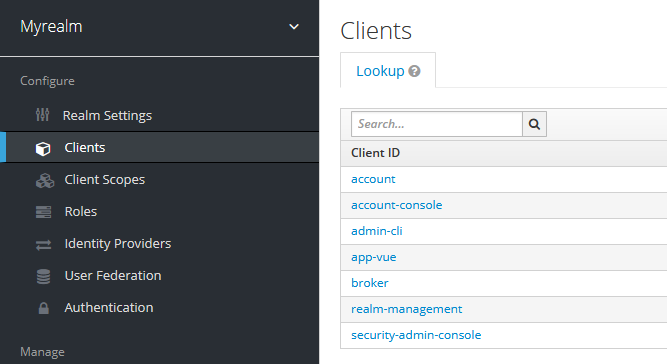
Each realm (identified below) might have a different set of client ids.
Client IDs Enumeration
When landing on a login page of a realm, the URL will be auto-filled with the default ‘client_id’ and ‘scope’ parameters, e.g.:
/auth/realms/<realm_name>/protocol/openid-connect/auth?**client_id=account-console**&redirect_uri=<...>&state=<...>&response_mode=<...>&response_type=<...>&**scope=openid**&nonce=<...>&code_challenge=<...>&code_challenge_method=<...>
It is possible to identify additional client_id via intruder, by keeping all the other parameters with the same value:

A good list to use for this purpose can be found on GitHub.
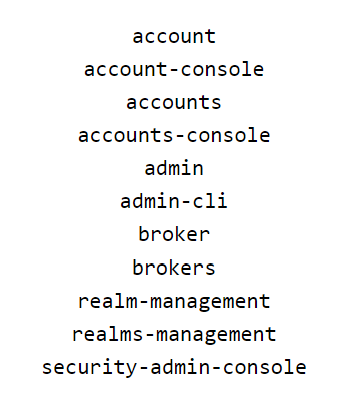
The following, additional, default client ids should also be available upon Keycloak installation:
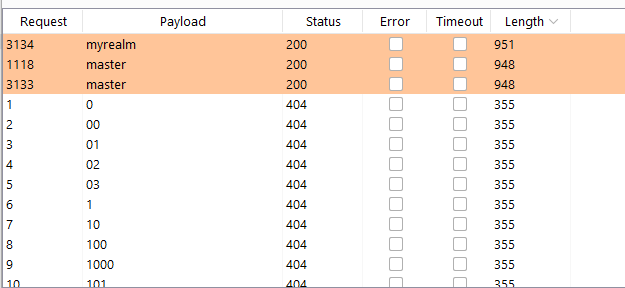
No HTTP response code could help us to identify a valid client_id from a wrong one. You should focus on whether the length of the response differs from the majority of the responses. In this example case, I had 1283 responses with a length of 2451 and just 6 with a different length. Those are the valid client IDs.
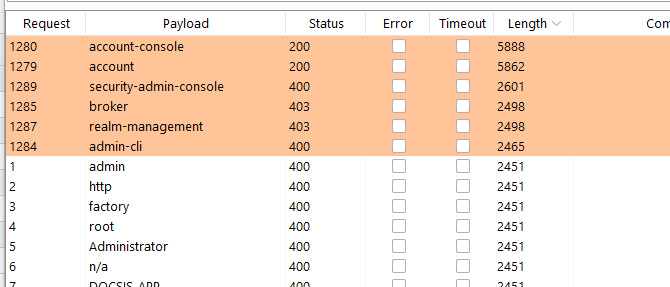
This process should be repeated for each valid realm identified in previous steps.
Clients can be configured with different Access Types:
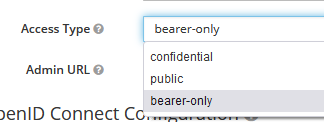
Bearer-Only – Used for backend servers and API (requests that already contain a token/secret in the request header)
Public – Able to initiate login flaw (Auth flow to get an access token) and does not hold or send any secrets
Confidential – Used for backend servers and able to initiate login flaw. Can accept or send secrets.
Therefore, when we encounter a “client_secret” parameter in the login request, we’re probably looking at a client with a Confidential or Bearer-Only Access Type. Find more information about this type of access in the exploitation part of this article.
Scopes
When a client is registered, you must define protocol mappers and role scope mappings for that client. It is often useful to store a client scope to make creating new clients easier by sharing some common settings. This is also useful for requesting some claims or roles to be conditionally based on the value of the scope parameter. Keycloak provides the concept of a client scope for this.
Scopes Enumeration
When landing on a login page of a realm, the URL will be auto-filled with the default ‘client_id’ and ‘scope’ parameters, e.g.:
/auth/realms/<realm_name>/protocol/openid-connect/auth?**client_id=account-console**&redirect_uri=<...>&state=<...>&response_mode=<...>&response_type=<...>&**scope=openid**&nonce=<...>&code_challenge=<...>&code_challenge_method=<...>
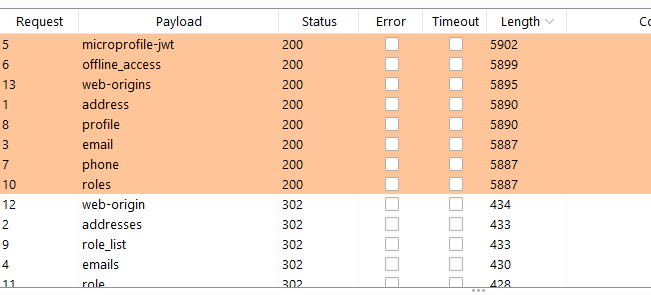
It is possible to identify additional scopes via Burp Suite Intruder, by keeping all the other parameters with the same value:
A good list to use for this purpose can be found on GitHub.
The following, additional, default scopes should also be available upon KeyCloak installation:
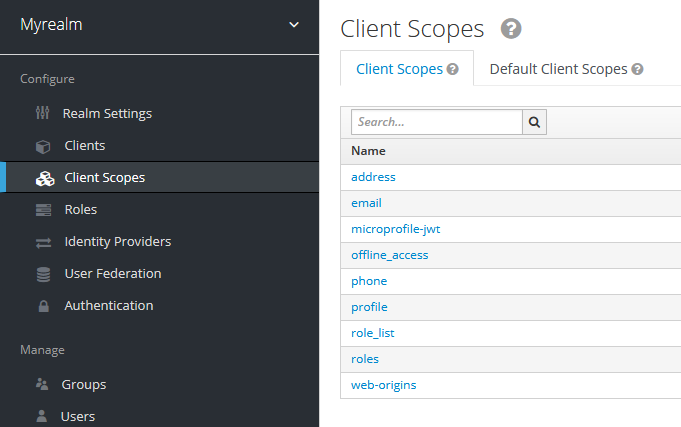
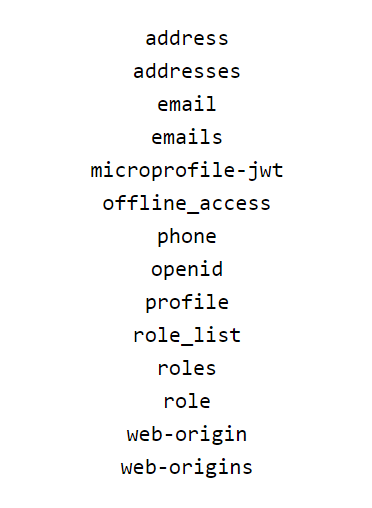
It is quite straight forward to identify valid scopes from non-valid scopes by looking at the content length or status code:
This process should be repeated for each realm identified in previous steps.
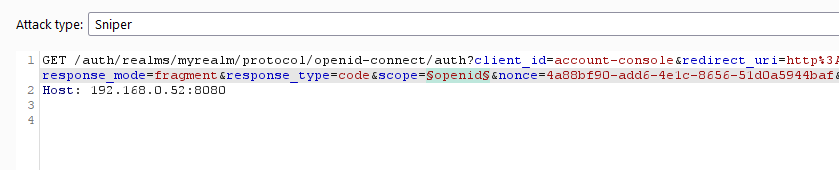
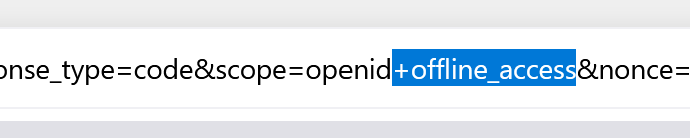
It should be noted that valid scopes can be concatenated within the URL prior of the login, e.g.:

This will ‘force’ Keycloak to grant any available/additional scope, for such realm – but also depending on the user’s role configuration. More information in the attack scenario below.
Grants
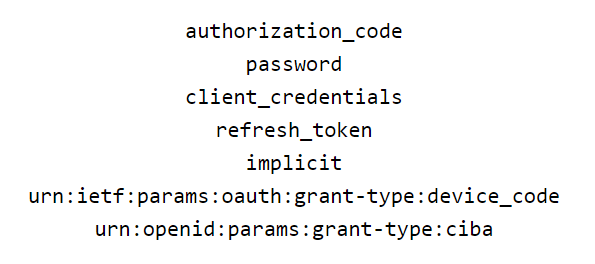
OAuth 2 provides several ‘grant types’ for different use cases. The grant types defined are:
-
- Authorization Code for apps running on a web server, browser-based and mobile apps
-
- Password for logging in with a username and password (only for first-party apps)
-
- Client credentials for application access without a user present
-
- Implicit was previously recommended for clients without a secret, but has been superseded by using the Authorization Code grant with PKCE
A good resource to understand use cases of grants is available from Aaron Parecki.
Grants cannot be enumerated and are as follow:
Identity Provider
Keycloak can be configured to delegate authentication to one or more Identity Providers (IDPs). Social login via Facebook or Google+ is an example of an identity provider federation. You can also hook Keycloak to delegate authentication to any other OpenID Connect or SAML 2.0 IDP.
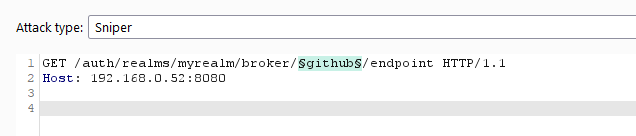
Identity Provider Enumeration
There are a number of external identity providers that can be configured within Keycloak. The URL to use within Intruder is:

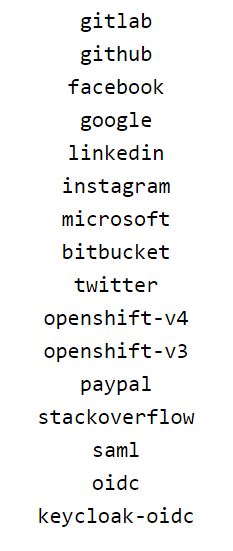
The full list of default IDP names is as follow:
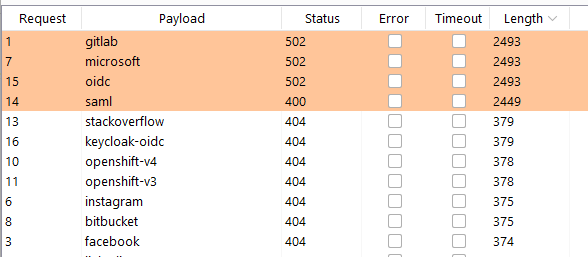
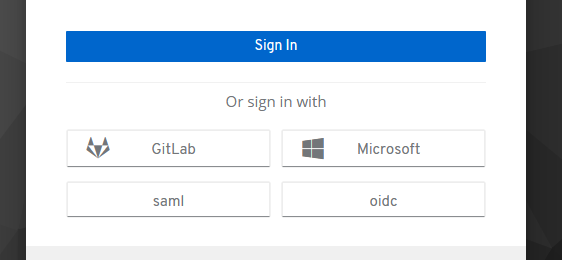
Once again, the status codes might differ, but the length will disclose which IDP is enabled. It should be noted that, by default, the login page will disclose which IDPs are enabled:
Roles
Roles identify a type or category of user. Admin, user, manager, and employee are all typical roles that may exist in an organization. Applications often assign access and permissions to specific roles rather than individual users as dealing with users can be too fine-grained and hard to manage.
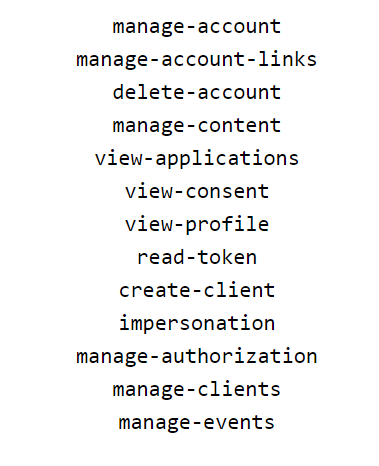
Roles cannot be easily enumerated from an unauthenticated perspective. They are usually visible within the JWT token of the user upon successful login:
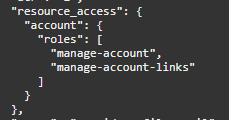
The above image shows that ‘account’ client_id has, by default, 2 roles.
Realm Default Roles:
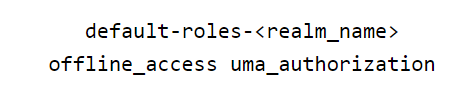
Client ID Default Roles:
User Email Enumeration (auth)
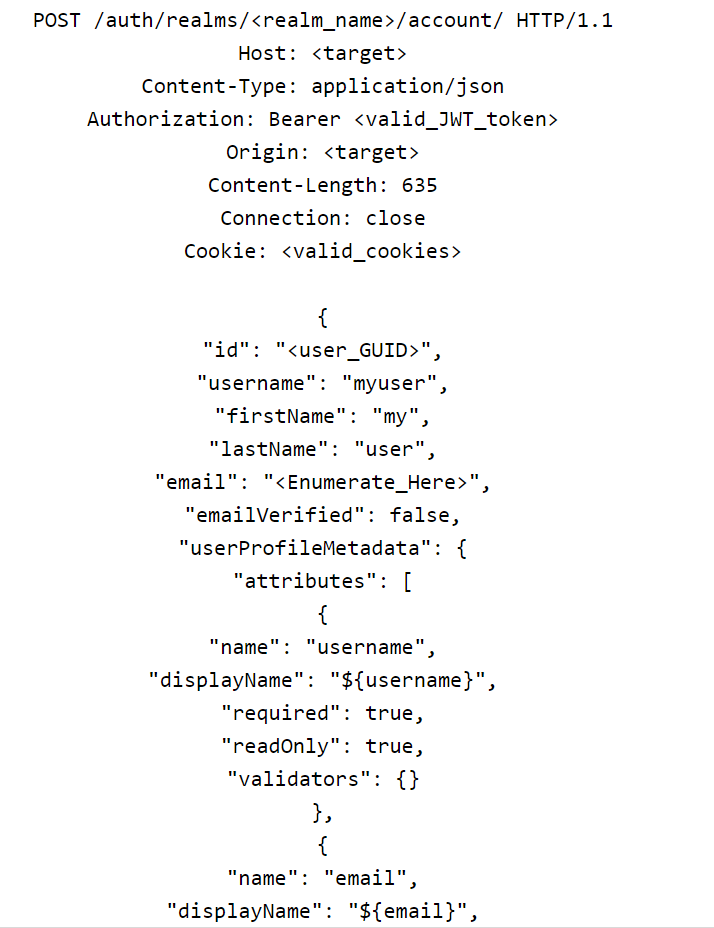
It is possible to enumerate valid email addresses from an authenticated perspective via Keycloak’s account page (if enabled for the logged-in user), available at:
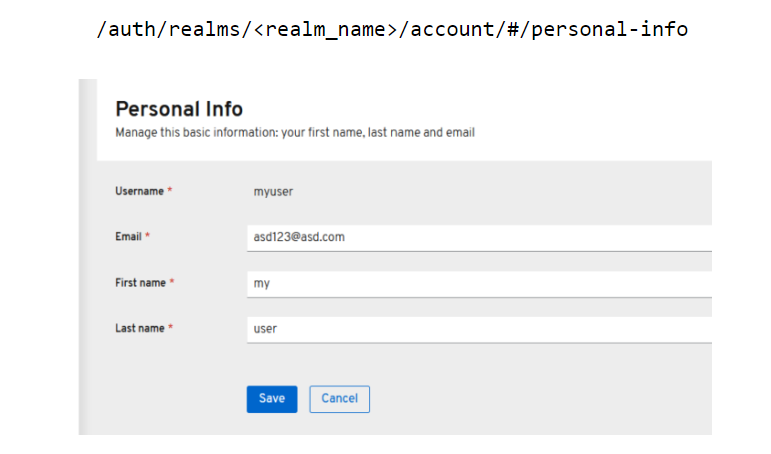
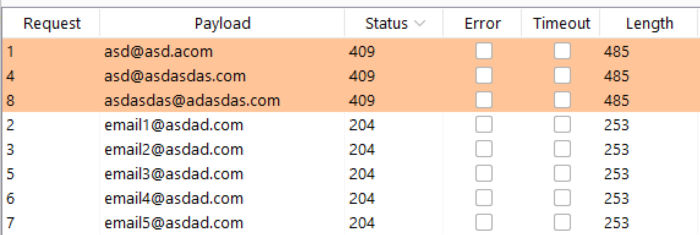
When changing the email address to an already existing value, the system will return 409 Conflict. If the email is not in use, the system will return ‘204 – No Content’. Please note that, if Email Verification is enabled, this will send out a confirmation email to all email addresses we’re going to test.
This process can be easily automated via Intruder and no CSRF token is needed to perform this action:
If the template of the account console was changed to not show the personal information page, you might want to try firing up the request via:

The valid email addresses identified in this process can be used to perform brute force (explained in the exploitation part of the Pentesting Keyclock Part Two). For this reason, access to the Keycloak’s account page should be disabled.
Reconnaissance
Additional Services and Ports
By default Keycloak starts the following services:
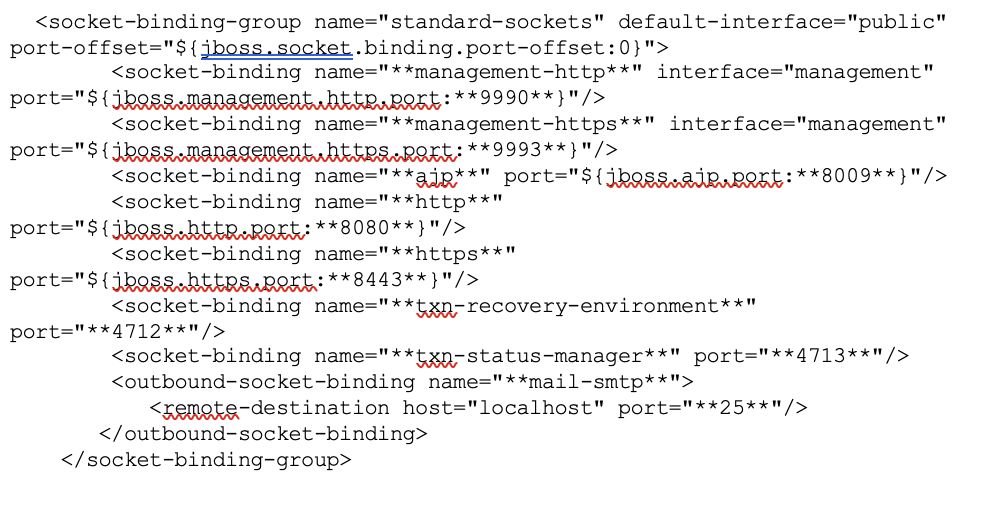
The http(s) defines what port Keycloak is listening to. On a production environment this is often set to be 443 on 0.0.0.0
The management-http(s) interface defines the HTTP connection used by Wildfly CLI and web console. This is known as the ‘ManagementRealm’ and it’s protected via a Digest Authorization header. Password complexity is enforced on user creation (8 digits, alpha, numeric and special).
The ajp socket defines the port used for the AJP protocol. This protocol is used by Apache HTTPD server in conjunction mod-cluster when you are using Apache HTTPD as a load balancer.
The txn-* refers to the recovery environment.
The above ports are all bound to 127.0.0.1 by default, but this can be changed via “-b” parameter at start-up.
Interesting Local Files
If you had a chance to get a local shell on a machine running Keycloak, the following files might be of interest:

Properties declaration of users and groups for the realm ‘ManagementRealm’ (port 9990/9993). Further authentication mechanism can be configured as part of the in standalone.xml.
Contains username and password (hashed) to access it. Format is:
username=HEX( MD5( username ':' realm ':' password))
Permissions were correctly set to allow only the local user to write on the file:
-rw- --- ---

Properties declaration of users for the realm ‘ApplicationRealm’ (port 8080/8443). This includes the following protocols: remote ejb, remote jndi, web, remote jms. Contains username and password (hashed) to access it. Format is:
username=HEX( MD5( username ':' realm ':' password))
Permissions were correctly set to allow only the local user to write on the file:
-rw- --- ---

The above contain definitions to the data source (database username and password).
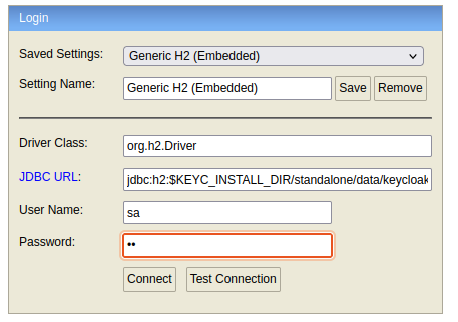
Keycloak comes with its own embedded Java-based relational database called H2. This is the default database that Keycloak will use to persist data and really only exists so that you can run the authentication server out of the box. A client might have changed it to other DBMS.
The physical position of the H2 database (also containing the user’s password) is:
$Keycloak_install_dir/standalone/data/keycloak*
And can be accessed locally (when Keycloak is not locking it), via the command:
java -jar $Keycloak_install_dir/modules/system/layers/base/com/h2database/h2/main/h2-*.jar
This will open the H2 database console on http://127.0.1.1:8082 - Use the following configuration to access it (default password is sa:sa)
User’s hashes can be extracted via query: SELECT * FROM CREDENTIAL

Hash format is pbkdf2-sha256 with 27500 iterations.
Finally, log files are available in:
$Keycloak_install_dir/standalone/lo
$ ls -lha standalone/log/
totale 644K
drwxrwxr-x 2 user user 4.0K Sep 9 08:45 .
drwxr-xr-x 8 user user 4.0K Aug 23 09:38 ..
-rw-rw-r-- 1 user user 0 Aug 23 09:38 audit.log
-rw-rw-r-- 1 user user 103K Sep 9 10:42 server.log
Exploitation
Brute Force Login
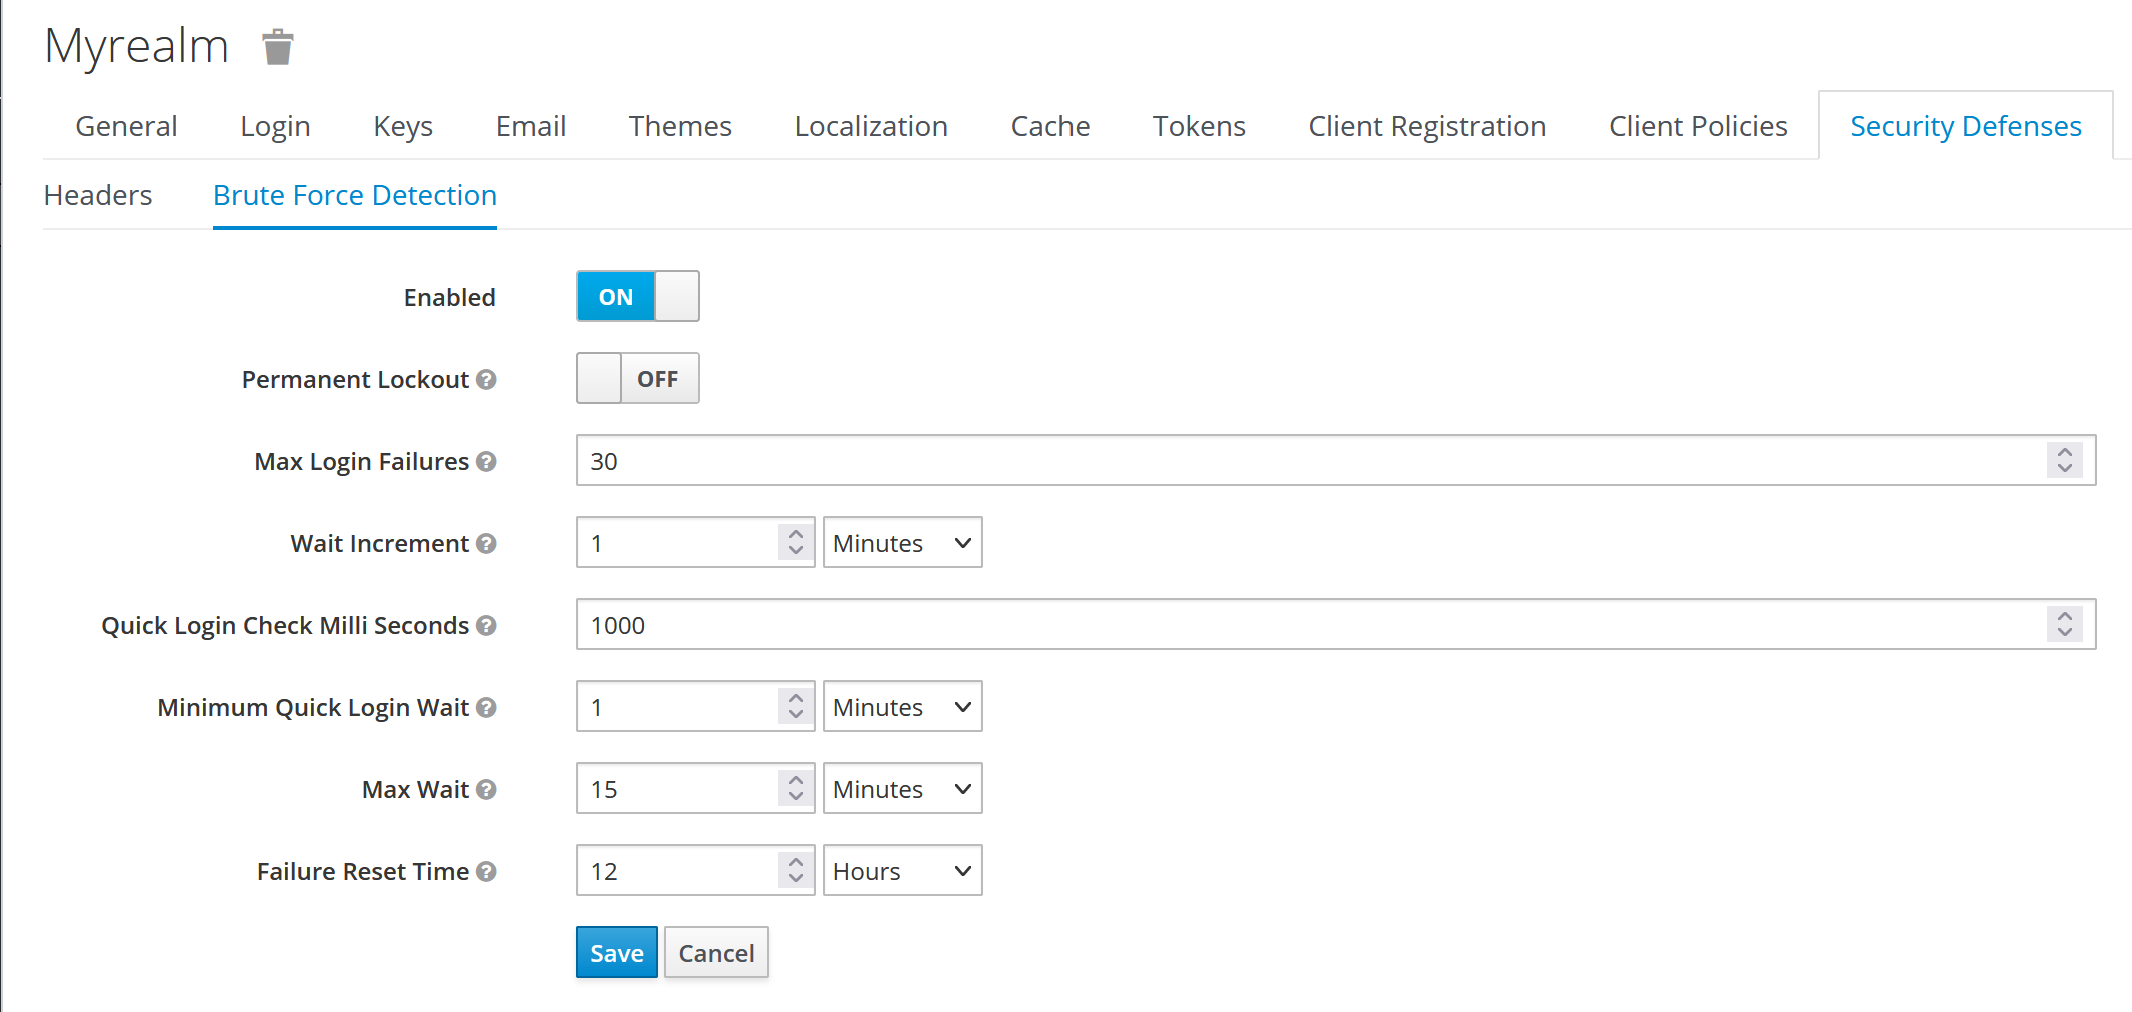
Keep in mind that Keycloak has a brute force protection, which is not enabled by default.
In case user enabled it, you’ll have 30 invalid attempt before being locked out (in a default configuration). Perform this attack at the end of your test, to avoid asking the client to manually re-enable your account.
Bypassing/Automating CSRF
The login page uses a Cross-Site Request Forgery (CSRF) token that needs to be extracted and used in the automated attack. For this task, we will use the Burp Intruder Recursive Grep.
- Submit a login request in the page and send it to Burp Intruder
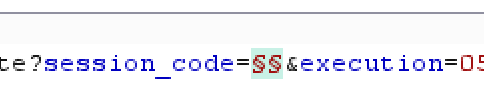
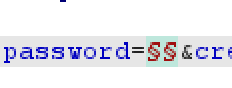
- Add the payload positions in the value of ‘session_code’ and ‘password’ parameters. Select the Pitchfork Attack Type.
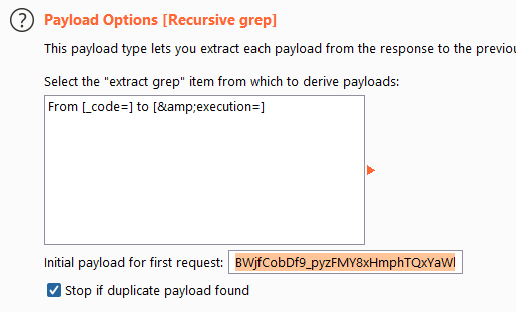
- In the Payload Tab, the first Payload Type should be Recursive Grep. The second Payload Type should be Simple List (with your passwords to try for a specific user).
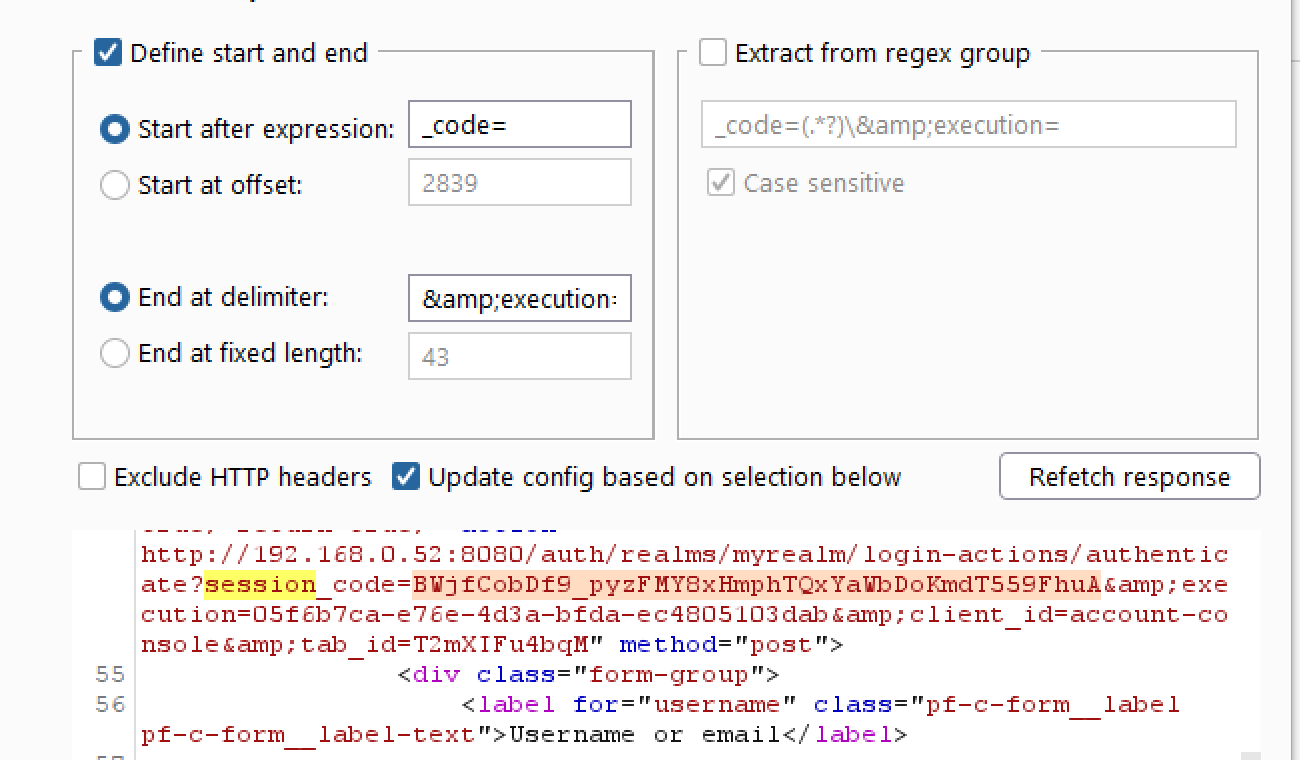
- Move to the “Options” tab and add a new element to “Grep - Extract” menu. We will need to extract the “session_code” from the response:
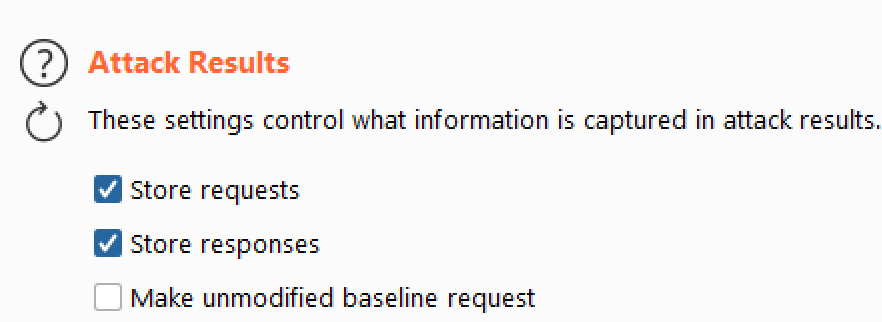
- Check “Extract the following items from responses” and also uncheck “Make unmodified baseline request” in the “Attack Results” section
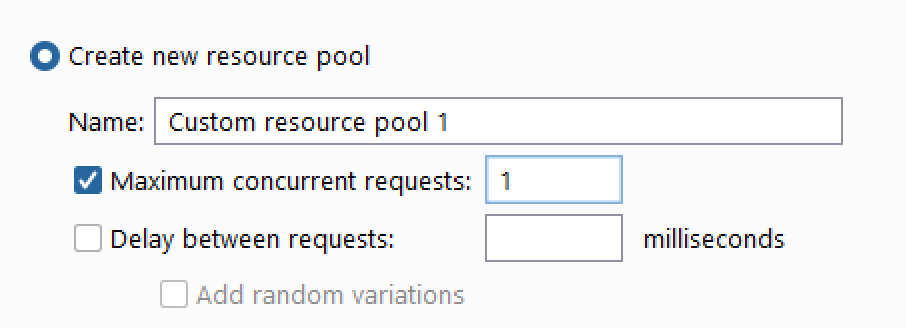
- In the “Resource Pool” tab, create one new pool with 1 maximum concurrent request
- Go back to the “Payloads” tab and add the “initial payload for first request”, which should be a clean, unused, session_code - You can grab one just by refreshing the login page.
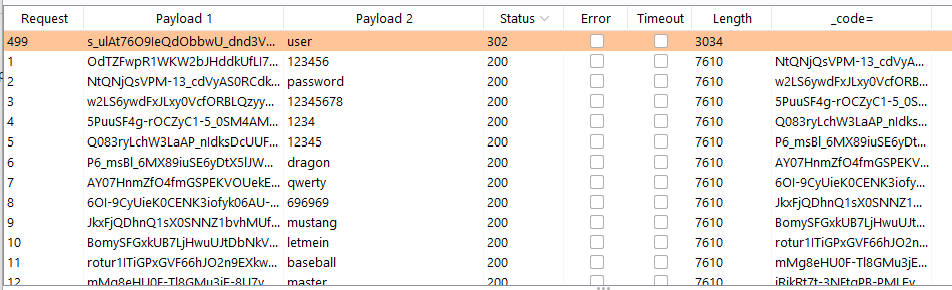
Start the attack and you’ll see a 302 Status code if you’ve found the correct password for the user.
JWT Signing Algorithms
By default, Keycloak sets RS256 as a signing algorithm for JWT, which is already a great standard. However, it also offers additional, stronger, options:
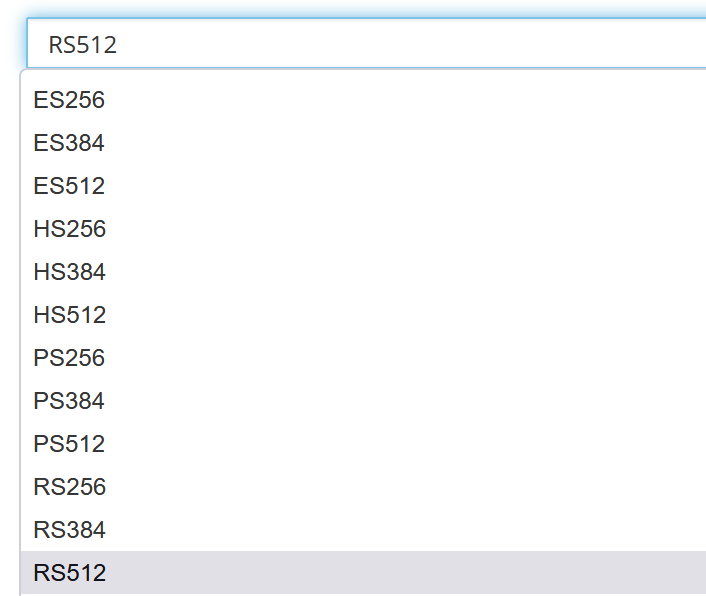
It might be worth to raise an information risk issue to make the client aware of this possibility. Please note: EdDSA is not yet implemented in Keycloak, and that’s the strongest algorithm to use (as today). Alternatively, RS512 or ES512 are the next best choices.
If HS* is in use, it should be noted that the secret is randomly generated by the system and it could be between 16 and 512 bytes (it cannot be easily cracked).
Make The Most Out of Your Scopes/Roles
In the reconnaissance part, we were able to identify roles and scopes available for our testing account. In this section, we’re going to make advantage of them with practical examples
offline_access
Offline access is a feature described in OpenID Connect specification . The idea is that during login, your client application will request an Offline token instead of a classic Refresh token. The application can save this offline token in a database or on disk and can use it later even if user is logged out. This is useful if your application needs to do some “offline” actions on behalf of user even when the user is not online. An example is a periodic backup of some data every night.
Therefore, having an offline_access scope on your user account is never a good idea, since it generates a long living refresh token that should only be used for server-to-server applications.
Request an offline token (method 1)
This first method requires you to add the additional ‘offline_access’ scope in the URL of the login page.
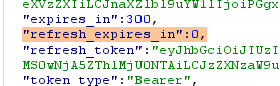
Perform the login and the /token endpoint will generate a refresh_token that does not expire:
We can generate a valid session token from the offline refresh_token via the following request:

Request an offline token (method 2)
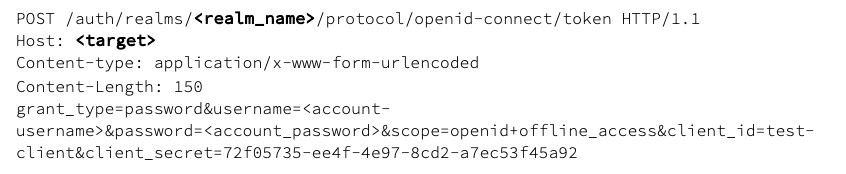
If you instead have client_id and client_secret of a client using ‘confidential’ access type, you can request an offline token via:
uma_authorization
Keycloak Authorization Services is based on User-Managed Access or UMA for short. UMA is a specification that enhances OAuth2 capabilities in the following ways:
Privacy
Nowadays, user privacy is becoming a huge concern, as more and more data and devices are available and connected to the cloud. With UMA and Keycloak, resource servers can enhance their capabilities in order to improve how their resources are protected in respect to user privacy where permissions are granted based on policies defined by the user.
Party-to-Party Authorization
Resource owners (e.g.: regular end-users) can manage access to their resources and authorize other parties (e.g: regular end-users) to access these resources. This is different than OAuth2 where consent is given to a client application acting on behalf of a user, with UMA resource owners are allowed to consent access to other users, in a completely asynchronous manner.
Resource Sharing
Resource owners are allowed to manage permissions to their resources and decide who can access a particular resource and how. Keycloak can then act as a sharing management service from which resource owners can manage their resources.
Keycloak is a UMA 2.0 compliant authorization server that provides most UMA capabilities.
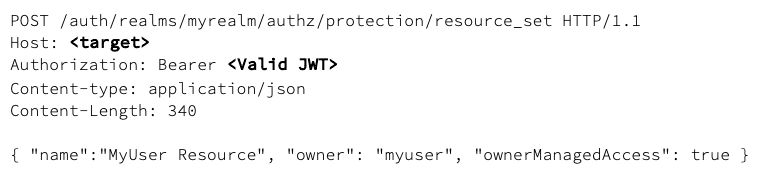
To add a specific resource type, we can use the following request:

By default, the owner of a resource is the resource server. If you want to define a different owner, such as an specific user, you can send a request as follows:
To list the security permissions we can visit (with a valid token):

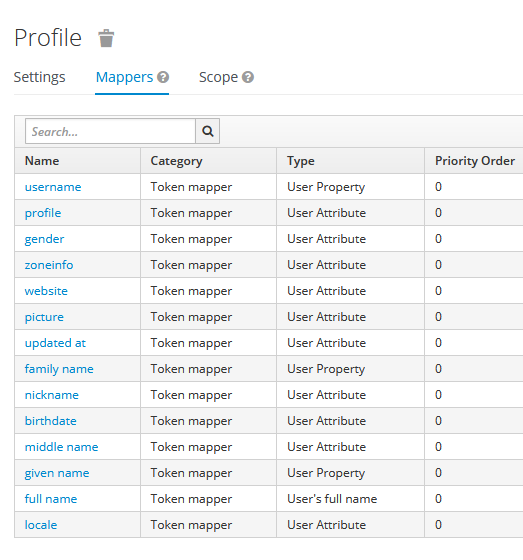
Profile
OPTIONAL. This scope value requests access to the End-User’s default profile Claims, which are: name, family_name, given_name, middle_name, nickname, preferred_username, profile, picture, website, gender, birthdate, zoneinfo, locale, and updated_at.
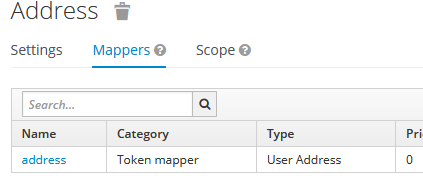
Address
OPTIONAL. This scope value requests access to the address Claim.
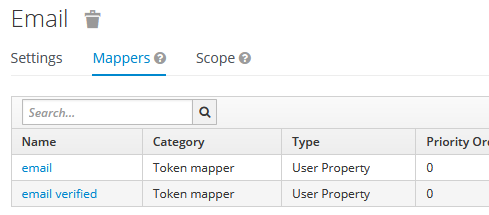
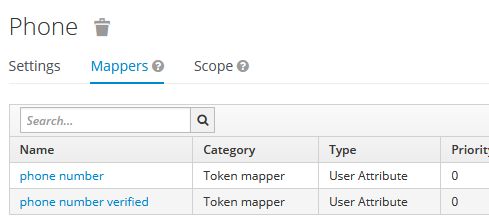
Phone
OPTIONAL. This scope value requests access to the phone_number and phone_number_verified Claims.
All of the above can be updated by the API endpoint available at
